cooling
 hvac systems
 learning center

You're shopping for a "complete A/C unit," then listings start throwing around labels like packaged, RTU, and split, and it's not clear what you're actually buying.
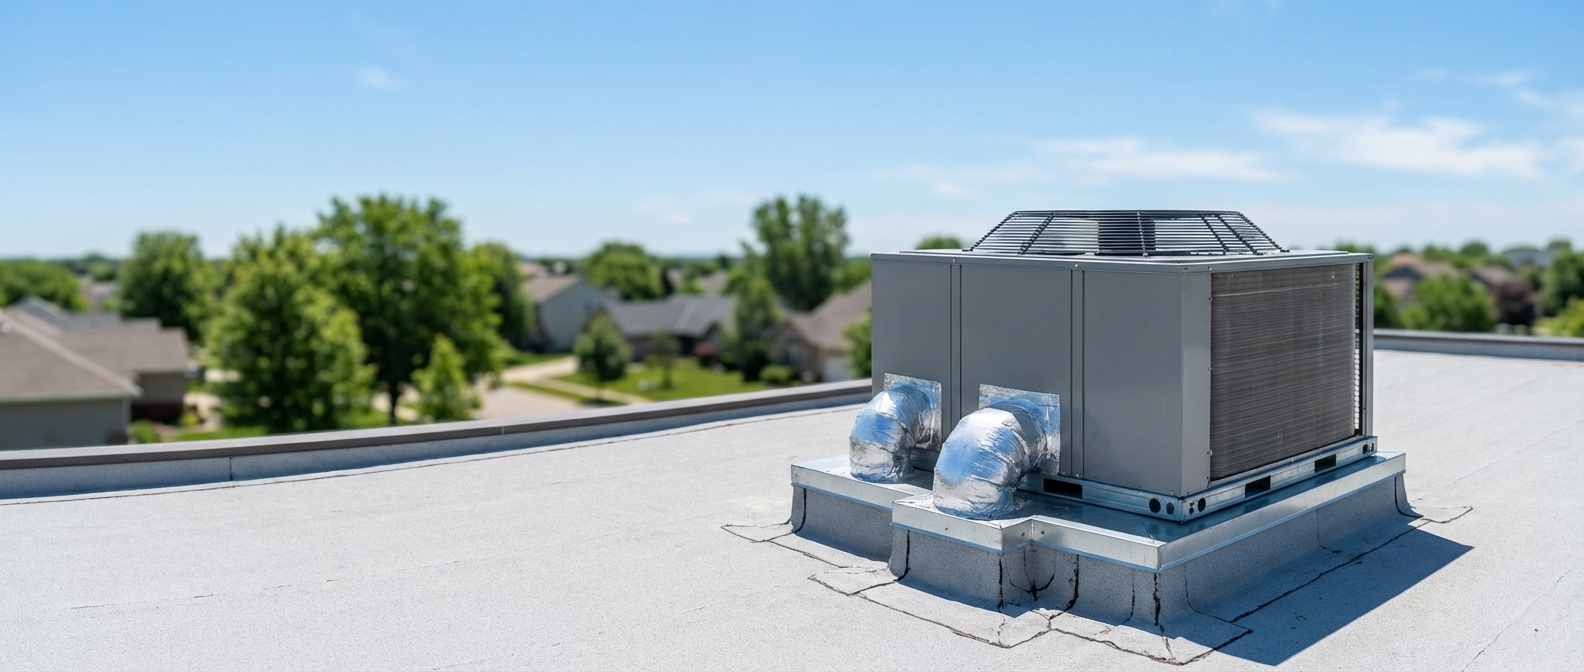
A packaged A/C system is a self-contained unit that house major components in one outdoor cabinet (evaporator coil, condenser coil, compressor), which makes it the simplest way to buy "the whole A/C" as one box. In most homes and light commercial setups, that cabinet sits outdoors either on a rooftop curb or on a ground level concrete pad next to the building. As you shop, you'll see the same basic format sold under three common names: packaged A/C (cooling-only), packaged heat pump, and packaged gas/electric.
A split system separates components: the condenser and compressor are outdoors and the evaporator is indoors in an air handler. That split matters because it changes how much indoor space the system consumes, how technicians access the parts for service, and what "replacement" means when only one side fails or when you're reusing existing indoor or outdoor equipment.
After the video, you'll be able to spot which category you're looking at, understand the high-level parts layout, and know the buying questions that prevent wrong-unit mistakes.
How a Packaged A/C System Works
A packaged unit's single-cabinet layout changes how the air-side and refrigeration components are arranged and serviced. Instead of troubleshooting "indoor vs outdoor" equipment, you are opening one cabinet that concentrates the major moving parts outside, which is why you should know what is inside before comparing quotes.
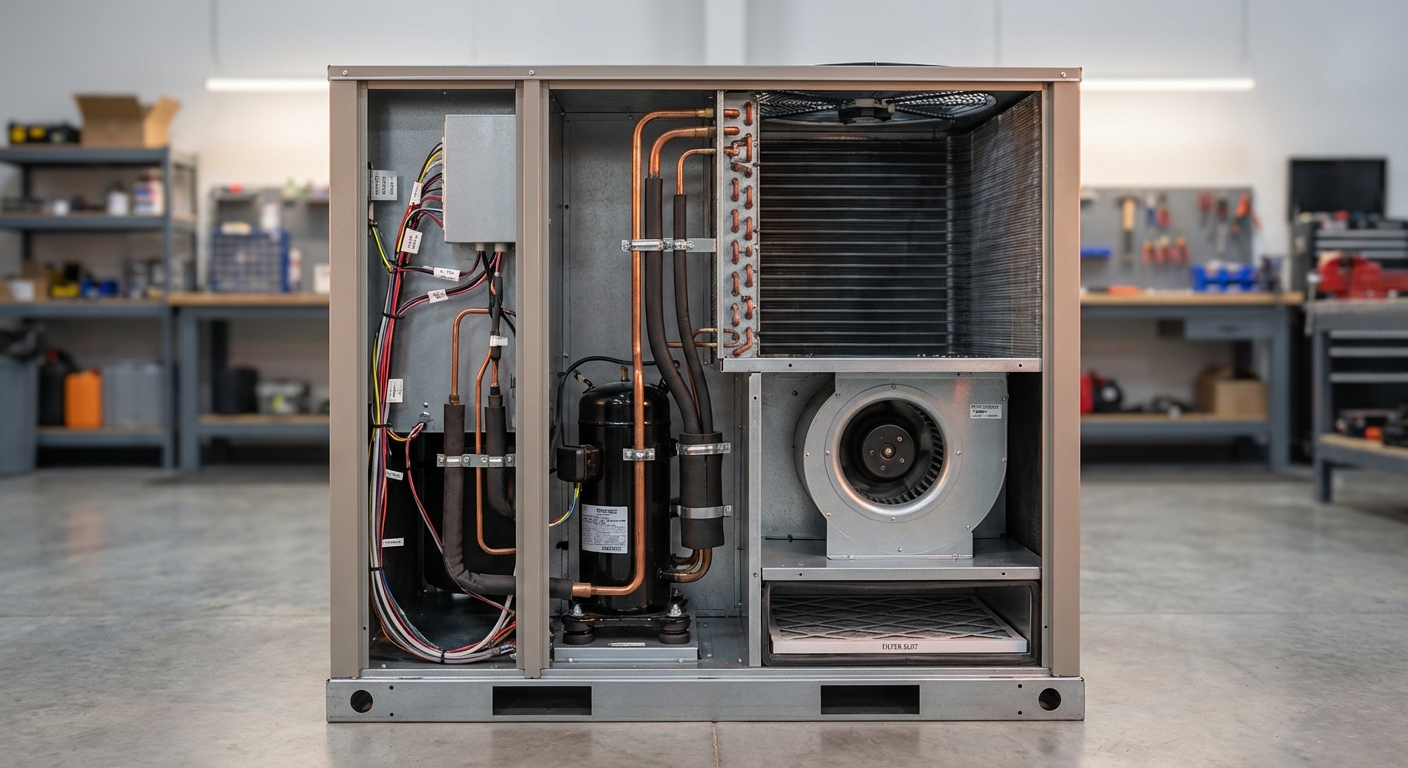
Most residential packaged HVAC cabinets bundle the core refrigeration and air-moving hardware in one place: a compressor (pumps refrigerant), condenser coil (rejects heat outdoors), condenser fan motor (moves outdoor air across that coil), a metering device (controls refrigerant feed), an evaporator coil (absorbs heat from return air), a blower (pushes conditioned air into the ducts), and controls (start, stop, and protect the system).
Airflow is straightforward: return air enters the unit, passes across the indoor-side coil section (the evaporator area), then the blower drives that conditioned air into the supply side and out through the home's ductwork.
The duct interface happens at two openings: return and supply. Those connections are made with plenums, and residential packaged units are commonly built as side-discharge or downflow configurations. Orientation is not a preference; it dictates whether the cabinet lines up cleanly with your existing trunk lines or forces a transition that can choke airflow and complicate service access.
One real-world friction point: packaged units are often selected for direct replacement where roof-terminated ducts already exist, but the discharge orientation and duct transitions still have to match.
A packaged A/C is cooling-only. A packaged heat pump provides both heating and cooling in the same cabinet, using the refrigeration system to move heat in either direction.
Before you shop, verify three things on the existing setup: side-discharge vs downflow, the exact supply and return plenum connections, and whether there is clear service access to the control and coil sections (you can see real wall-hung packaged A/C units and a single-cabinet packaged A/C system for reference).
Packaged Unit vs Split System vs Ductless Mini Split
The "right" system type is a fit decision driven by your space, your ducting, and your zoning goals, not just the equipment price tag. Two homes can buy the same tonnage and still end up with totally different results if the ducts are wrong, the mechanical closet is tight, or you need real room by room control.
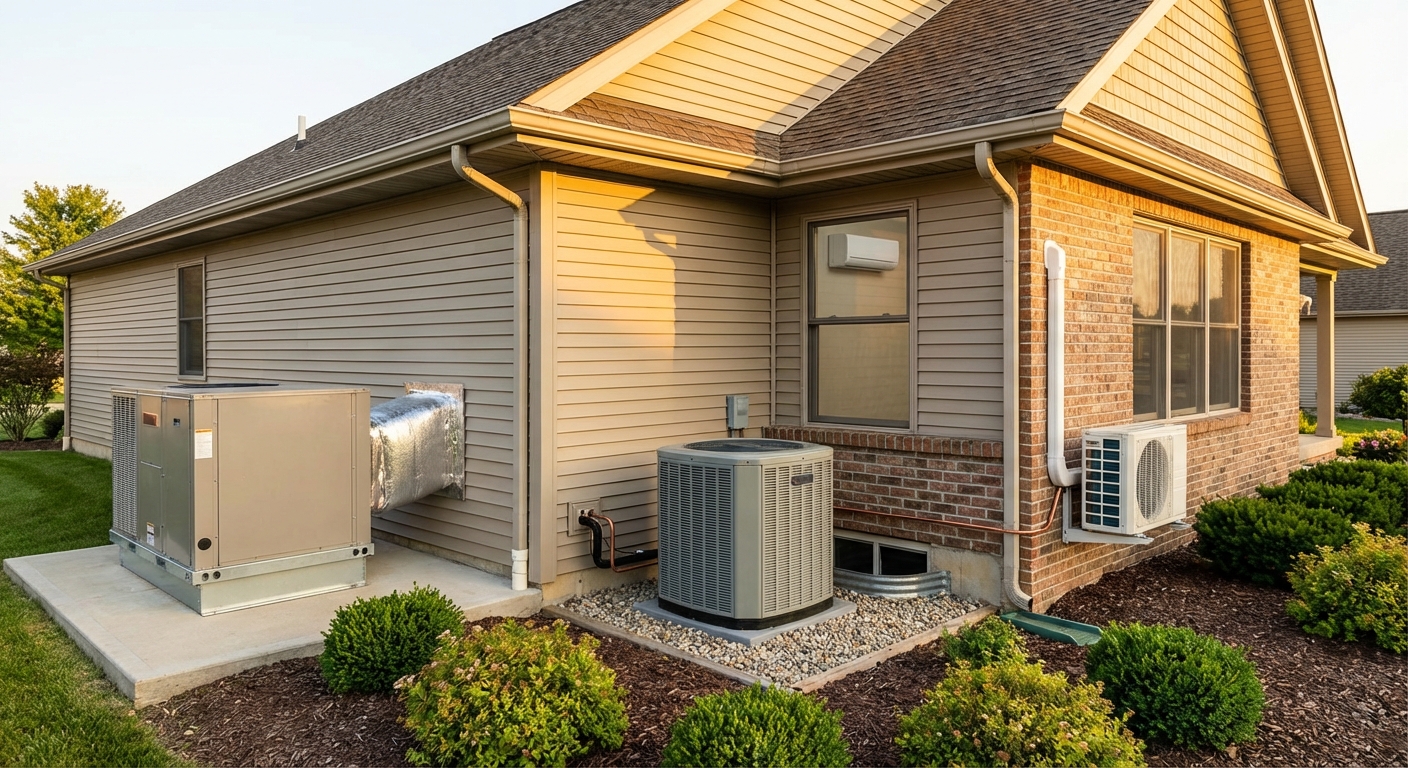
In the simplest layout terms, a packaged unit keeps the major components in one outdoor cabinet and ties into ductwork at the supply and return openings you already have (downflow or side/horizontal discharge). A split system keeps an outdoor condenser/compressor (for example, a 2–3 ton inverter heat pump outdoor unit) but moves the evaporator into an indoor air handler, so the job includes making room for that indoor mechanical section.
The practical win for packaged equipment is footprint: you reduce or avoid a major indoor equipment footprint because the big components live outside, which is why packaged systems show up so often in commercial style installs. The tradeoff is that fitment is less forgiving-your supply/return locations and orientation have to line up cleanly with the cabinet.
If you already have usable ductwork, packaged or split can both be clean solutions. Packaged units get especially attractive when you are replacing a roof terminated duct setup, and they are commonly installed faster and about 5 to 15% cheaper than split installations.
A ductless mini split, defined as outdoor unit + one/more indoor heads, typically without ductwork, solves the jobs where ducts are the problem: additions, garages, bonus rooms, and older homes where extending or rebuilding ducts is expensive. It also dominates multi-zone comfort because room by room temperature control is built into the format, instead of being dependent on duct zoning design and added hardware.
Capacity anchor: 12,000 BTU equals 1 ton of cooling capacity. Manufacturers commonly size a 12,000 BTU mini split for roughly 500 to 600 sq ft as typical guidance, not a promise, because insulation, sun exposure, ceiling height, and room layout can move the load fast.
Quick decision filter: Do you have ductwork worth keeping? Do you have indoor space for an air handler or furnace? Do you need true zones, meaning different rooms run at different setpoints most days?
Sizing, SEER2, and Refrigerant
Once you've narrowed the category (packaged vs split vs ductless), the performance outcome depends heavily on sizing, efficiency ratings, and refrigerant choice. If your packaged A/C disappoints, it is usually not because you picked the "wrong brand." It is because the unit is the wrong size, the efficiency rating was read the old way, or the refrigerant choice sets you up for a messy service future.
A quote that is not built on a Manual J load calculation is guesswork. Manual J load calculation is ACCA's standard method for calculating heating and cooling loads, using your home's real inputs instead of a square-foot rule.
The friction is speed: a Manual J typically takes about 1 to 2 hours, while rule-of-thumb sizing can be done in roughly 30 seconds. Contractors who skip the load calc save time, but you absorb the risk in comfort and operating cost.
Oversizing is the classic expensive mistake: it drives short cycling, weaker humidity control, and uneven temperatures because the system does not run long enough to stabilize the space.
Shop using SEER2, not legacy SEER. SEER2 is the U.S. Department of Energy's updated seasonal cooling efficiency rating, designed to let you compare how efficiently units cool over a typical season using updated ratings.
DOE metrics have shifted from SEER/EER/HSPF to SEER2/EER2/HSPF2, so make sure every bid is quoting the same "2" metrics before you compare numbers line by line (for example, a 15 SEER heat pump should be evaluated using the updated scale).
Refrigerant is not a footnote; it affects long-term serviceability. A2L refrigerant is an ASHRAE safety class for lower-toxicity, mildly flammable refrigerants used to replace higher-GWP options.
For context, R-410A is about 2,088 GWP, while R-454B is about 466 GWP, roughly a 78 to 80% reduction. Ask which refrigerant the exact unit uses and whether your installer services that refrigerant with the correct tools, training, and recovery practices (including A2L-compatible manifold gauges).
- Confirm sizing: "Will you provide a Manual J load calculation with the inputs you used?"
- Lock the rating: "What SEER2 (and EER2/HSPF2 if applicable) am I buying, in writing?"
- Verify refrigerant: "Which refrigerant is in this unit, and what does that change for installation and future service (including A2L charging gauges)?"
Packaged Heat Pumps and Dual-Fuel Options
Packaged equipment is not a cooling-only decision. If you're comparing packaged heat pumps or packaged dual-fuel units, you're also choosing a winter comfort and operating-cost strategy, not just a summer SEER2 number.
A packaged heat pump delivers both heating and cooling from the same outdoor cabinet.
In heating mode, a reversing valve flips refrigerant flow so the outdoor coil collects heat and the indoor airstream gets warmed. Cold-weather operation adds a second layer of logic: defrost temporarily runs the system in a mode that melts frost off the outdoor coil so airflow and capacity recover. During defrost or deep-cold operation, packaged heat pumps can use auxiliary heat, typically electric resistance heat strips or another backup heat source, to keep supply air temperature from sagging.
Packaged heat pumps are commonly recommended for mild-winter areas, where most heating hours stay within the heat pump's efficient operating range.
Dual fuel typically means a heat pump paired with a gas furnace, and packaged dual-fuel units combine the heat pump and the gas furnace in one cabinet.
Changeover is controlled by thermostat logic that supports 2H/1C staging or control-board logic using a balance point or lockout temperature: above the set point it runs the heat pump; below it, it locks out the heat pump and fires the furnace.
Packaged dual-fuel equals heat pump plus gas furnace; packaged gas/electric equals gas heat plus electric A/C and is not a heat pump.
When gas is involved, AFUE (the percentage of a fuel's energy that is converted into usable heat over a heating season) tells you how effectively the furnace turns fuel into delivered heat.
- Confirm the unit is a heat pump (not straight cool A/C).
- Identify the backup/aux heat type (electric strips vs gas furnace).
- Verify the furnace AFUE if the quote includes gas heat.
- Specify the changeover strategy and the planned balance point or lockout temperature.
Buying + Installation Considerations
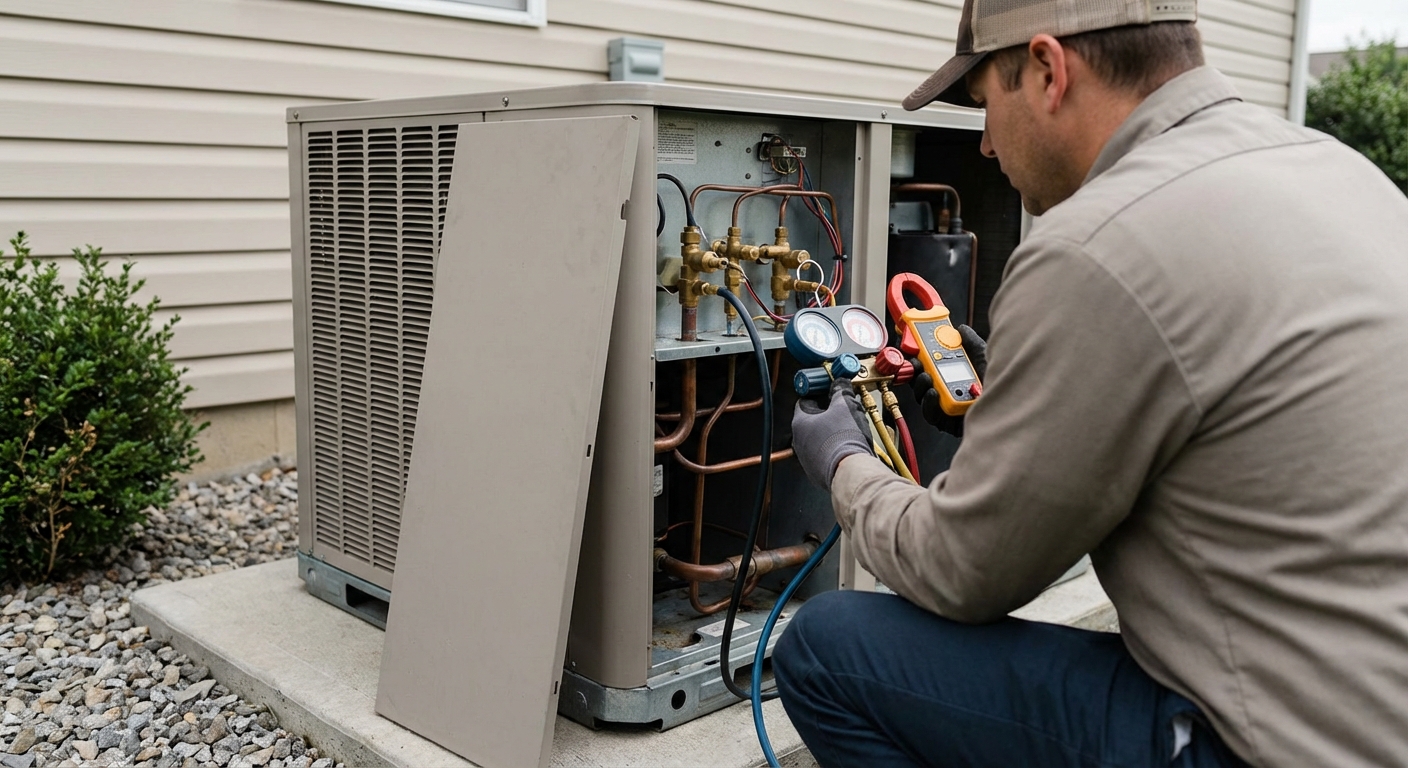
After you know the configuration, size, and heating option you're actually buying, installation details determine whether the equipment performs the way it should. A packaged unit can have the right capacity and efficiency on paper and still fail early or perform poorly when site prep is treated like an afterthought. The repeat offenders are predictable: misaligned duct transitions, electrical mismatch, bad drainage planning, and no real commissioning.
Start with fitment, not guesswork. Confirm the unit's supply and return locations (downflow vs horizontal) match your existing openings, and confirm you have the correct transitions so the connections land squarely without forcing the cabinet. If you are using a roof curb, plan the duct connection to the curb and structure, not "hanging" ductwork off the unit.
Electrical is non-negotiable: the installer must verify supply voltage, frequency, and phase match the unit rating plate before connecting power. A common example you will see on many units is 208/230V, 1-phase, 60 Hz, but the rating plate is the authority for your exact model (and adding an adjustable in-line voltage monitor can help protect equipment after startup).
Rooftop installs often require a model-specific roof curb. Curb listings commonly show 14-inch height, and the footprint varies by model and downflow openings. One example curb is 14 inches tall with a 42-5/16 x 71 inch footprint, which is not interchangeable across models.
Plan condensate drainage before the crane shows up. Route the drain so it stays pitched, protected, and won't dump water onto roof decking, ceilings, or walkways.
Permits and inspections may be required. Your installer or local authority makes that call; treat it as a pre-order question, not a day-of surprise.
"Done right" commissioning includes air balancing and refrigerant checks (as applicable). That work verifies airflow is actually in range and the refrigeration circuit is operating correctly, giving you baseline numbers to defend performance expectations later.
- Do the unit's supply/return openings match my duct locations (downflow or horizontal), and what transitions are included?
- What roof curb or stand does this exact model require, and what is the curb footprint and height?
- What does the rating plate call for (voltage, phase, frequency), and what will you verify before energizing?
- How will condensate be drained, where will it terminate, and what prevents overflow damage?
- What clearances will you leave for filter, blower, controls, and service panels?
- Will you provide commissioning results (airflow balance and refrigerant checks if applicable) in writing?
For ordering, shipping, and order status help, Budget Heating & Air Conditioning supports online checkout with delivery options and in-store pickup at select locations, plus U.S.-based support for matching the right accessories to the model you're buying.
Summary
A packaged unit is the simplest way to buy "the whole A/C" as one outdoor cabinet, but it only works cleanly when your site can accommodate the required duct orientation, openings, and placement. If those constraints do not line up, a split system or ductless mini split is often the better tool.
Because the major components are concentrated outside, packaged systems can free up indoor footprint and simplify the equipment layout, but only if electrical service and any curb or duct connections match what the cabinet expects.
To avoid wrong-unit mistakes, lock the decision in with correct sizing from a proper load calculation (not the old unit's tonnage), compare bids using SEER2 "2" metrics, and confirm what refrigerant you're buying and servicing.
Watch the video at Budget Heating, then either build a shopping list or request a quote for the right system with your square footage, insulation level, duct size/location, electrical service, desired efficiency, and climate zone. Rebates and tax credits hinge on efficiency thresholds and documentation, and federal credits versus utility/state rebates differ and can change over time.
Wrapping Up
A packaged A/C system is the simplest way to buy "the whole A/C" in one cabinet, with the major refrigeration and air-moving components housed outdoors on a pad or rooftop curb. That layout can save indoor space and streamline the equipment footprint, but it also makes fitment critical, especially duct orientation (side-discharge vs downflow), plenum connections, clearances, and proper drainage and electrical matching.
The bigger takeaway is that the right choice is not just "packaged vs split vs ductless", it is getting the configuration and installation details to match your home and goals. Lock in performance by confirming Manual J sizing, comparing equipment using SEER2 metrics, and verifying the refrigerant you are buying so service and compliance stay straightforward over time.
Now that you can identify each system type and the buying questions that prevent wrong-unit mistakes, your next step is to gather your duct orientation, electrical specs, and comfort priorities before you compare quotes.
 Heating
 Money Saving Tips
 Product and Brands Insights
 Buying Guides
 State by State