




 buying guides
 cooling
 learning center

Right size is performance plus constraints, not diameter alone. If you bought a big fan and still have hot and cold pockets, draft complaints, or no winter payoff, the problem is almost always mismatch between what the occupants feel and what the building can actually support.
The tension is real: an HVLS (High-Volume, Low-Speed) fan, meaning a large-diameter ceiling fan built to move high volumes of air at low RPM, can deliver summer relief, but it can also create nuisance airflow if you drive air speed, the velocity at occupant level measured in fpm or m/s, past what the space can comfortably tolerate.
Sizing is the act of hitting two outcomes inside your constraints: occupant-level air speed targets where people stand or sit, and destratification, mixing stacked air layers to cut floor-to-ceiling temperature differences in high-bay spaces.
ASHRAE Standard 55 forces practical control and verification decisions: elevated air speed must be adjustable continuously or in maximum steps of 0.25 m/s (50 fpm) at the occupant location, and air temperature and speed are measured at 0.1 m, 0.6 m, and 1.1 m seated, or 0.1 m, 1.1 m, and 1.7 m standing. The PMV model in ASHRAE 55 is limited to air speeds below 0.20 m/s (40 fpm), so higher air speeds rely on elevated-air-speed methods, not PMV alone.
You will leave with a workflow that selects diameter and quantity, confirms mounting feasibility, and aligns controls with comfort goals, eliminating dead zones, drafts, and winter disappointment.
Key Sizing Factors
Square footage alone routinely mis-sizes HVLS fans because "enough airflow" changes with what you're trying to accomplish and what the building will actually allow you to install.
In a lightly occupied open bay, the goal is usually noticeable occupant air movement, which means selecting a fan setup that can deliver the needed CFM (cubic feet per minute) where people stand and work. Pack the same area with dense staffing, a fitness class, or close-in workstations and comfort sensitivity spikes, pushing you toward more precise placement and tighter speed control expectations.
A simple rectangle with clear floor space favors fewer, larger fans. Break that same footprint into odd shapes, mezzanines, or aisles and racked storage, and coverage becomes a routing problem: you may need more fans, different spacing, or zones so air reaches the occupied paths instead of churning above shelving.
Bigger is not automatically better; oversizing can create functional problems in the usable floor zone even when the ceiling is tall.
Blade height sets the hard limits. Codes commonly require minimum blade height of at least 7 ft above finished floor in homes and about 10 ft in industrial spaces; verify locally. If your ceiling height, drop rods, and hardware cannot keep blades safely above that threshold, diameter and placement options collapse fast.
Then inventory what competes for the same overhead real estate: high-bay lights, beams, cranes, ducts, signage, garage doors, and sprinklers. These obstructions often force smaller diameters, shifted centers, or additional fans to avoid dead zones while staying within manufacturer installation guidance.
Summer sizing is about occupant air movement, so speed range matters. Fan laws apply: airflow scales roughly in proportion to RPM, so a 10% RPM increase delivers about 10% more airflow, which is how you fine-tune comfort after placement is fixed.
Winter sizing is about destratification. Manufacturers commonly recommend running HVLS fans slowly forward to mix warm ceiling air down; reverse can pull cooler air upward and work against the heating goal.
Before you touch a chart, record: floor shape and use (open bay, racked storage, fitness), ceiling height and target blade height (per local code), occupancy density and comfort sensitivity, major heat sources (process heat, kitchens, sun load), and a marked-up ceiling plan of obstructions (lights, beams, cranes, signage, sprinklers).
Once those inputs are clear, the square-footage chart becomes useful again-because you can immediately sanity-check whether the "typical" diameter will actually fit and serve the occupied zones.
Fan Diameter by Square Footage
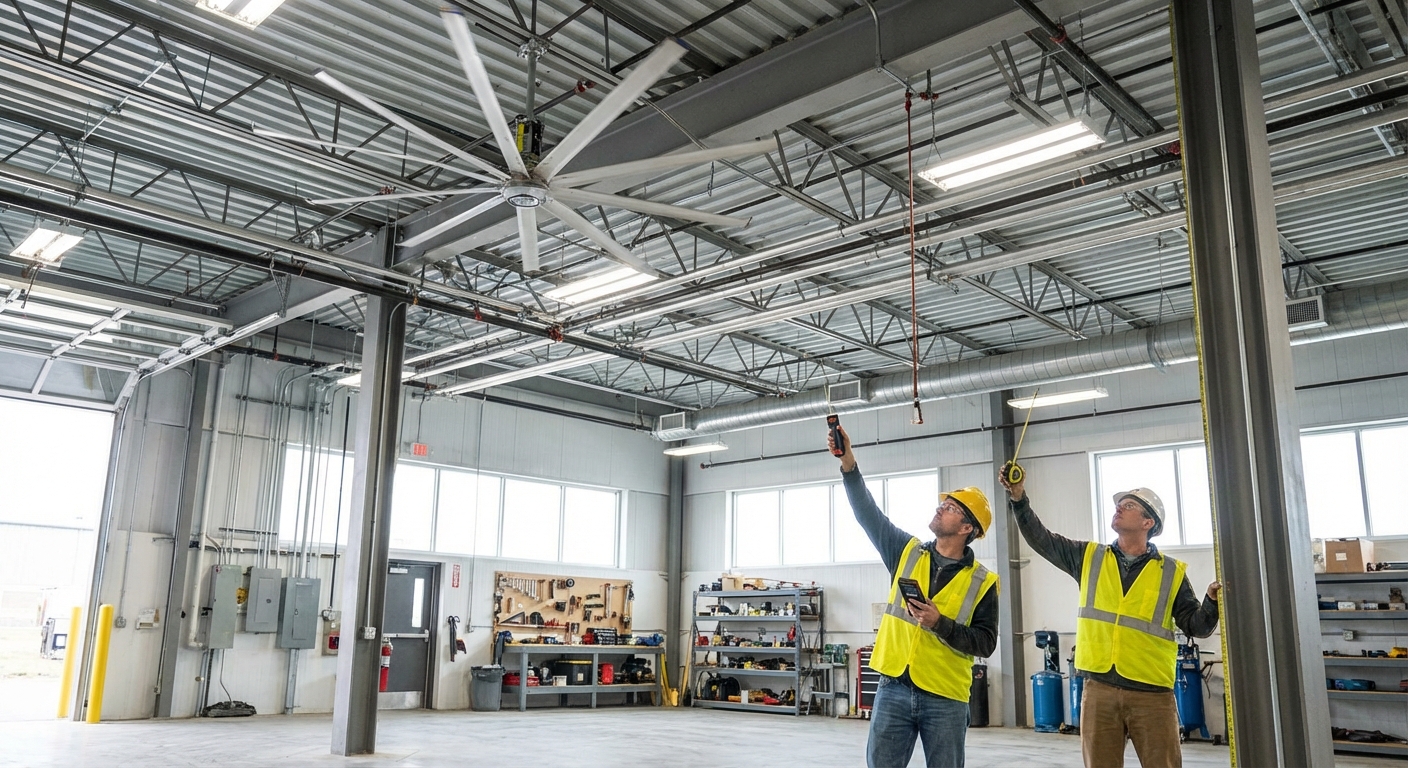
If you want the diameter decision to stay simple, treat the sizing chart and the layout constraints as a single rule set. Fan diameter largely determines both coverage area and the clearances you need to keep the airflow pattern intact; ignore spacing, walls, and diffusers and even the "right" diameter underperforms.
| Floor area (sq ft) | Typical HVLS diameter | Start with | Add fans when |
|---|---|---|---|
| 1,000 to 1,800 | 6 to 10 ft | 1 fan | Partitions, multiple aisles, or you cannot keep required wall offsets |
| 1,800 to 3,000 | 10 to 12 ft | 1 fan | Long, narrow bays or racking breaks the space into zones |
| 3,000 to 4,500 | 12 to 14 ft | 1 fan | Obstructions create dead corners or the footprint is not roughly rectangular |
| 4,500 to 6,000 | 14 to 16 ft | 1 fan | You have multiple work areas with different comfort targets, or diffuser conflicts force a bad location |
| 6,000 to 10,000 | 16 to 20 ft | 1 to 2 fans | Any L-shape, heavy racking, or segmented production lines |
| 10,000 to 20,000+ | 20 to 24 ft | 2+ fans | Most real facilities: plan a grid, not a single "center" fan |
Lock the layout before you buy: keep fan centers roughly 3 to 5 times the fan diameter apart, keep the fan centerline at least 1.5 times the diameter off walls, and if a fan ends up under an air diffuser, place the fan at least two fan diameters away from that diffuser.
Add fans when the footprint and obstacles break the space into zones. Racking rows, partial-height partitions, mezzanines, and odd shapes create dead areas that a single large fan cannot "reach" without throwing away placement options. Two smaller fans placed over the actual occupied zones beats one larger fan centered over an unoccupied aisle.
2,400 sq ft (40 x 60), open floor, no diffusers in the center: choose one 10 to 12 ft fan. This sits squarely in the 1,000 to 3,000 sq ft band, and the rectangular footprint lets you center it while still holding the wall offset. Placement note: center the fan so the blade sweep stays clear of lights and the wall offset rule is met on all sides.
5,500 sq ft (55 x 100), several ceiling diffusers down the centerline: start with one 16 ft fan, but only if you can offset it to maintain 2D separation from the diffuser. If that forces the fan too close to a wall, switch to two 12 to 14 ft fans spaced on a grid. Placement note: place the pair so each fan serves one half of the room without sitting directly under a diffuser.
6,000 sq ft L-shaped shop, racking creates two aisles and a packing zone: pick two 12 ft fans instead of one 16 ft. The chart says either approach can cover the area, but the L-shape and racking demand zone coverage, not a single center. Placement note: center each fan over its aisle/packing zone and keep their centers 3 to 5 diameters apart.
Before you purchase, sketch the fan circles and verify three numbers: center-to-center spacing, wall offsets, and diffuser separation. Retailers like Budget Heating & Air Conditioning, Inc. can help confirm what diameters and control options are actually available once your layout works on paper.
The chart can point you to a diameter, but mounting is what makes that diameter usable-especially when clearances, sprinklers, and real structure decide where the fan can actually go.
Mounting Height, Downrods, and Clearance Rules
A perfectly sized fan still performs badly if it's mounted at the wrong height: too low creates an impact hazard, and too high lifts the airflow off the occupant zone. ENERGY STAR placement guidance puts ceiling fan blades typically about 7 to 9 ft above the floor (where applicable), with a minimum safe blade height commonly cited as at least 7 ft.
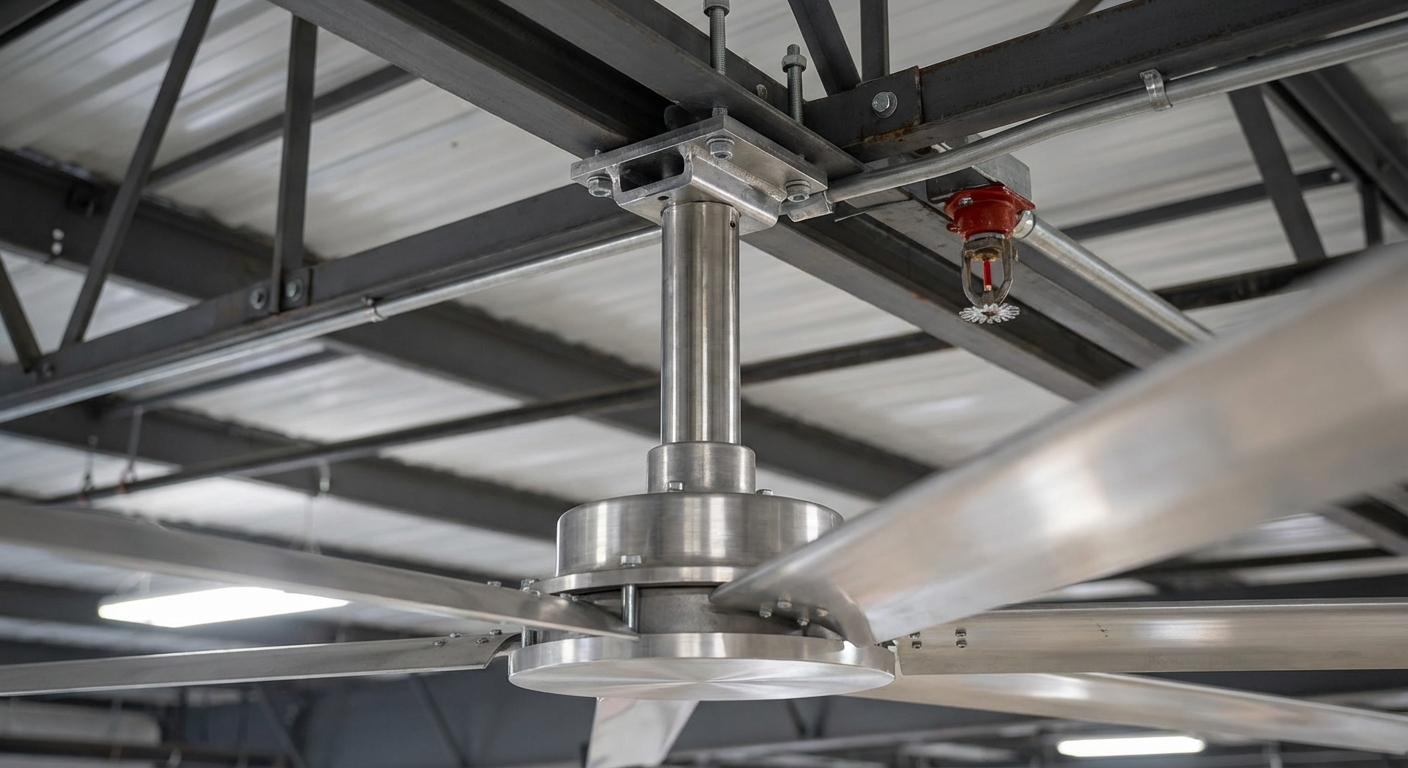
In higher-bay and industrial environments, the enforceable minimum is whatever your local code, owner spec, and fan manufacturer require.
A downrod (the extension tube that drops the fan below the ceiling structure) is the hardware that lets you hit the target blade height under tall decks, trusses, or purlins. Treat it as performance equipment, not an accessory: pick the blade height you need first, then select the downrod length that lands it there without forcing the fan into beams, lights, or sprinklers.
Do a ceiling walk with a tape, not a drawing. Verify the full blade sweep clears sprinklers, light fixtures, signage, crane rails, hoist paths, overhead doors at full open, and any low steel. For sprinkler coordination, NFPA 13 and NFPA 13R are the standards most teams reference. NFPA 13 carries provisions written specifically for HVLS fans in sprinklered spaces, commonly covering maximum fan diameter, minimum vertical separation from sprinkler deflectors, positioning the fan approximately centered between four adjacent sprinklers, and interlocking the fan to shut down on waterflow. Those constraints can move your fan center, so resolve them before the layout is final; NFPA 13R includes a simple rule for residential pendent sprinklers near ceiling fans that's commonly cited as 3 ft. Confirm the applicable edition, the AHJ interpretation, and the sprinkler manufacturer listing before you lock the layout.
HVLS comfort lives in low-speed, high-volume airflow. Specify true variable-speed control so you can tune airflow to the space instead of bouncing between "off" and a draft. Run the fan slowly forward for winter destratification rather than in reverse, consistent with the guidance above, and treat a reversing feature as optional unless your manufacturer specifically calls for it, and choose automation options that preserve low-speed setpoints, scheduling, and zone-by-zone tweaks rather than blunt start/stop commands.
- Measure finished-floor to planned blade height and confirm it meets the project minimum (7 ft minimum is common; industrial often higher).
- Select the downrod length that lands that blade height under real structure, not just the ceiling plane.
- Check blade sweep against sprinklers, lights, trusses, cranes, doors, and signage, and get sprinkler spacing rules confirmed under NFPA 13 or 13R for your job.
- Specify true variable-speed control so commissioning can dial in the steady low-speed airflow that destratification actually needs.
Once the fan is physically feasible, the remaining sizing question is operational: how that airflow interacts with your heating and cooling equipment in both seasons.
HVLS Fans + HVAC
HVLS fans do not replace HVAC capacity; they make HVAC distribution behave. Correct sizing and control fix the friction HVAC struggles with in big volumes: stratification, short-throw supply patterns, and stubborn perimeter zones that persist even when the equipment is correctly selected.

In cooling season, the win is air speed at occupant level. Stronger, uniform mixing reduces hot and cold spots and can let you raise the thermostat setpoint without losing perceived comfort, because people feel cooler when air moves consistently across the floor.
In heating season, the win is pulling trapped heat down from the ceiling. In a measured example from an approximately 8,600 m² warehouse, destratification reduced ceiling-level temperature by about 4°C and increased floor-level temperature by about 1.5°C; results vary. A separate warehouse case study reported up to about 40% heating cost reduction after installing destratification fans; that outcome is case-specific, not guaranteed.
Heat pump split systems and dual-fuel systems benefit when mixing stabilizes return-air temperature, reducing comfort swings between cycles and taming high-bay heat pooling. High-efficiency furnaces often resolve "warm up high, cold at the floor" complaints fastest when the fan runs low and steady during calls for heat. Ductless mini splits need special attention because the indoor head has short throw; a properly controlled HVLS fan spreads that discharge to the perimeter without blasting occupants. Budget Heating & Air Conditioning, Inc. supplies the HVAC systems most commonly paired this way.
Control is the divider between "air movement" and "better comfort." Coordinate fan speeds with heating and cooling modes, and plan the standard integration item: project specs commonly require HVLS fans to shut off on fire alarm.
Those same control and coordination details are also where many projects stumble at purchase time-because the fan that "fits" on paper still has to match power, wiring, and site realities.
Buying Checklist + Common Sizing Mistakes
Most HVLS disappointments are predictable: a real site has messy obstructions and electrical constraints, and any "standard" assumption collapses the moment it hits manufacturer requirements. Treat the purchase like a short engineering check, because the install has to follow manufacturer guidance.
- Clear ceiling height at the exact install point (not "average" height).
- Obstruction map: lights, trusses, cranes, door tracks, signage, cameras, catwalks.
- Diffuser/return locations and throw direction.
- Floor plan dimensions and ceiling slope changes.
- Occupancy zones: where people actually work, queue, or dwell.
- Verify blade height and all sprinkler/obstruction clearances per manufacturer and local authority.
- Confirm voltage and phase on-site: HVLS models are commonly available in 120-240V single-phase and 208-480V three-phase configurations depending on model.
- Confirm controls early: some HVLS controllers output three-phase power to the motor regardless of input phase, which changes wiring and coordination. Plan any fire alarm interface as a coordination item if required.
Sizing by area only: confirm the layout matches occupancy zones and follows the spacing and diffuser separation guidance.
Ignoring diffusers and obstructions: shift the fan or move the obstruction, then re-check coverage.
Wrong mounting height: mounting too low increases accident risk; confirm blade height and clearance requirements before buying.
Placing the fan over the wrong spot: center it on the work zone, not the building.
Assuming any circuit works: match nameplate input, controller requirements, and disconnect method.
If you want a clean order the first time, build a shopping list before you buy and contact support for pre-purchase questions. Budget Heating's tech support can verify electrical and control compatibility before you commit.
Summary
This workflow is repeatable: the "right size" comes from matching comfort outcomes to building constraints, not from diameter alone.
Start by locking the comfort goal-air movement at occupant level or destratification-then capture the site inputs that drive the chart call. Use the sizing chart to pick diameter and quantity, and treat layout as a pass/fail gate: spacing checks and diffuser separation decide whether the coverage you selected actually performs. Before you buy, prove the fan can be mounted where you want it, with blade height and downrod planning that preserves your usable floor zone, and confirm the electrical and controller details, including single-phase vs three-phase and control wiring limits. Finish by coordinating with HVAC so the fan supports the thermostat strategy instead of fighting it, and make sure the control approach matches the adjustability and verification expectations that show up in standards like ASHRAE 55.
For standards-aligned context, ANSI/AMCA 230 covers laboratory testing of air circulating fans, the category HVLS fans fall into. ANSI/AMCA 210 and ANSI/ASHRAE 51 cover ducted fan testing and are less applicable here.
Confirm blade height, clearance, and spacing checks against the manufacturer's instructions and the local authority having jurisdiction.
Next actions: run your room through the available sizing resources, request a quote for multi-fan or commercial projects and submittal support from Budget Heating & Air Conditioning, Inc. for larger layouts, and check utility and state rebates. Programs commonly offer prescriptive and custom paths, and HVLS fans can qualify in some commercial programs when you provide spec sheets, control type, and facility details; eligibility and documentation requirements vary by program.
Wrapping Up
Choosing the right HVLS fan comes down to matching what people should feel at floor level with what your building can actually support. Start by defining the goal, summer air movement or winter destratification, then use the square footage chart as a starting point, not the final answer.
From there, layout and installation realities decide whether the fan will perform: spacing, wall offsets, diffuser separation, blade height, downrod selection, and clearance around lights, sprinklers, doors, and structure. Pair that physical fit with true variable speed control and coordinate operation with your HVAC strategy so the fan improves comfort and consistency instead of creating drafts or dead zones.
With your comfort target, a marked-up ceiling plan, and verified clearances in hand, run your space through the workflow and move forward with a sizing and layout plan you can confidently install.
 Heating
 Money Saving Tips
 Product and Brands Insights
 State by State
 HVAC Systems