




 hvac systems
 learning center
 money saving tips
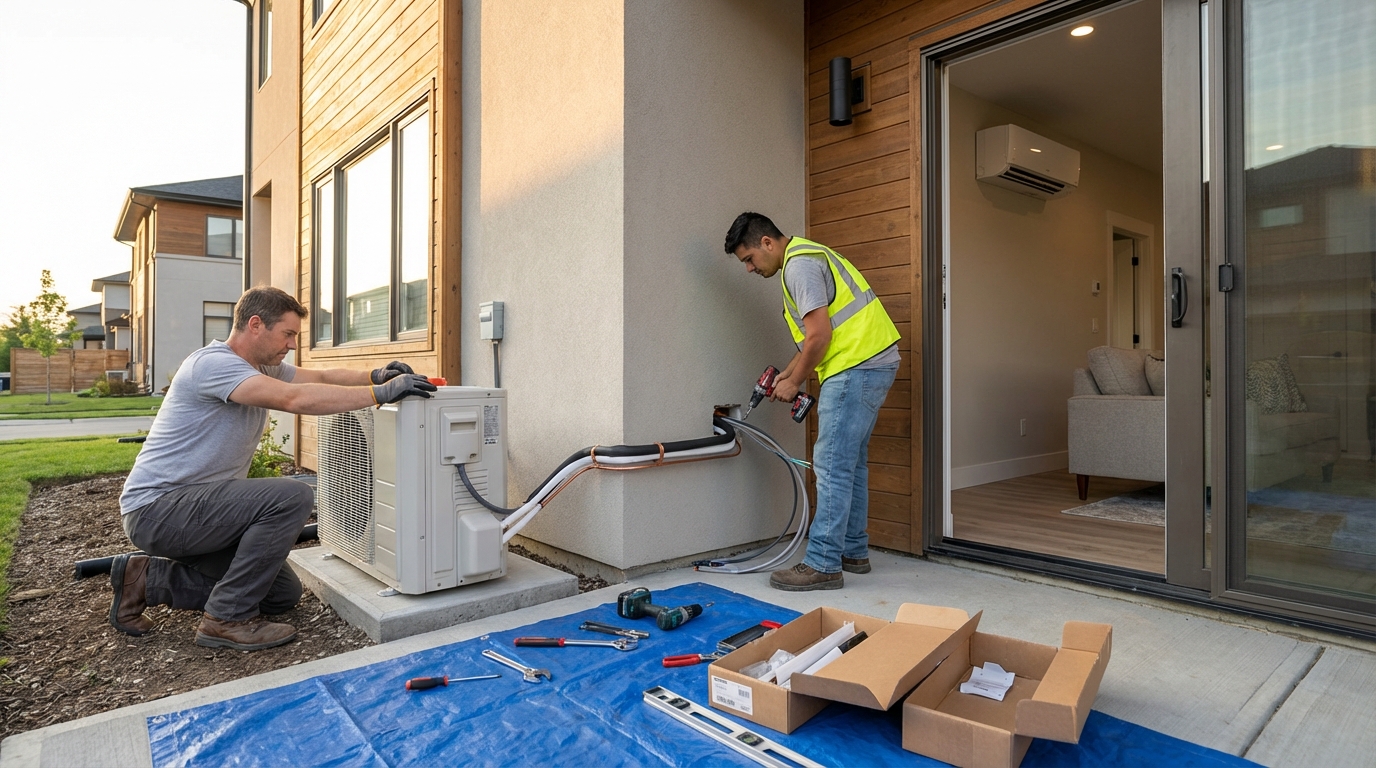
The install looks simple on video until the system will not hold vacuum, throws a communication error, or seeps oil at a flare. A DIY ductless mini split, an outdoor condenser tied to one or more indoor units by refrigerant lines and wiring, succeeds or fails on planning and commissioning, not on how straight you hang the bracket.
The hard part is proving the refrigerant circuit is clean, dry, and leak-tight and the electrical is correct before startup. Quality commissioning includes a Nitrogen Pressure Test, a Vacuum Decay Test, and verifying refrigerant charge when the design calls for it. Pulling vacuum is not the finish line; a micron gauge has to show it, with 500 microns as a common target, and evacuation is not finished if the microns climb beyond an acceptable amount during the hold window.
DIY is a fit if you can wire to code, measure and torque carefully, stay patient through test-and-verify steps, and stop when something is uncertain. Hire a pro if you are not comfortable with electrical circuits, cannot perform and verify evacuation and leak checks, or your warranty requires licensed installation. Some manufacturers gate full warranty coverage behind licensed install, and warranties are layered with different components carrying separate warranties.
There is also a legal line: EPA Section 608 Technician Certification is required for specific refrigerant-handling activities, and the rules vary by equipment type and whether you open the sealed circuit. Expect a practical playbook for choosing the right path, planning the site, executing the install checks, and budgeting without rework surprises.
How to Choose the Right Ductless Mini Split
Most DIY mini split regret comes from choosing the wrong capacity, overcomplicating zoning, or expecting "set-and-forget" comfort in a leaky house, not from the bracket kit or condenser pad. Treat sizing like risk management: get the load right, and everything downstream gets easier.
Put a Manual J load calculation at the top of your decision tree. Done correctly, it typically lands within about 10 to 15% of the real heating and cooling load, which is tight enough to make an equipment choice you can defend.
Rules of thumb swing wide, commonly 25 to 50% off, because the drivers are not "square feet." Climate, insulation levels, window area and orientation, ceiling height, and infiltration move the load fast. Use the common screen only: roughly 1 ton per 400 to 600 sq ft (1 ton per 500 sq ft is commonly cited). If your plan is wildly outside that range, stop and re-check, but do not buy off the shortcut—use a mini split sizing guide to sanity-check your BTU target.
Single-zone wins when one space needs targeted comfort: a bonus room, garage conversion, or a hot upstairs bedroom. The DIY complexity stays contained to one head, one line set route, one drain plan.
Multi-zone earns its keep when multiple rooms need independent control, but it adds real friction: more line routing, more penetrations, more flare points, more wiring runs, and harder commissioning logistics when one problem can affect several zones. If you're unsure how many rooms actually need a head, start with whether you need a ductless mini split in every room.
A "mini split air conditioner" locks you into cooling. A mini split heat pump covers cooling plus shoulder-season and winter heating, which changes how often you touch your existing heat system and how comfortable the house stays year-round.
DIY-friendly systems reduce refrigerant-side work with precharged line concepts and simplified connections. Consumer Reports tested a MrCool DIY model that comes with a copper line prefilled with refrigerant from the factory, which is exactly what "DIY-friendly" looks like in practice.
Premium systems focus on installer-driven performance, controls, and integration. Budget Heating & Air Conditioning, Inc. sells both DIY-leaning and contractor-focused categories, including cooling-only and heat-pump mini splits.
- Capacity confidence: Manual J numbers in hand, not guesses.
- Zone plan simplicity: Single-zone unless you truly need room-by-room control.
- Heating needs: Heat pump if you want shoulder-season and winter capability.
- Refrigerant direction: R-32 GWP 675 vs R-410A GWP 2,088, about 68% lower for R-32.
- Warranty constraints: Verify DIY eligibility and required documentation.
- Serviceability: Short, accessible line runs and a layout a tech can troubleshoot.
Once the equipment and zone plan are settled, the project shifts from "what to buy" to "where everything can actually go." That layout work is where permits, clearances, and drain routing either support an easy install or force expensive do-overs.
Planning Like a Pro
Most DIY mini-split failures start before the box is opened: unpermitted work that fails inspection, or a layout that forces you to move equipment after holes are already drilled. Confirm permit requirements and any HOA or condo rules before you purchase, because approvals dictate where components are allowed to land.
Inspections also drive timing. Electrical rough-in, the required outdoor disconnect location, and even the allowed condenser placement can lock your schedule. If you buy first and discover a setback, noise rule, or disconnect constraint later, the "fix" is usually relocation and patchwork, not a quick tweak.
Indoors, pick a location that preserves a clean airflow path and leaves service access for filters and the coil. Plan the condensate route first, because "we'll figure out the drain later" produces impossible drain-slope placements that require pumps or rework. Your line set, the insulated copper refrigerant tubing pair linking the indoor head to the outdoor condenser, should have a realistic route for wall penetrations, covers, and bend radius.
Outdoors, design for snow and ice, drainage away from the pad, and noise or vibration next to bedrooms. Maintain service access, and use clearance rules as constraints: common guidance targets about 24 inches around the condenser, while some manufacturers allow a minimum 12 inches to walls or shrubbery. Confirm the manual.
Size the branch circuit from the unit nameplate, not rule-of-thumb guesses that trigger failed inspections. MCA (Minimum Circuit Ampacity) is the minimum conductor ampacity, so it controls wire sizing discipline. MOCP (Maximum Overcurrent Protection) is the largest allowed breaker or fuse, so it caps overcurrent device size.
If your breaker exceeds MOCP or your conductors don't meet MCA, the correction is not cosmetic: it is a rewire. Nameplates commonly show both values together, for example a 25A breaker limit with a 29A MCA.
- Mounting pad or bracket: sets height above drainage and snow, and controls vibration transfer.
- Line-hide cover: protects the line-set route and forces you to plan penetrations and corners cleanly.
- Disconnect and whip: inspection-driven items that often dictate final condenser location.
- Surge protection (optional): easiest to add while the disconnect is being planned.
- Condensate parts: proper drain fittings, termination, and any pump decision before the indoor unit is hung.
- Fasteners and sealant matched to the wall: masonry, siding, and stucco each demand different anchors and weather sealing.
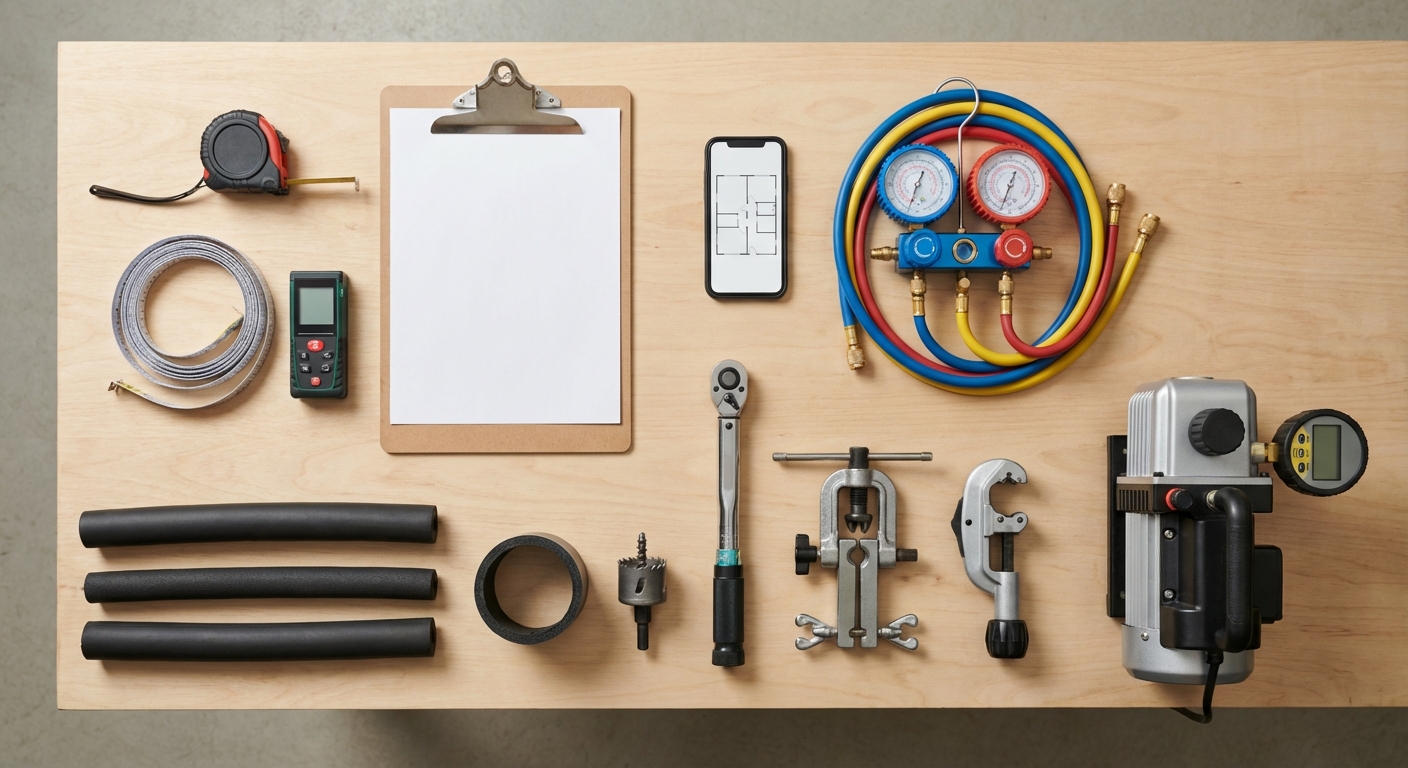
- Tool planning: torque-wrench capability (example range 3.1 to 62.7 ft·lbs) keeps flare torque consistent to prevent leaks; plan vacuum equipment and whether flaring tools are needed for your line set.
Budget Heating & Air Conditioning, Inc. carries common mini-split installation accessories like pads, whips, and line-hide to prevent last-minute stalls.
A solid plan also gives you clear checkpoints: if the drain can't slope, the condenser can't meet clearance rules, or the electrical can't satisfy MCA/MOCP, you find out on paper instead of mid-install. Those same checkpoints map directly to the step-by-step work that follows, after you’ve chosen from ductless mini split systems.
DIY Mini Split Installation Step-by-Step
DIY mini split installs succeed when you treat every phase as a one-way gate: you verify alignment, drainage, torque, wiring, and circuit tightness at deliberate pause points before you move on or energize anything.
- Mount the indoor unit wall bracket and lock in level and service access per the manual and your plan.
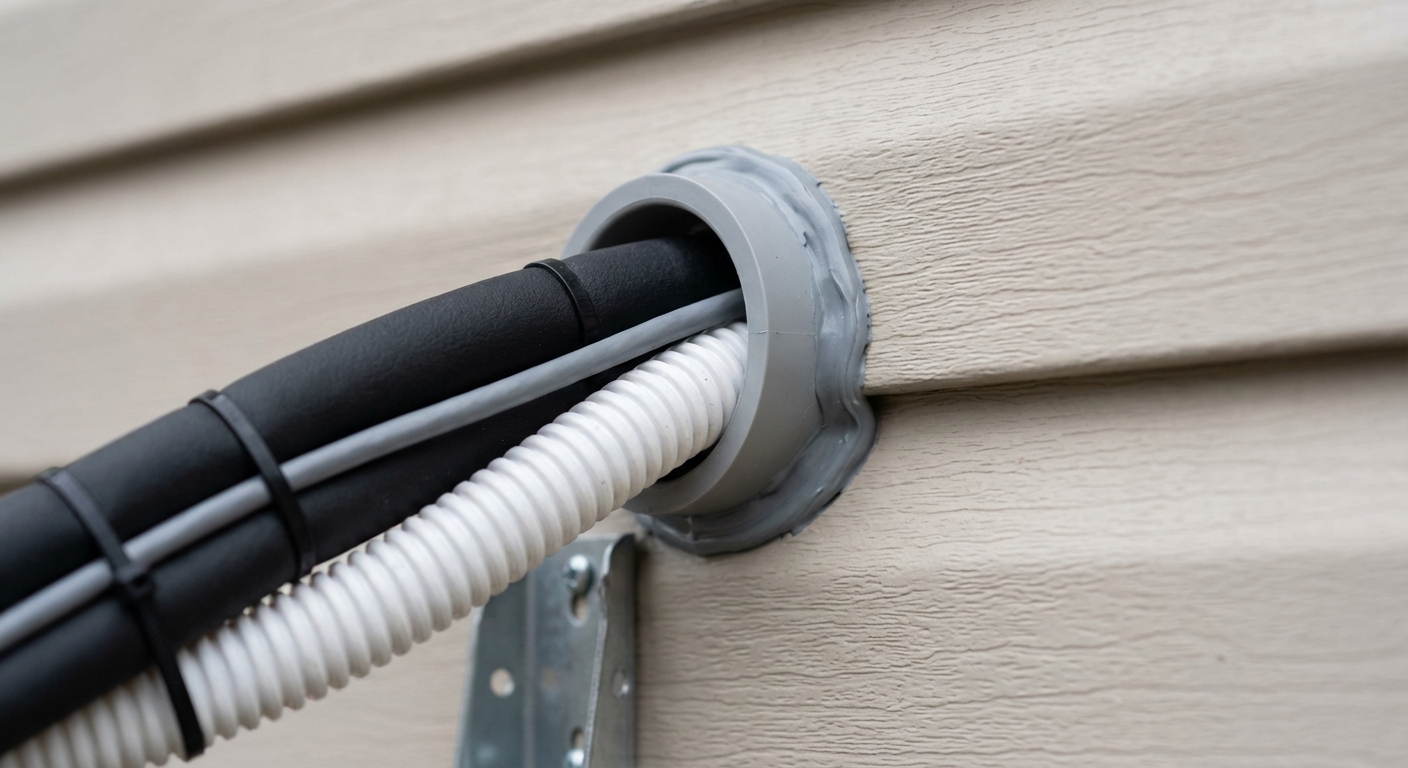
Double-check: bracket is dead level, fasteners hit structure, and the unit can be lifted on and off without fighting the ceiling or trim. - Drill and route the wall penetration(s) for line set, drain, and wiring, then plan protection and sealing.
Double-check: sleeve or bushing protects the bundle, the penetration slopes correctly for drainage, and your exterior seal plan is ready before anything goes through. - Set the outdoor unit on its pad or wall bracket and confirm it is stable and serviceable per your earlier placement plan.
Double-check: the base does not rock, mounting hardware is tight, and panels/valves remain accessible for service. - Run and protect the line set without kinks, keep a generous bend radius, and keep both ends capped until you are ready to connect.
Double-check: no flattened sections, no sharp bends at the indoor flare stubs, and the insulation stays intact where it enters the wall. - Route the condensate drain with continuous slope and a termination you trust.
Double-check: no uphill sections, no sags that trap water, and the outlet cannot splash back onto the wall or foundation. - Wire power and communication exactly to the terminal designations and order shown in the manufacturer diagram. Add strain relief and protect the cable where it enters metal.
Double-check: terminals match end-to-end (no swapped conductors), strain relief is tight, and your conductor sizing and breaker choice match what you already planned. - Prep and connect the refrigerant circuit: cut tubing square, ream and deburr, flare cleanly, align perfectly, then torque to spec per manufacturer installation instructions.
Double-check: flares seat without forcing, threads start by hand, and torque is controlled. Flare leaks come from debris on the flare, wrong flare size, misalignment, over-torque or under-torque, or skipping ream/deburr. - Pressure test and evacuate before you open any service valves or attempt startup. Commissioning uses nitrogen pressure testing, then evacuation and a vacuum decay verification, with exact values and times set by the manufacturer. A common reference range for nitrogen leak testing on a new R-410A installation is 150 to 200 psi, but you follow the equipment manufacturer's specified test pressure and procedure.
Double-check: evacuation reaches a commonly used best-practice target of 500 microns, then passes a vacuum decay hold often run 10 to 15 minutes (often cited around 15) without an unacceptable rise. - Start up and verify basic operation only after every prior gate passes.
Double-check: no error codes, indoor fan and louvers behave normally, outdoor unit ramps smoothly, condensate drains, and supply air temperature moves in the correct direction for the mode you selected.
Leaks (flares): Dirty flare faces, wrong flare size, misalignment, and bad torque discipline create leaks. Prevent it with square cuts, ream/deburr, clean seating surfaces, perfect alignment, and torque-to-spec.
Contamination (moisture): Rushing evacuation and skipping verification holds leaves moisture in the lines. Prevent it by treating your micron target plus a 10 to 15 minute decay hold as a hard pass-fail gate before opening valves.
Electrical/controls (wiring): Miswired communication conductors cause nuisance faults and no-starts. Prevent it by matching terminal designations end-to-end, using strain relief, and re-checking every screw terminal before closing panels.
Water management (drain): Poor drain slope creates back-ups and indoor leaks. Prevent it with continuous fall, no sags, and a termination that cannot freeze, clog easily, or dump water where it causes damage.
Take photos of every terminal block, every flare before insulation goes on, and write down your nitrogen pressure and micron/decay readings as you go. If any verification fails, stop before energizing and correct it while everything is still accessible (especially if you chose DIY-friendly mini split options designed to simplify self-install).
Real-World Costs, Rebates, and Where DIY Savings Are
The unit price is not the project price. DIY savings are real only when you budget the invisible line items: electrical work, copper and accessories, and the possibility you pay for commissioning or fix-forward troubleshooting when something doesn't start cleanly.

- Equipment package: outdoor unit, indoor head(s), and whatever the bundle actually includes.
- Electrical: disconnect and whip, plus breaker or panel work if capacity is tight.
- Mounting and weatherproofing: pad or wall bracket, fasteners, line-hide, and penetration sealing.
- Tools and supplies: the "small stuff" adds up fast if you don't already own it.
- Optional pro help: commissioning-only service or fix-forward labor when a leak, wiring issue, or protection fault stops progress.
The federal Energy Efficient Home Improvement Credit (25C), which covered 30 percent of project cost up to a 2,000 dollar annual cap for qualifying heat pumps, ended for property placed in service after December 31, 2025. Check state, utility, and local programs where you live because incentives are location and model dependent.
Many online and wholesale mini split packages do not include a line set or communication wiring, and inclusions vary by model, bundle, and required length. For a concrete budgeting benchmark, see how much a mini split system costs for a 1000 sq ft home. Use a 2025 reality check: standard central AC line sets often run about $500 to $800, which resets expectations for copper and accessory spend. Before you buy, confirm included lengths, lead times, and pickup vs shipping; Budget Heating & Air Conditioning, Inc. supports online ordering with in-store pickup at select locations.
Build a pre-purchase checklist of every inclusion and every needed length, then schedule any paid commissioning or support early so your savings don't get erased by downtime.
Mini Split vs Central Heat Pump vs Dual Fuel
Ductless mini splits solve specific problems fast, but they are not the default "best upgrade." Central heat pumps and dual-fuel systems win when you need whole-house air distribution, a uniform look (no wall cassettes), and simple control across many rooms.
Mini splits tend to fit best when the goal is targeted comfort without opening walls for ducts:
- You're conditioning an addition, garage conversion, or bonus room without tying into the main system.
- One or two rooms stay hot or cold and you want targeted zoning without opening walls for ducts.
- The home has no ductwork, or the existing ducts are undersized, leaky, or poorly laid out.
- You want room-by-room setpoints and the lowest disruption to finishes.
Central heat pumps make more sense when you want one piece of equipment serving most rooms through existing distribution:
- You already have ductwork in decent shape and want one system to serve most rooms.
- Whole-home air mixing and filtration through a single air handler matter to you.
- You care about consistent aesthetics and resale-friendly mechanicals.
- You want one thermostat and straightforward multi-room control.
Dual-fuel becomes the conversation when gas is available and you want managed switchover in colder weather:
- Gas is available and you want predictable cold-weather heating with cost control.
- You want thermostat-managed switchover; the balance point is not universal, and many dual-fuel thermostats offer multiple switchover modes plus compressor lockout and aux-heat controls.
Quick capacity reality check: 1 ton of cooling = 12,000 BTU/hr; a 3-ton system provides about 36,000 BTU/hr.
Efficiency comparison trap: SEER2 replaced older SEER metrics starting in 2023 to reflect more real-world test conditions, so compare like-for-like ratings.
Decision test: write down your distribution needs (one room vs whole house), your duct reality (none, bad, or usable), and your cold-weather strategy (all-electric vs gas backup). Pick the system type that satisfies those constraints with the fewest compromises—this mini splits vs traditional HVAC decision framework can help you sanity-check the tradeoffs.
Conclusion
A successful DIY mini split is one you can verify and document, because that proof keeps the project efficient and preserves warranty leverage if anything fails.
Your best results come from avoiding rule-of-thumb-only sizing, keeping the zone plan simple enough to install and service, and doing nameplate-driven electrical planning with placement that still allows drainage and access.
The quality gate is flare discipline plus verified evacuation and hold tests, and the money trap is assuming line set and wiring are included instead of budgeting copper and electrical up front. Those are the same failure points that show up later as oil at a flare, a vacuum that will not hold, or a communication fault that traces back to terminal mismatches.
- Register the warranty on time and save every invoice, serial number, and model tag photo.
- Archive commissioning readings (for example, micron levels), hold results, and install photos in one folder because they may be requested.
- Confirm running amps against the unit nameplate, then document your readings.
- Validate reasonable heating and cooling performance; many inverter mini splits are not charged using superheat or subcooling like traditional systems.
- Maintain a monthly-to-quarterly filter cleaning or replacement cadence based on dust and occupancy, and do visual checks and light cleaning on the same cadence.
- Recheck your purchase scope so line sets, wiring, and electrical parts are accounted for in your final budget.
Budget Heating & Air Conditioning, Inc. can supply the equipment and the install accessories you will actually need, with fast shipping and U.S.-based technical support.
Order your mini split, line sets, pads, electrical whips, and related parts at budgetheating.com and use their team for pre-purchase and post-install support (and reference the HVAC resources and installation guides for next steps).
Wrapping Up
A DIY ductless mini split can absolutely work, but the difference between a smooth startup and a frustrating no-cool call usually comes down to decisions made before you ever hang the indoor unit. Getting the load right with Manual J, keeping the zone plan as simple as your comfort goals allow, and planning placement around clearances, drainage, and service access sets you up for an install that is easier to finish and easier to live with.
The real make-or-break step is commissioning: clean flare work, correct wiring, and verified leak-tight, dry lines using nitrogen pressure testing, evacuation to a solid micron level, and a vacuum decay hold. Budgeting matters too, because line sets, electrical parts, and the right tools often determine whether DIY savings stay savings, especially when warranties and refrigerant-handling rules add constraints.
As you move forward, treat each phase as a pass-fail checkpoint, document your readings and photos, and decide early where you can DIY confidently versus where a pro keeps the project on track.
 Cooling
 Heating
 Product and Brands Insights
 Buying Guides
 State by State