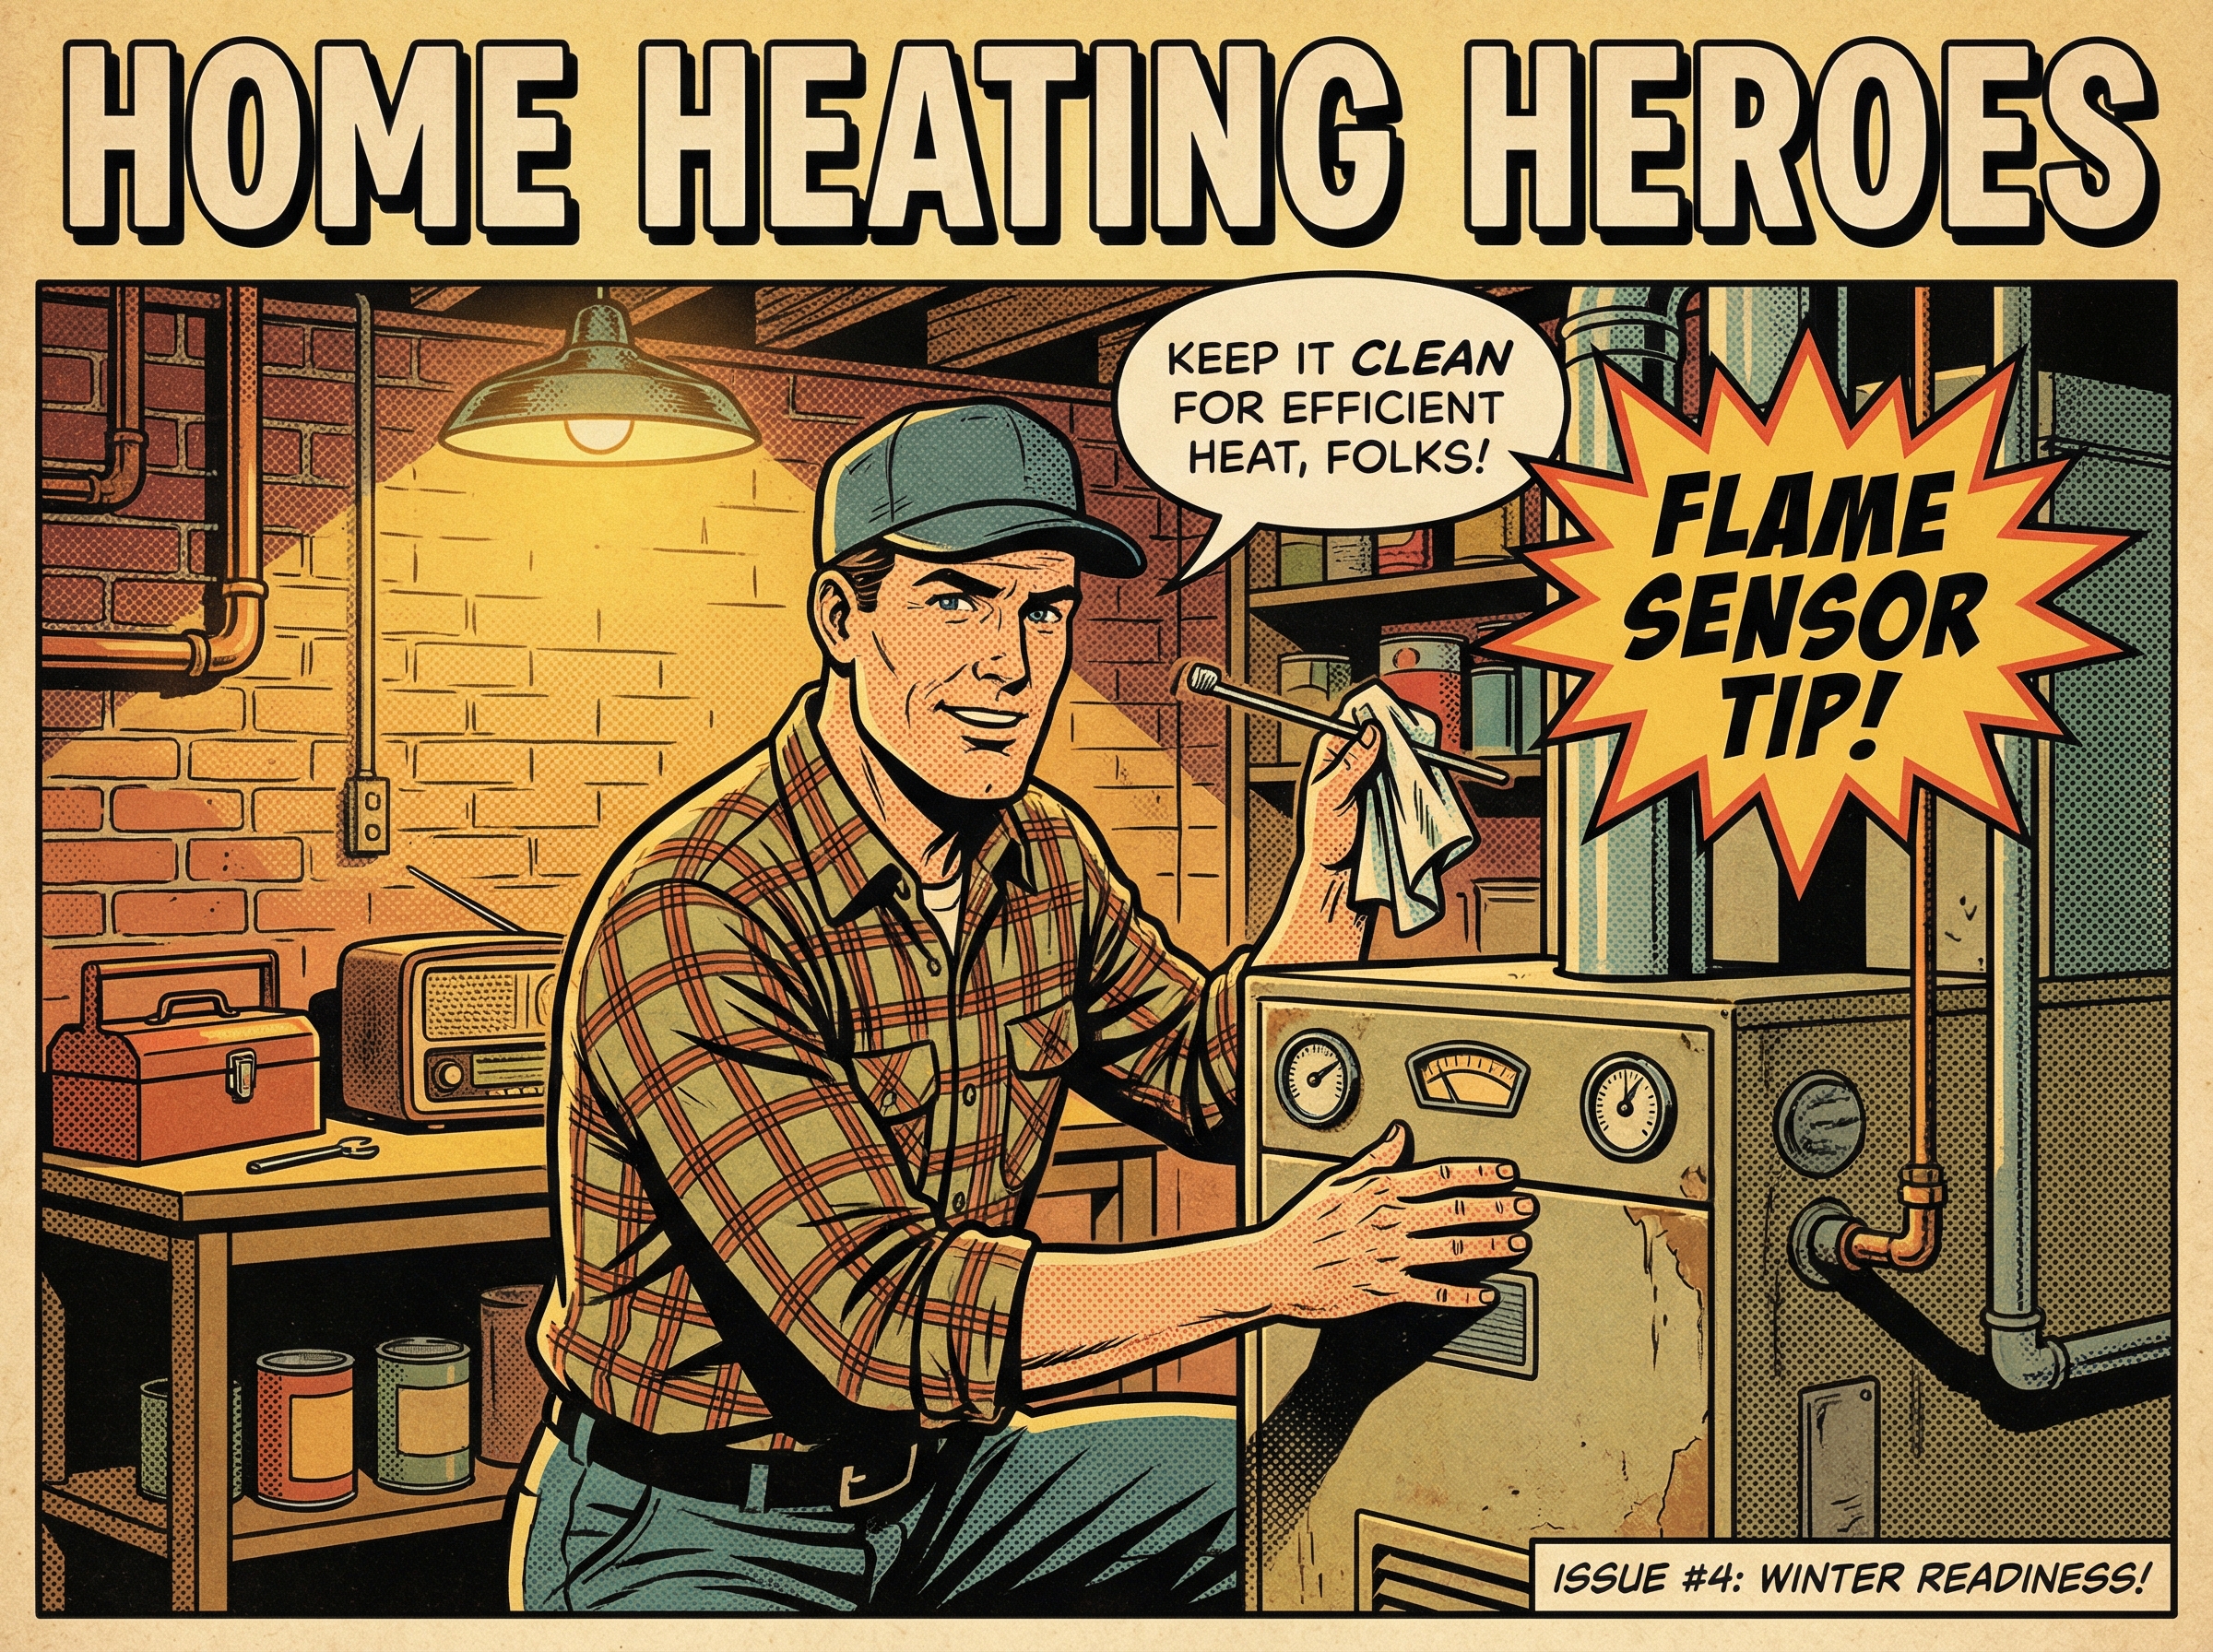
Is Your Furnace Flame Sensor to Blame? A Quick Overview
If your gas furnace lights for a few seconds, then shuts down and tries again, the flame sensor is a prime suspect. This small safety device, typically a thin metal rod with a porcelain base mounted at the burner, confirms that a flame is present. If it gets dirty, misaligned, or simply fails, the control board will cut fuel and stop the cycle to keep you safe.
We have seen countless no-heat calls traced to a tired or grimy sensor. Think of it like a lifeguard for your burners, watching for flame and signaling that it is safe to keep gas flowing. The good news is that this problem is often straightforward to diagnose and, in many cases, fix with careful cleaning and basic checks.
- How to recognize classic flame sensor symptoms
- Simple DIY checks you can do safely
- Cleaning and alignment basics
- How to confirm if the sensor is failing
- When a replacement makes sense
- When to stop and call a professional
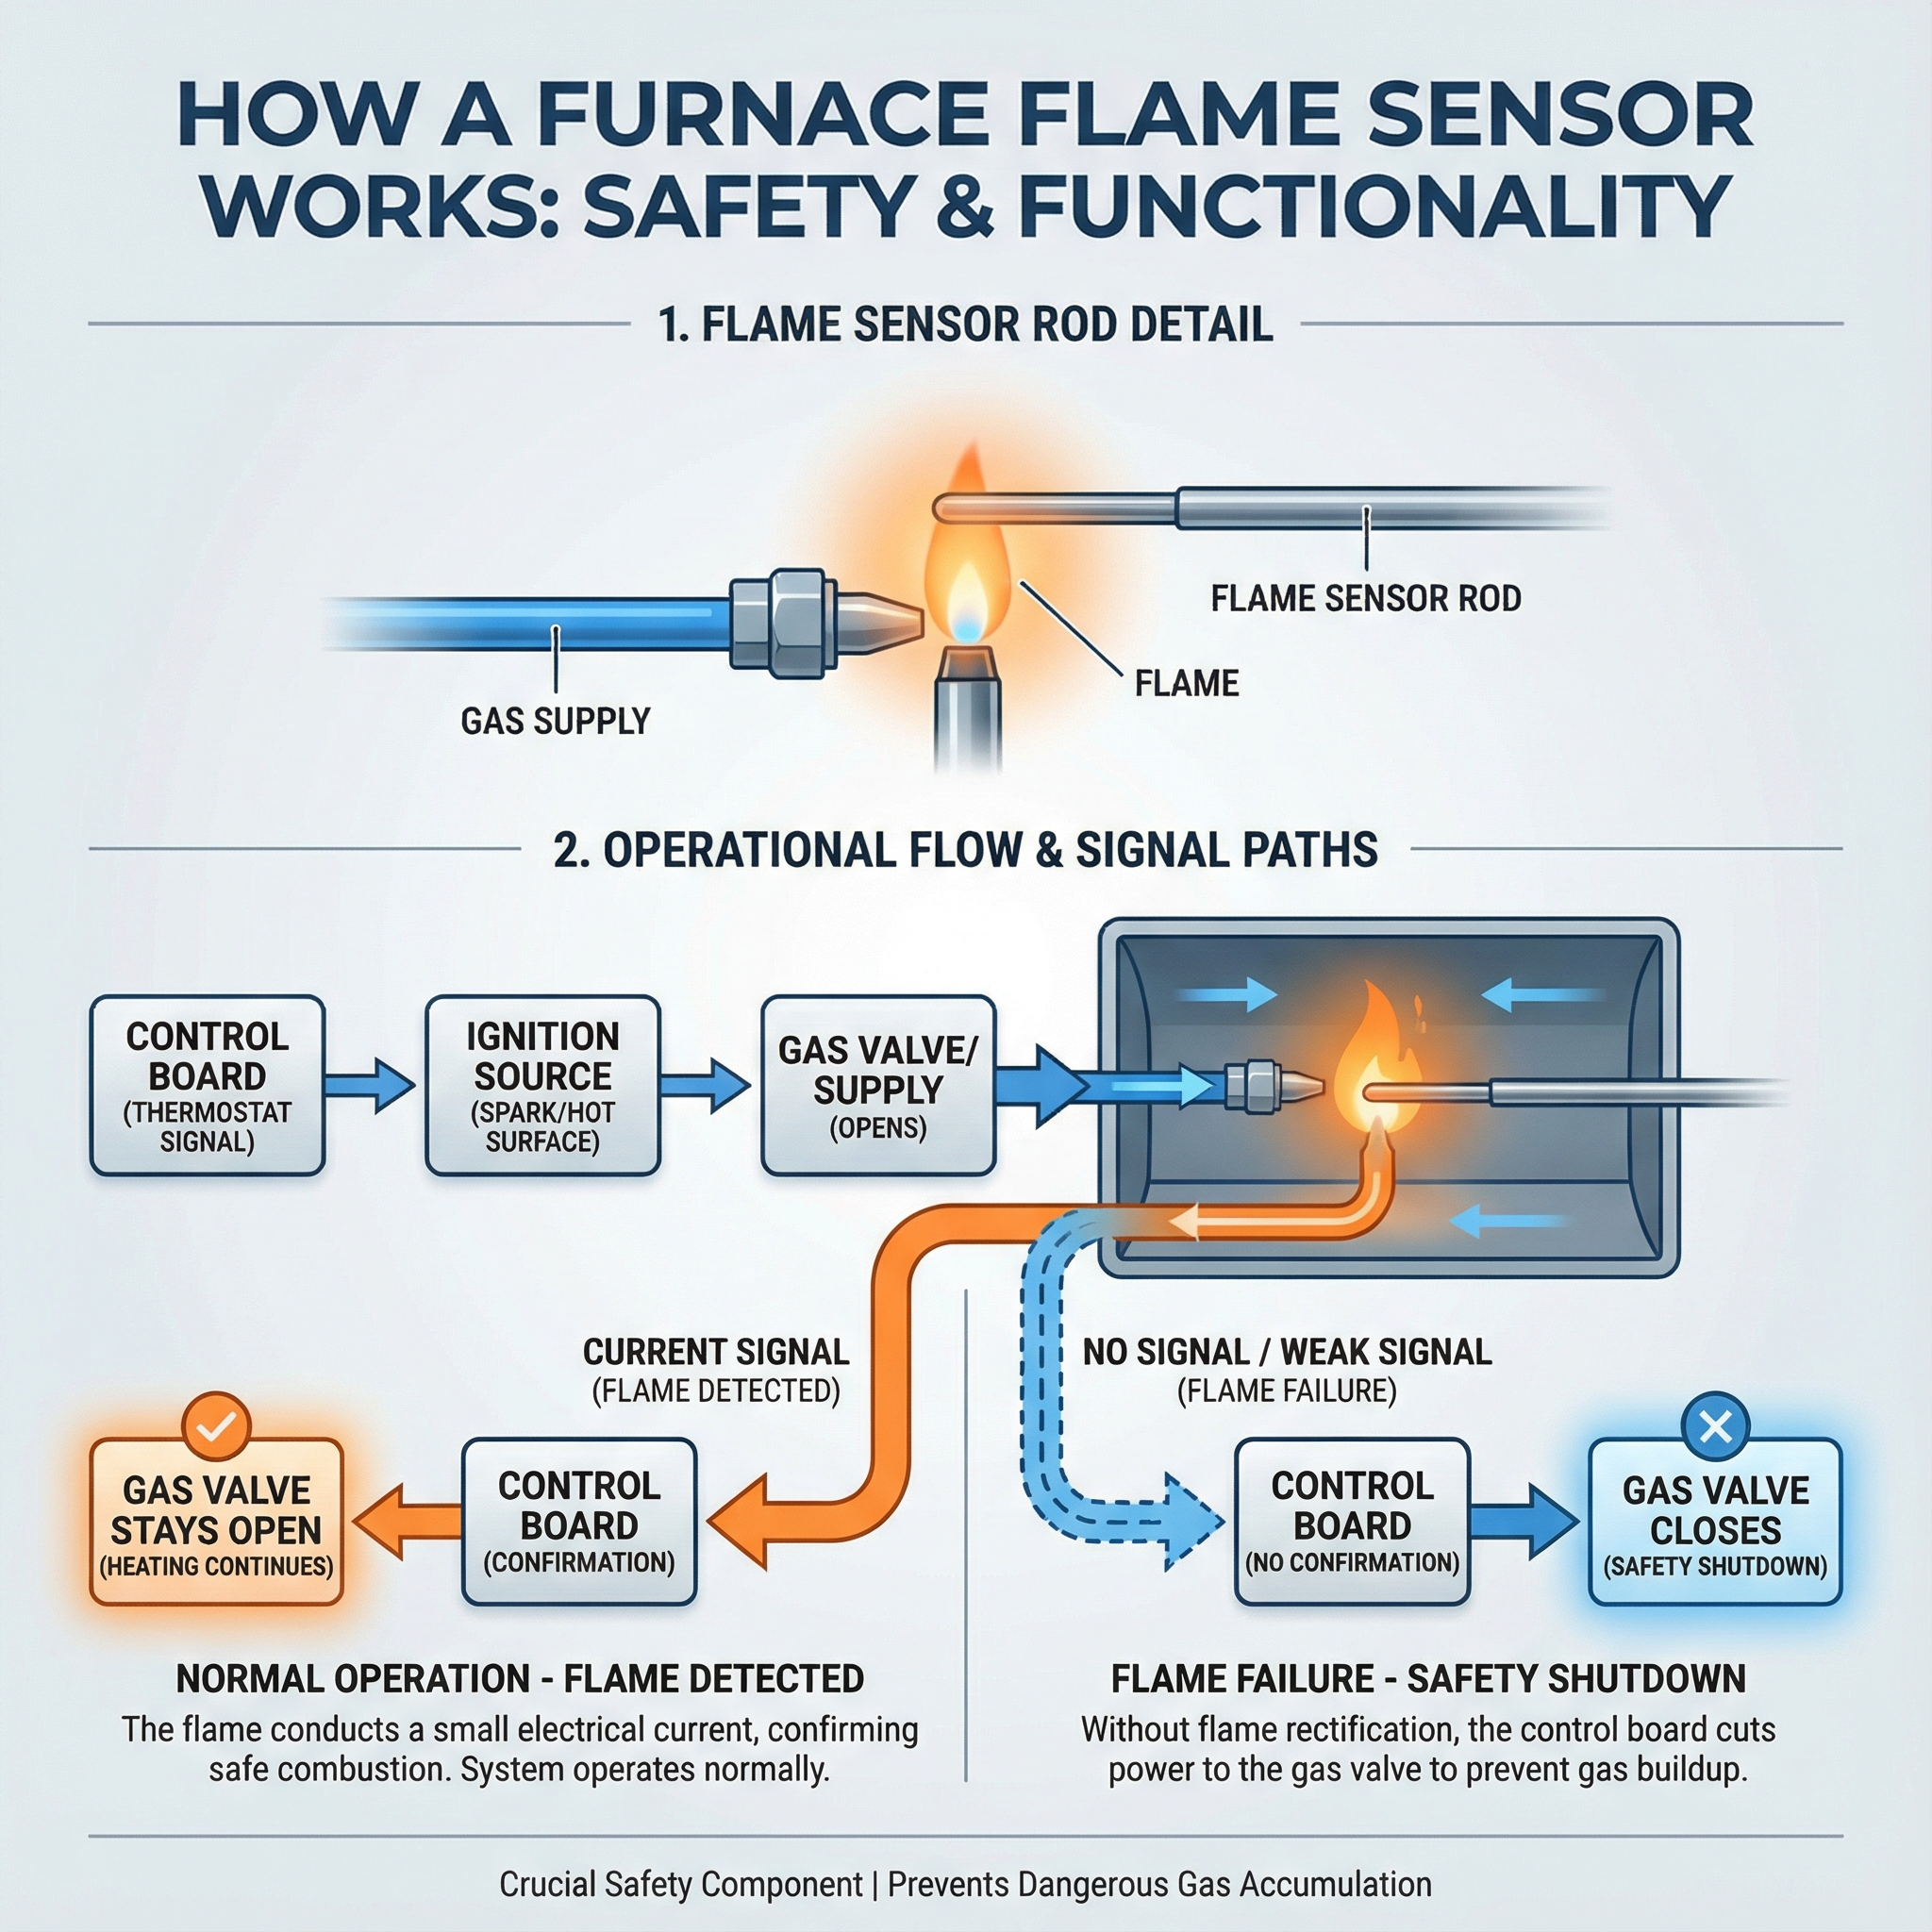
What a Furnace Flame Sensor Is: The Safety Role (Not an Ignitor)
A furnace flame sensor is a dedicated safety device that proves flame to the control board right after the gas valve opens. If the sensor does not confirm flame within a few seconds, the board shuts the valve and stops the gas flow to prevent unburned fuel from accumulating. The sensor does not ignite gas or produce heat; ignition is handled by a hot surface ignitor or a spark system. The sensor's job is monitoring only.
It works through flame rectification. When a proper flame engulfs the probe, the flame becomes a weak conductor that passes a tiny electrical signal, typically a microamp-level DC current, back to the control board. That signal tells the board combustion is stable. No signal, no gas. Think of it like a hall monitor that checks attendance: if the flame is present, class continues, and if not, the room is cleared.
Common Signs a Flame Sensor Is Failing: Symptoms to Watch For
Use this quick checklist to spot a dirty or failing flame sensor so you can triage the issue. In our experience at Budget Heating (BudgetHeating.com), these are the tells we see most often:
- Burners ignite, then shut down within about 10 seconds, and the cycle repeats, a classic short cycling pattern.
- The control shows a no flame error or flashing code, and the furnace may enter a soft lockout after several failed attempts.
- The flame does not fully envelop the sensor rod during operation, which weakens the detection signal.
- Visible clues on the sensor: soot or carbon buildup, a blackened tip, surface oxidation or corrosion.
- Porcelain insulator that is cracked, chipped, or otherwise damaged.
If you check off more than one of these, the sensor likely needs cleaning or replacement attention.
Step-by-Step: How to Safely Inspect Your Furnace's Flame Sensor
Before touching anything, we confirm the symptom. If your furnace has a viewing window, watch a full heat call. Burners that light then shut off point to a sensor issue. Power down and proceed.
- Turn off power at the service switch or breaker, and close the gas valve feeding the furnace. Let the unit cool to avoid burns.
- Remove the front panel. Locate the flame sensor: a slender metal rod in front of one burner, held by a single screw with a white porcelain base.
- Perform a visual check. Look for soot or carbon on the rod, a blackened tip, light scaling or heavy corrosion, cracked or chipped porcelain, loose wiring at the terminal, and a bent or loose mounting bracket that keeps the rod out of the flame.
- Document findings before any cleaning attempt or adjustment.
When to Replace the Flame Sensor: Limits, Tradeoffs, and Alternatives
From our field experience, replacement is the right move when cleaning does not restore steady operation or the sensor is visibly compromised. Watch for a cracked porcelain insulator, a bent or pitted rod, heavy corrosion, or flame-rectification readings that stay low even after cleaning. Replacement itself is typically a straightforward, low-cost repair for a technician who can verify correct part selection, mounting, grounding, and wiring. Actual price varies by furnace model and region.
Replacement is not a cure-all. If the sensor fouls again within weeks, the root cause is usually elsewhere: poor combustion, sooting burners, venting issues, or thermostat and staging problems. In those cases, alternatives work better than another sensor: professional combustion tuning, burner cleaning or replacement, venting inspection, and control board or wiring troubleshooting. Also, if short cycling is tied to airflow or limit controls, a new sensor will not help.
- Replacing the sensor immediately without cleaning.
- Assuming every short cycle is a sensor problem.
- Confusing the flame sensor with the ignitor or a thermocouple.
- Bypassing the sensor, which is dangerous and never acceptable.
How a Dirty or Bad Flame Sensor Actually Causes Short Cycling
Short cycling often starts at the flame sensor. Soot and carbon on the rod insulate it, weakening the tiny flame signal. The control board reads no flame, shuts gas within seconds to prevent unburned fuel, then retries, creating quick on-off cycles. It is like putting tape over a light sensor.
Soot builds fastest on older or poorly maintained furnaces, with dirty burners, or when airflow is restricted. Environment matters: long cold seasons add runtime, condensing units encourage corrosion, coastal salt and moisture attack terminals and porcelain, and dusty attics or garages coat the tip.
Wiring and grounding matter too. Loose grounds, corroded connectors, or a weak chassis bond drop the microamp signal below what the board can read. In our experience at Budget Heating (BudgetHeating.com), cleaning the rod and fixing the ground often stops the short cycling.
How to Test a Flame Sensor: Multimeter Tips and What Technicians Measure
There are two very different checks. A basic multimeter check can flag obvious wiring issues, but the definitive test is a live microamp measurement with burners lit. Because that involves live circuits, it is usually technician-level. Homeowners should avoid live measurements unless trained.
- Power off. Remove the flame sensor and disconnect its lead.
- With a multimeter on ohms, check the sensor lead and related wiring for continuity end to end. Opens, shorts to ground, or unusually high resistance indicate wiring problems.
- Inspect the connector and terminal for corrosion or looseness.
How we measure flame-rectification current: set the meter to DC microamps and place it in series between the sensor lead and the control board's flame-sense terminal, or use dedicated test posts if provided. Run the burners and observe. Many designs expect roughly 1 µA or more. A steady reading is healthy; very low or fluctuating values point to sensor, grounding, or contact issues. If the microamp reading is normal but shutdowns persist on flame-failure codes, suspect the control board, wiring or grounding, or other safety devices rather than the sensor.

How to Clean a Dirty Flame Sensor: Tools, Technique, and What to Avoid
A dirty flame sensor can make a furnace light, then shut down. Cleaning is simple if you go slow and treat it like polishing tarnish off a spoon, just the buildup, not the metal.
- With power and gas safely off, remove the sensor's mounting screw and disconnect the lead wire.
- Gently polish the thin metal rod with fine emery cloth, very fine steel wool, or a light abrasive to remove soot and oxidation. Do not gouge the metal and do not scrape or chip the porcelain insulator.
- Wipe away all residue with a clean, dry cloth.
- Reinstall the sensor so it sits directly in the burner flame, restore gas and power, then run a full heating cycle. Many units return to normal operation after cleaning.
What to avoid: heavy sandpaper, files, powered tools, bending the rod, or chemicals that leave a film. Do not rush to buy a replacement, soot buildup is the most common cause, so careful cleaning often does the trick.
Other Causes of No-Heat, Short Cycling or Blower Shutdowns (and What to Check)
Not every no-heat, short cycle, or blower shutdown is a flame sensor issue. Start with airflow, a furnace that cannot breathe is like jogging with a scarf. Many nuisance trips are the system protecting itself.
- Filter and vents: Replace or clean the filter and keep return and supply vents open; restriction causes overheating, sooting, and high limit trips.
- Blower behavior: Buzzing, slow starts, or random stops can mean a failing motor, electrical problems, or airflow restriction tripping the high limit.
- Controls and wiring: If flame microamps are normal yet it still shuts down, look to the control board, loose or corroded wiring, poor grounding, or safety switches.
- Efficiency context: SEER or SEER2 rate cooling, not AFUE. FER rules shape blower efficiency and airflow, and poor airflow or short cycling increases heating use.
Next Steps: Clean, Test, or Call a Pro: Staying Safe and Restoring Reliable Heat
A dirty or failing flame sensor is a common reason a furnace lights then quits, and a careful cleaning often restores heat. We know a cold house is stressful. If issues continue, do not bypass the sensor. Shut the system down if you smell gas or see cracked porcelain, heavy corrosion, yellow flames, or wiring problems. A licensed pro will follow local codes and manufacturer instructions, replace the sensor if needed, and check the control board, grounding, combustion, airflow, and venting. With 30+ years in HVAC, our team delivers code compliant diagnostics and annual maintenance that reduce nuisance shutdowns.
- Get a Custom Quote for a replacement flame sensor or furnace upgrade
- Talk to Our Team by phone for fast, U.S.-based guidance
- Shop Furnace Parts at wholesale pricing, with fast shipping and financing through Affirm