Ductless Mini Split Retrofit Guide for 2026: What to Expect
Retrofitting with a ductless mini split in 2026 is an effective way to fix hot and cold rooms, cut energy use, and skip new ductwork. New refrigerant rules, plus SEER2 and HSPF2 efficiency standards, shape what is on the shelf and what qualifies for incentives. With 30 plus years in HVAC and hundreds of thousands of shipments, we have seen why this path is popular.
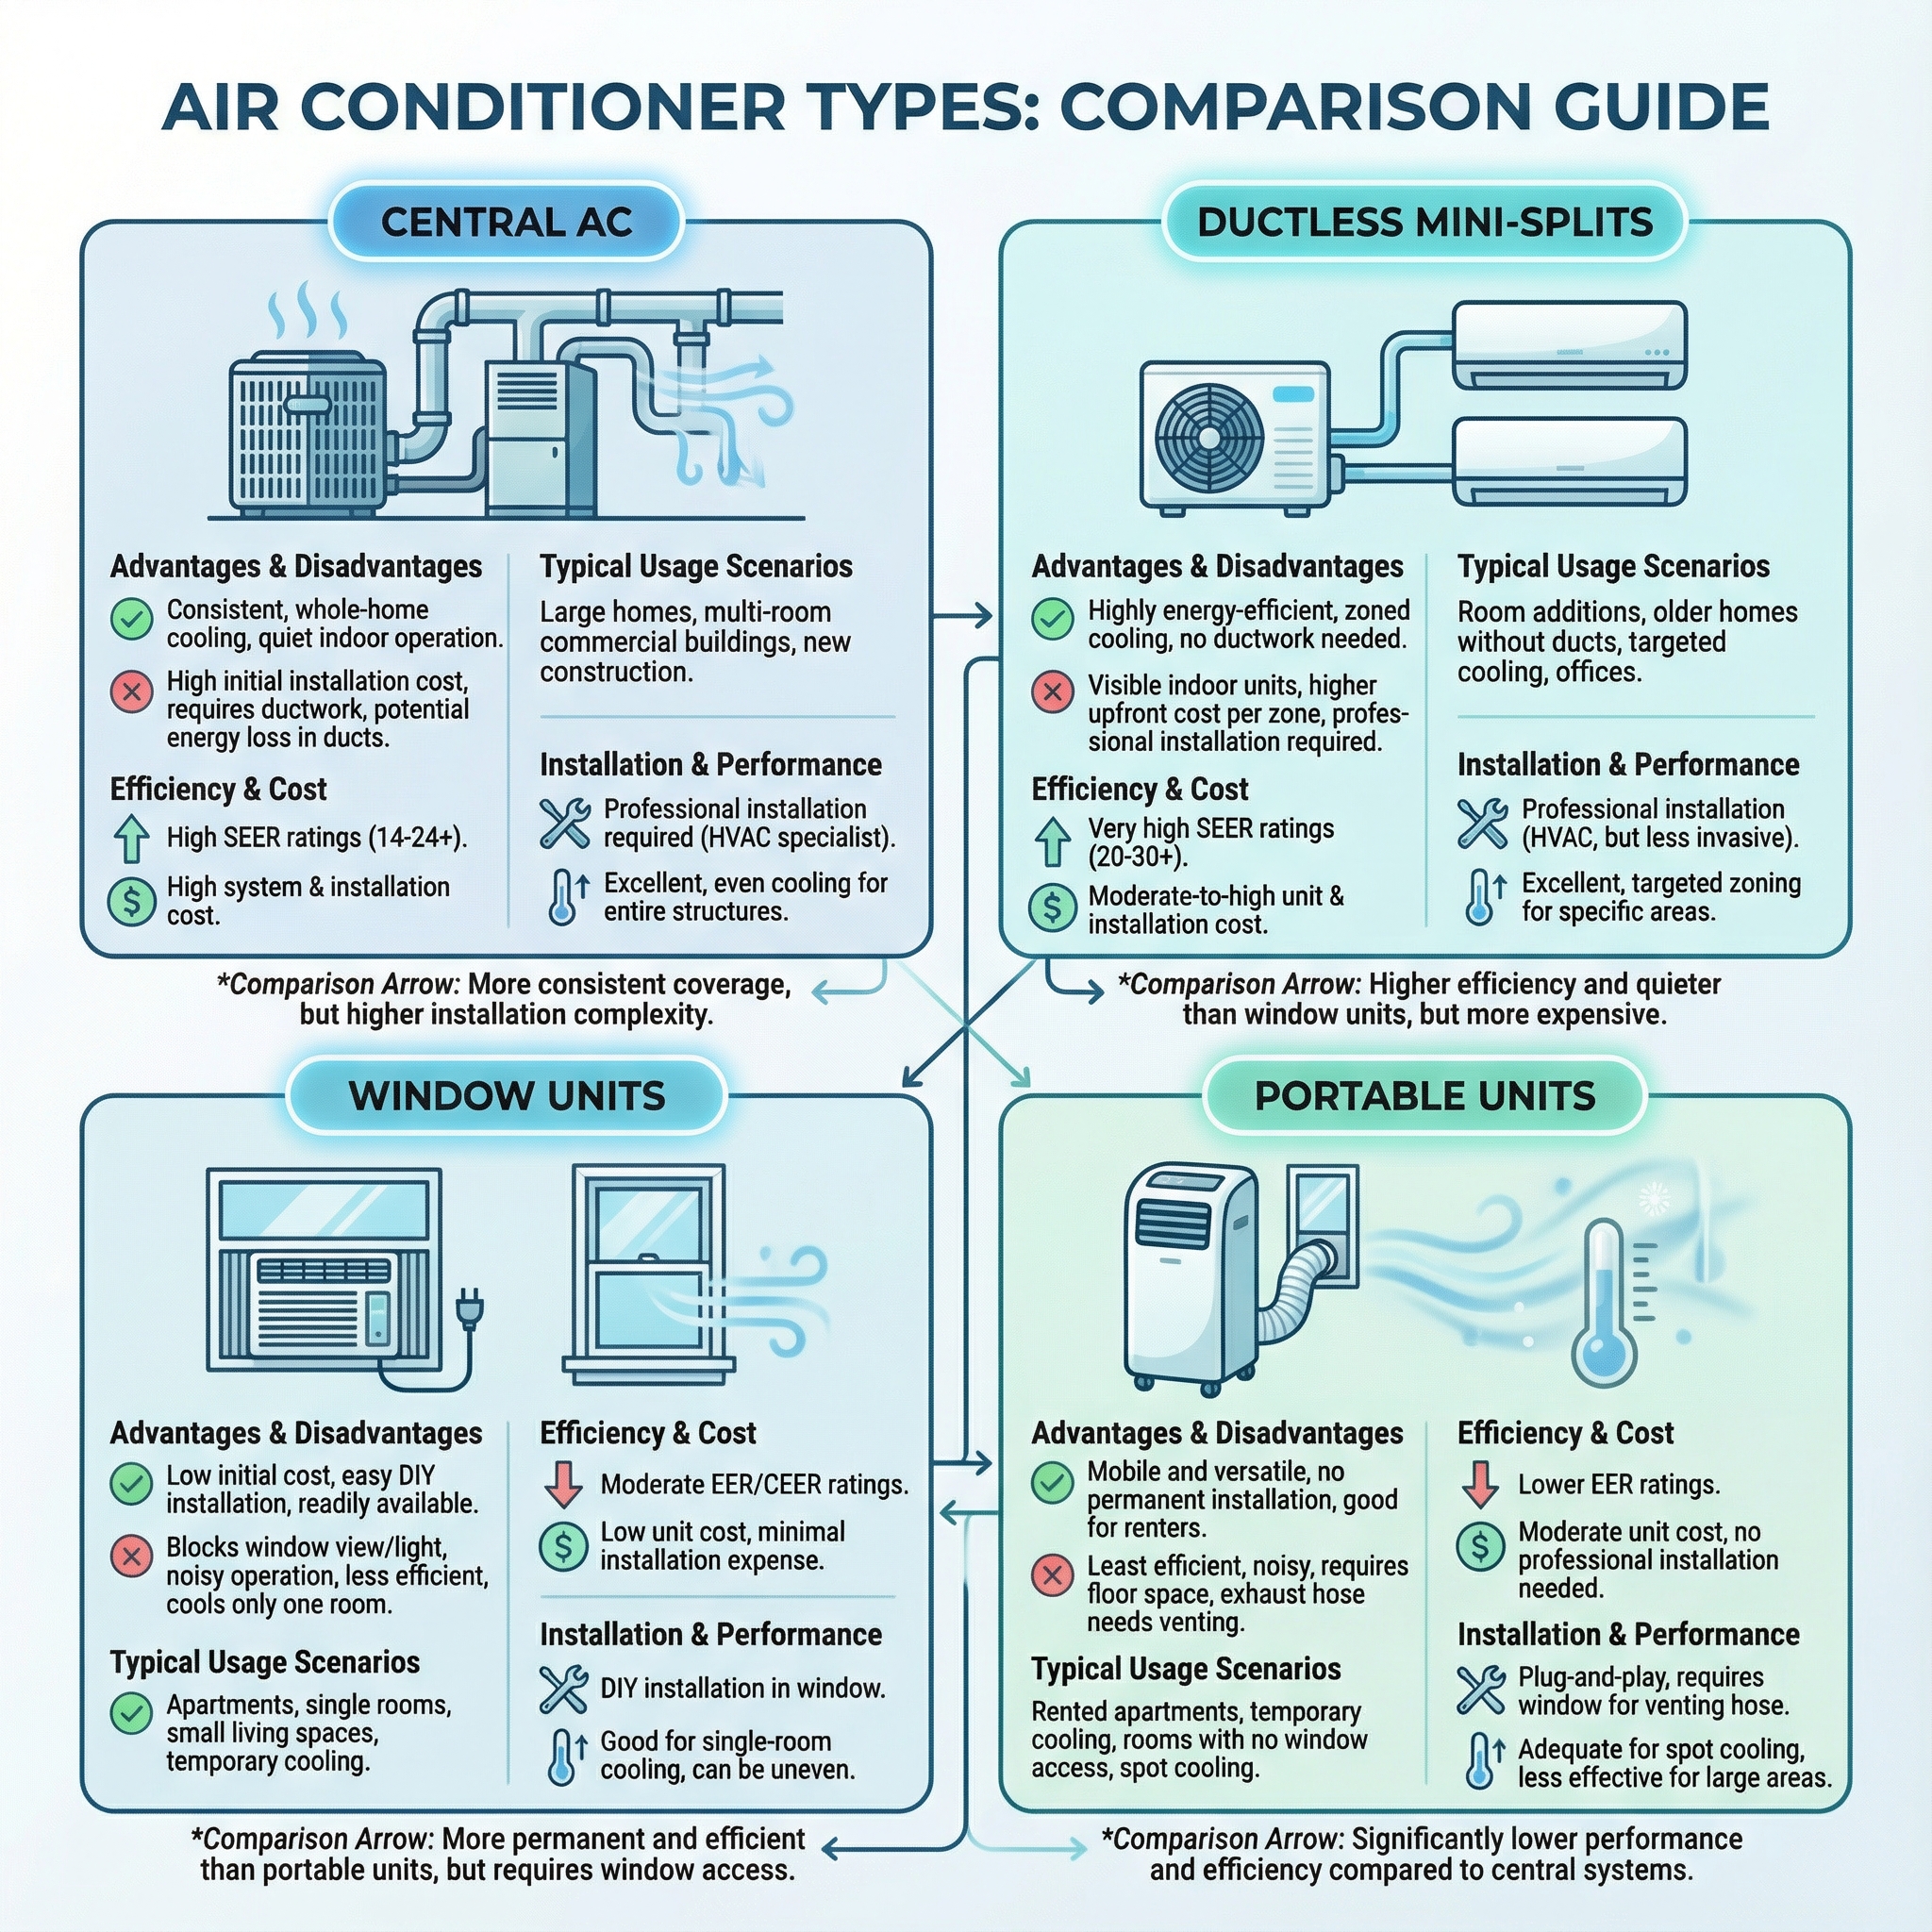
A ductless mini split is a small heat pump system: one outdoor unit connects to one or more indoor air handlers by slim refrigerant lines. Each indoor unit conditions its own zone, so bedrooms, additions, basements, and sunrooms get tailored comfort. No supply and return trunks means minimal disruption, faster installs, and cleaner walls and ceilings.
Mini splits work by heat transfer, not heat generation. The refrigerant circuit moves heat from one place to another, like a conveyor that carries boxes between rooms. In cooling, it removes indoor heat to the outside. In heating, it pulls available outdoor heat and brings it in, using electricity efficiently because it is moving energy rather than making it.
Is a Ductless Mini Split Right for Your Retrofit? Pros, Cons and When to Choose Alternatives
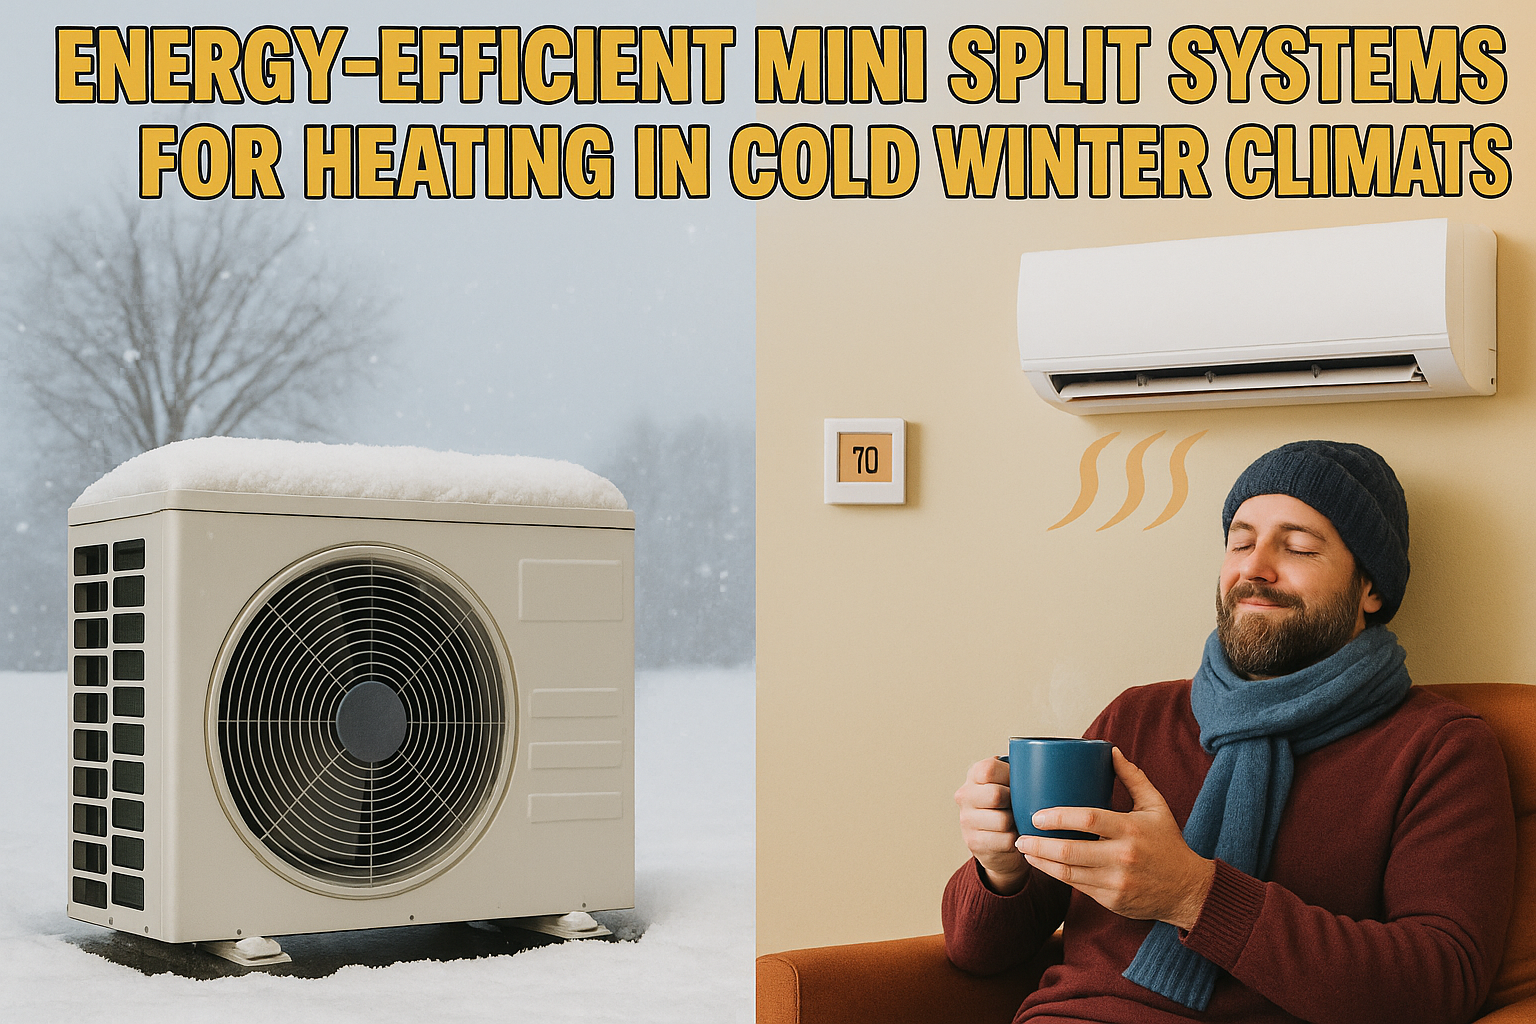
We size and choose mini splits to solve problems, not to chase the biggest spec sheet. For retrofits, they shine: small line set penetrations, little mess, fast timelines. They cut duct losses and use inverter modulation and room by room zoning to trim runtime and energy use. Ignore the myth that higher SEER2 is always better. Match efficiency to the use case, and for heating, focus on HSPF2 and low temperature capacity. Modern cold climate models can heat reliably in many regions, but output drops as temperatures fall. Plan for backup heat in severe cold or outages, such as electric strips, a dual fuel furnace, or keeping a boiler as secondary heat. Right sizing matters: oversizing small rooms leads to short cycling, humidity swings, and wear.
Multi zone systems offer one outdoor unit and flexibility, but that can be a single point of failure. Multiple single zone units improve resilience and can be easier to size correctly. Do not choose on lowest price or labels alone. The refrigerant transition is ongoing, but R 410A equipment in service remains legal and supportable.
- Already have tight, well designed ducts: a central heat pump or furnace with AC can be simpler and cost effective.
- Very cold climate beyond a model's design temperature: consider dual fuel or plan explicit electric backup heat.
- Many closed rooms needing balanced airflow and dehumidification: a small ducted system or whole house dehumidifier can outperform wall cassettes.
How Mini Split ACs and Heat Pump Mini Splits Work (Simple, Practical Explanation)
A mini split has two main pieces connected by small refrigerant lines: the indoor head, which contains the coil, blower, filter, and controls, and the outdoor condenser and compressor assembly. Think of the refrigerant as a conveyor belt that moves heat from one side to the other.
Cooling mode follows the standard refrigeration cycle. Inside, the coil acts as an evaporator. Cold refrigerant enters the indoor coil, absorbs room heat and moisture, then travels to the outdoor unit as a warm vapor. The compressor raises its pressure and temperature. The outdoor coil then condenses that vapor back to liquid while releasing heat to the outside air. A metering device drops the refrigerant's pressure so it returns cold to the indoor coil, and the loop repeats.
Heating mode uses a reversing valve. This four way valve redirects refrigerant so the outdoor coil becomes the evaporator that pulls heat from outside air, and the indoor coil becomes the condenser that releases that heat inside. The hardware is the same, the flow direction changes to move heat in the opposite direction.
Most modern mini splits use inverter driven compressors. Instead of simple on and off, the compressor speed modulates to match the exact load. That steady output keeps indoor temperatures and humidity stable, reduces swings, and improves comfort in both seasons. In the field we see rooms hold a tight temperature band while the system runs quietly at low speed. Modulation also supports better dehumidification in cooling and gentler, consistent warmth in heating, with less wear from start stop cycling.

Site Assessment: Where to Place Indoor Heads, Cassettes and the Outdoor Unit
Start with airflow. Aim each indoor head across the longest clear path so air can mix evenly, and avoid direct sun, ovens, tall furniture, or door swings. Think of airflow like a flashlight beam: obstructions shorten the throw and create hot and cold spots. Choose the unit style room by room: wall mounts high on a long wall, floor consoles for knee walls or low ceilings, ceiling cassettes centered for balanced throw, and short-ducted units where you want discreet supply to one or two small rooms. For bedrooms, we target low to mid 20s dB(A) on low fan. In our experience at Budget Heating (BudgetHeating.com), a quiet head placed well beats oversizing every time.
- Condensate: plan a continuous downhill slope to a safe discharge, keep it away from the foundation, add traps where required, and test with water before closing walls.
- Structural: locate studs and verify no hidden electrical, plumbing, or gas lines before drilling. Seal all penetrations.
- Mounting: set indoor wall brackets level; outdoors, use a level pad or wall brackets with vibration isolation.
- Outdoor unit: allow generous intake and discharge clearance, keep away from bedrooms and neighbor windows, elevate above snow and debris, and leave space for service access.

Common Problems After a Retrofit and How to Troubleshoot Them
After a retrofit we often see a few predictable hiccups. Start with simple diagnostics: confirm filters are clean, vents open, and thermostat modes are correct. For humidity, inverter systems work best when they run steadily at low output, so use the dedicated dehumidify mode in muggy weather instead of quick on/off cycling.
- Electrical: if breakers trip again, any burning smell, visible arcing, or melted insulation, stop and call a professional.
- Water: recurring condensate backups, interior leaks, or staining need immediate professional attention.
- Refrigerant or pressure: hissing, oily fittings, ice on coils or lines, or weak cooling point to a leak or pressure fault. Proper checks require gauges and nitrogen, which only a certified tech should perform.
Planning Your Retrofit: Manual J Sizing, Zoning and Choosing Capacity for 2026
Start with a clear plan. A successful retrofit rests on proper load calculations. Perform a room by room Manual J (or equivalent) for each zone. Think of it like tailoring a suit to each room, not buying one size fits all.
- Define problems and goals: list the rooms or zones you want to address and the comfort outcomes you expect.
- Right size each room: determine BTU needs from square footage, insulation levels, window area and orientation, and your local climate. Avoid rules of thumb.
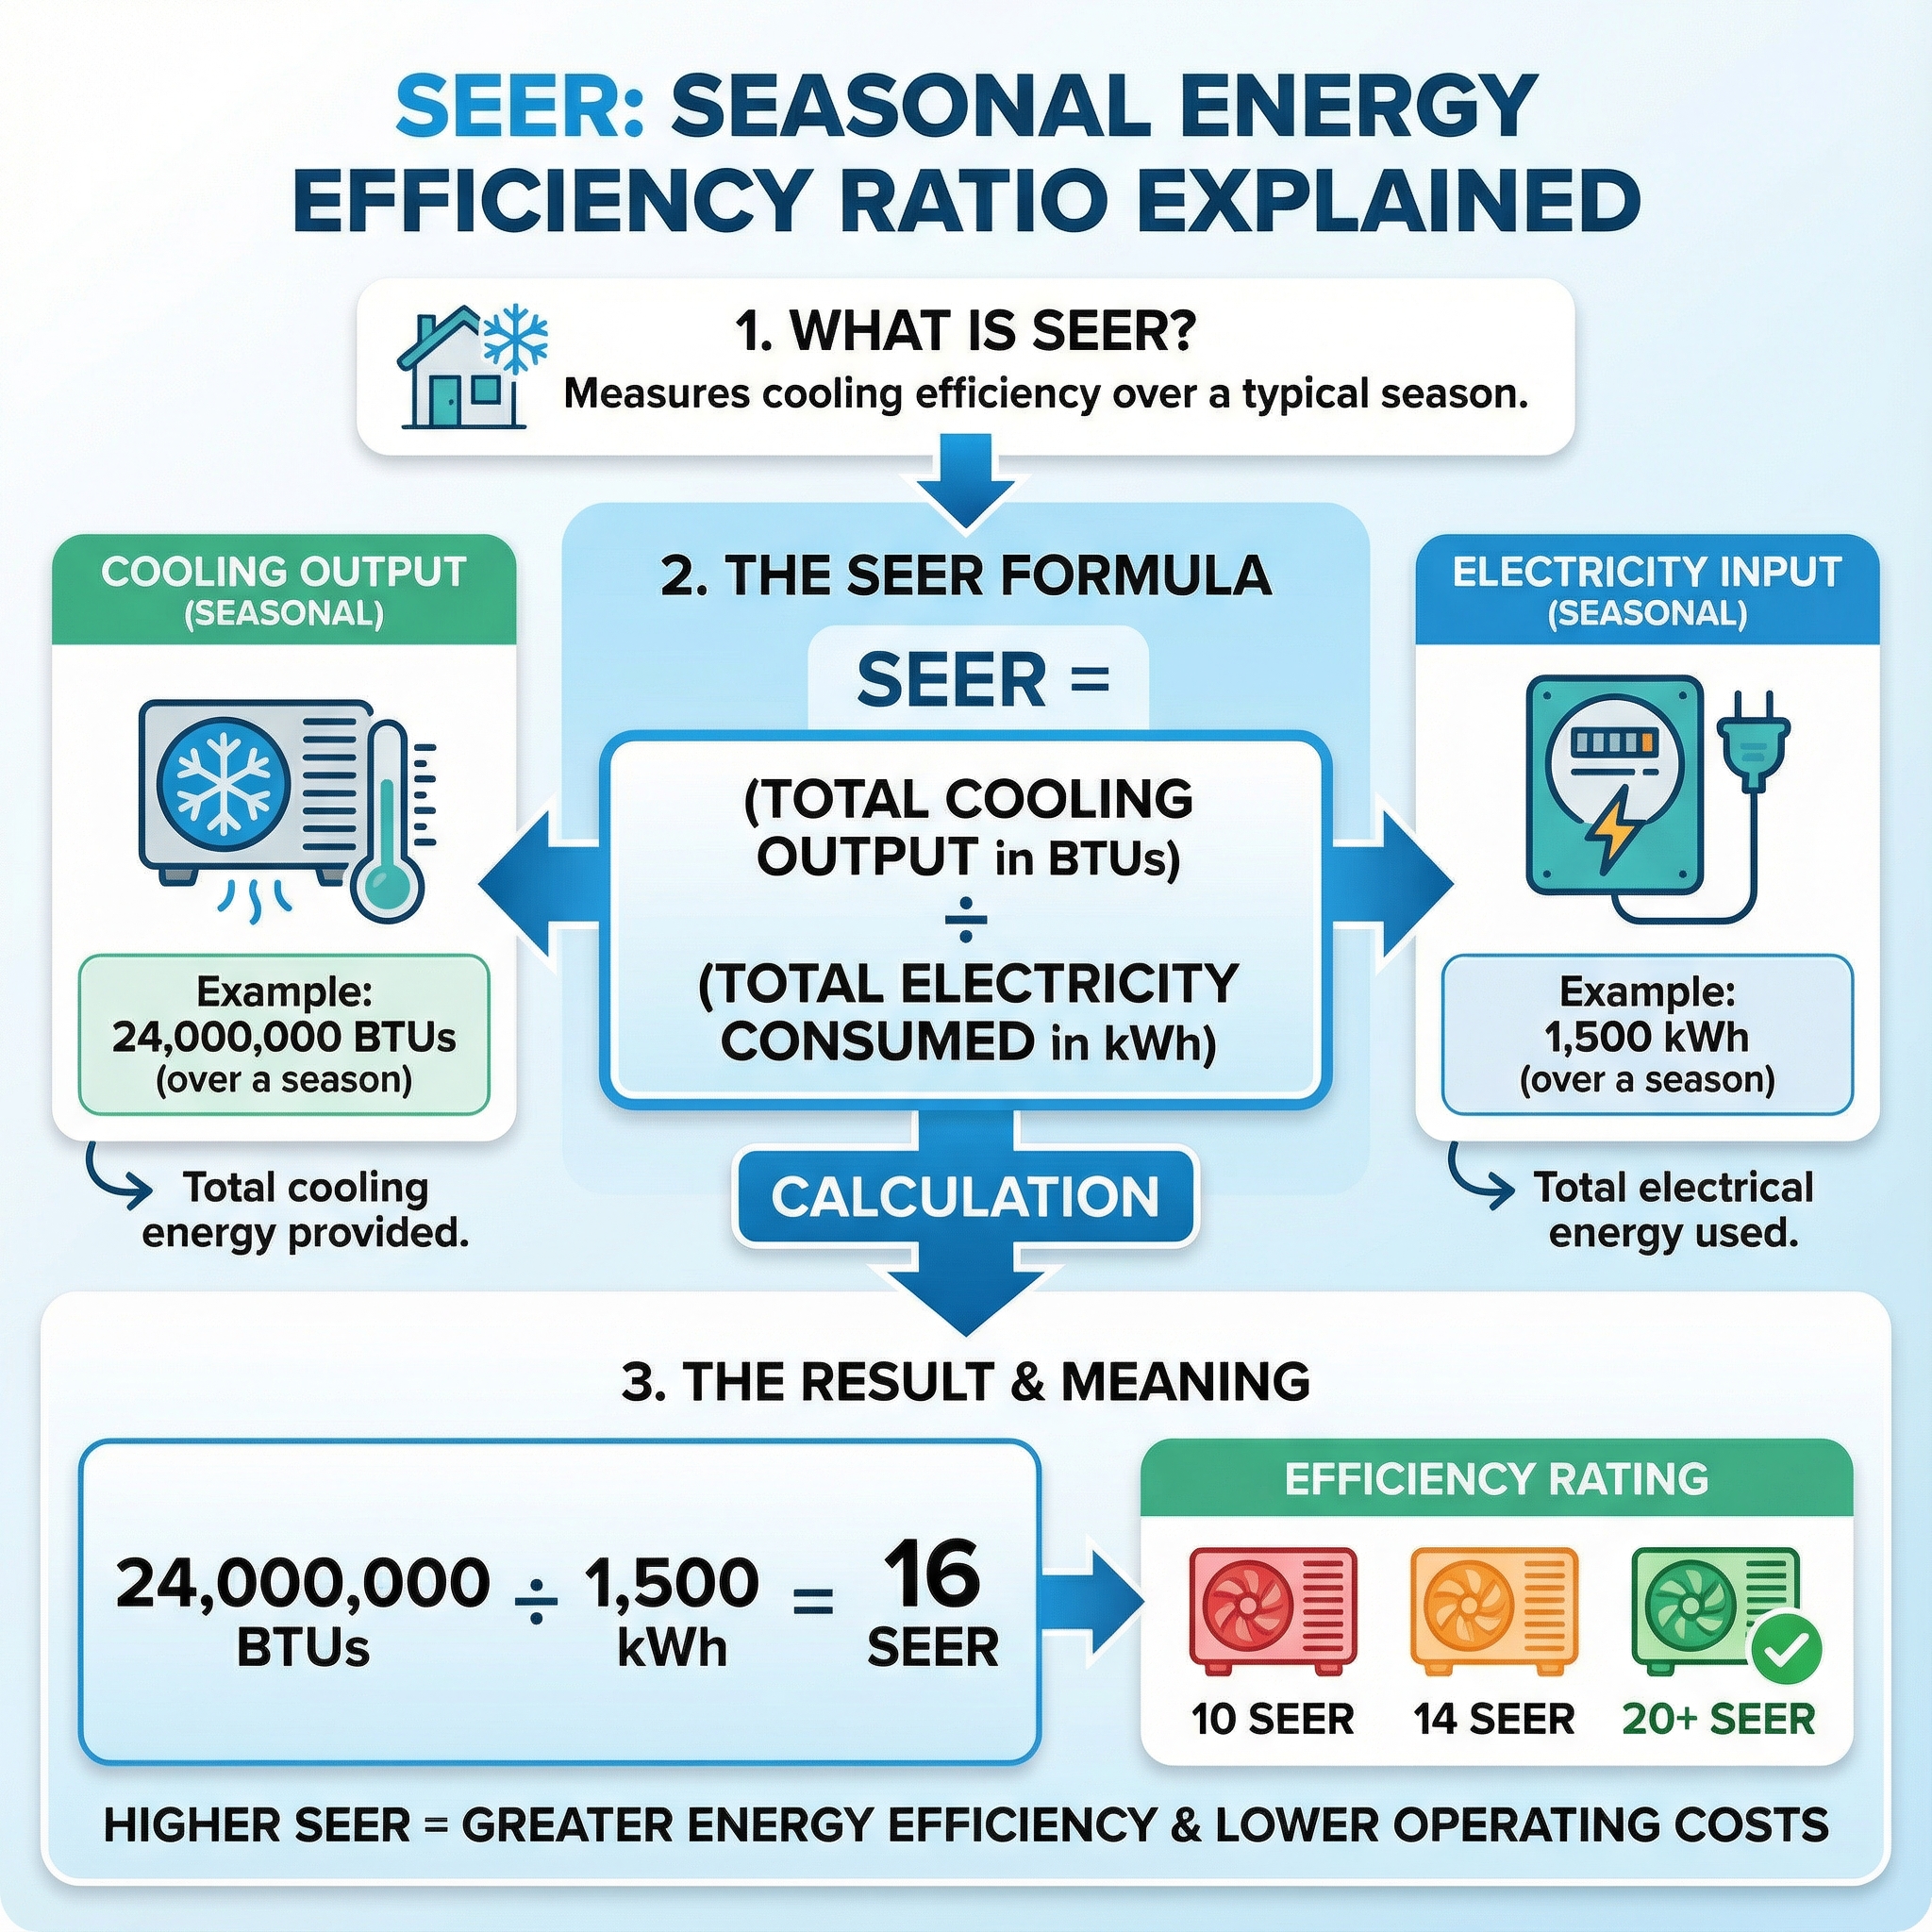
- Set efficiency targets: choose SEER2 and HSPF2 levels that match whether the system will be primary heat or serve an occasional use room.
Correct sizing is critical. Oversized equipment short cycles, undersized systems struggle and feel drafty. In our experience at Budget Heating (BudgetHeating.com), accurate Manual J results guide both capacity and equipment selection.
Choose a zoning strategy early. Decide between single zone and multi zone based on layout, desired redundancy, and comfort needs. One outdoor unit can serve multiple indoor heads (wall, floor, or ceiling cassette) for room by room control. For any multi head setup, confirm indoor unit compatibility with the outdoor unit and verify wiring and communication requirements before purchasing.
Electrical, Line Set Routing and Refrigerant Best Practices for Retrofits
For retrofits, power and refrigerant work are safety critical. We verify electrical readiness first: confirm panel and breaker capacity, plan a dedicated circuit sized to the manufacturer, and include an outdoor disconnect per code. High voltage tasks like circuit runs, breaker sizing, grounding, and final terminations belong to a licensed electrician. Always de energize before working near electrical components, since improper wiring can cause shock, fire, or equipment damage.
Line sets and controls should be routed exactly as specified. Use pre flared or pre charged lines, insulate and protect them, and seal wall penetrations, along with communication cables. Refrigerant handling, evacuation, deep vacuum, charging, and leak testing must be performed by an EPA certified HVAC technician. Never vent refrigerant, and keep moisture out to protect the compressor and stay compliant. Commissioning includes verifying deep vacuum with a micron gauge, confirming charge by superheat or subcooling or a weighed in method, and documenting results for warranty. With refrigerants shifting from R 410A to lower GWP options like R 32 and R 454B, choose equipment that aligns with policy and future serviceability. Using licensed pros helps meet tightening leak rate rules and preserves warranties.
Step by Step Retrofit Installation Checklist: Permits, Tools and Post Startup Safety
- Planning and permits: select locations that meet manufacturer clearances and local code, and secure permits plus HOA or architectural approvals before work starts.
- Permit checklist and 2026 code updates: verify which permits are required and that the installer will pull them. Ask the authority having jurisdiction if 2026 code-cycle changes will apply to your project and ensure the design and inspection criteria match that cycle.
- Contractor questions: confirm load inputs used to size zones, SEER2 and HSPF2 ratings, low-temperature performance, indoor sound levels, refrigerant type, and any electrical panel upgrade needs.
- Homeowner planning: map line-set length and wall penetrations, plan concealment with line-hide or conduit, and route condensate to daylight, never into the building envelope.
- Safety near combustion equipment: any decommissioning or fuel-line work belongs with licensed pros to maintain code and safety.
- Post-startup checks: verify indoor units deliver conditioned air, condensate drains freely, and controls are configured.
- Post-install basics: learn filter cleaning, keep outdoor clearance, confirm condensate flow, and record the warranty or service contact.
- Routine maintenance every 1-3 months: clean or replace filters, wipe grilles, keep the outdoor unit clear, and never pressure-wash coils.
- Seasonal tasks: flush and confirm clear condensate drains, re-seal wall penetrations, and inspect line-set insulation for UV damage.
- Annual professional service: tighten electrical connections, verify currents, test defrost, and confirm refrigerant charge. Documented service is often required for warranty.
Typical Costs, Payback and 2026 Rebates, Tax Credits and Incentives
Installed costs vary widely by region and scope, from the lower thousands for simple single zone retrofits to the mid or high thousands for complex multi zone projects. Budgeting should account for equipment selection, number of zones, line set length and routing, electrical panel work and accessories. Incentives can materially shift what makes sense to install. Exact pricing and savings ranges are not available here, regional quotes are required for precise numbers.
Since 2023, efficiency ratings use SEER2, EER2 and HSPF2. SEER2 reflects seasonal cooling efficiency, EER2 reflects peak condition efficiency, and HSPF2 covers seasonal heating performance. In 2026, whole home systems commonly land at SEER2 20 or higher with strong HSPF2, while occasional use room units are often SEER2 16 to 18. Upgrading from older SEER about 10 equipment to mid or high teens or 20 plus SEER2 mini splits can cut cooling energy by roughly 30 to 50 percent. Stepping to SEER2 20 plus often pays back over the life of a primary system, but seldom used spaces may not justify the top tier.
Rebates and credits are in flux. Confirm 2026 federal, state and utility programs and any tied requirements. Past federal credits, for example in 2025, required higher efficiencies such as 17 SEER2 and 12 EER2. Also verify regulatory baselines, for example many split heat pumps require about SEER2 14.3 and HSPF2 7.5, and ensure equipment uses modern refrigerants to stay serviceable and eligible.
Choosing, Installing and Maintaining the Right Mini Split for Your Home: Next Steps
Modern mini splits deliver high seasonal efficiency, quiet comfort, and reversible heating and cooling, and they eliminate duct losses when they are selected and installed correctly. Long term results depend on right sizing and placement, cold climate models where winters demand it, and documented professional commissioning. Your part is simple, clean filters regularly and keep the outdoor unit clear. Improve insulation and air sealing to shrink the load, which lets you choose smaller, quieter, more efficient equipment. Next steps: get a room by room load calculation, gather 2 to 3 bids from certified installers, confirm permits and rebates, select properly rated equipment, then insist on commissioning verification.
If this feels like a lot, we guide homeowners through it every day. With 30+ years in HVAC and 200,000+ orders fulfilled, our U.S. team matches the right system with wholesale pricing made accessible.
- Get a Custom Quote
- Talk to Our Team, call our U.S. phone support for straight answers
- Shop Mini Split Systems
- Ask about financing with Affirm and full manufacturer warranties