Is a 3-Room Mini Split Right for Your Home Layout?
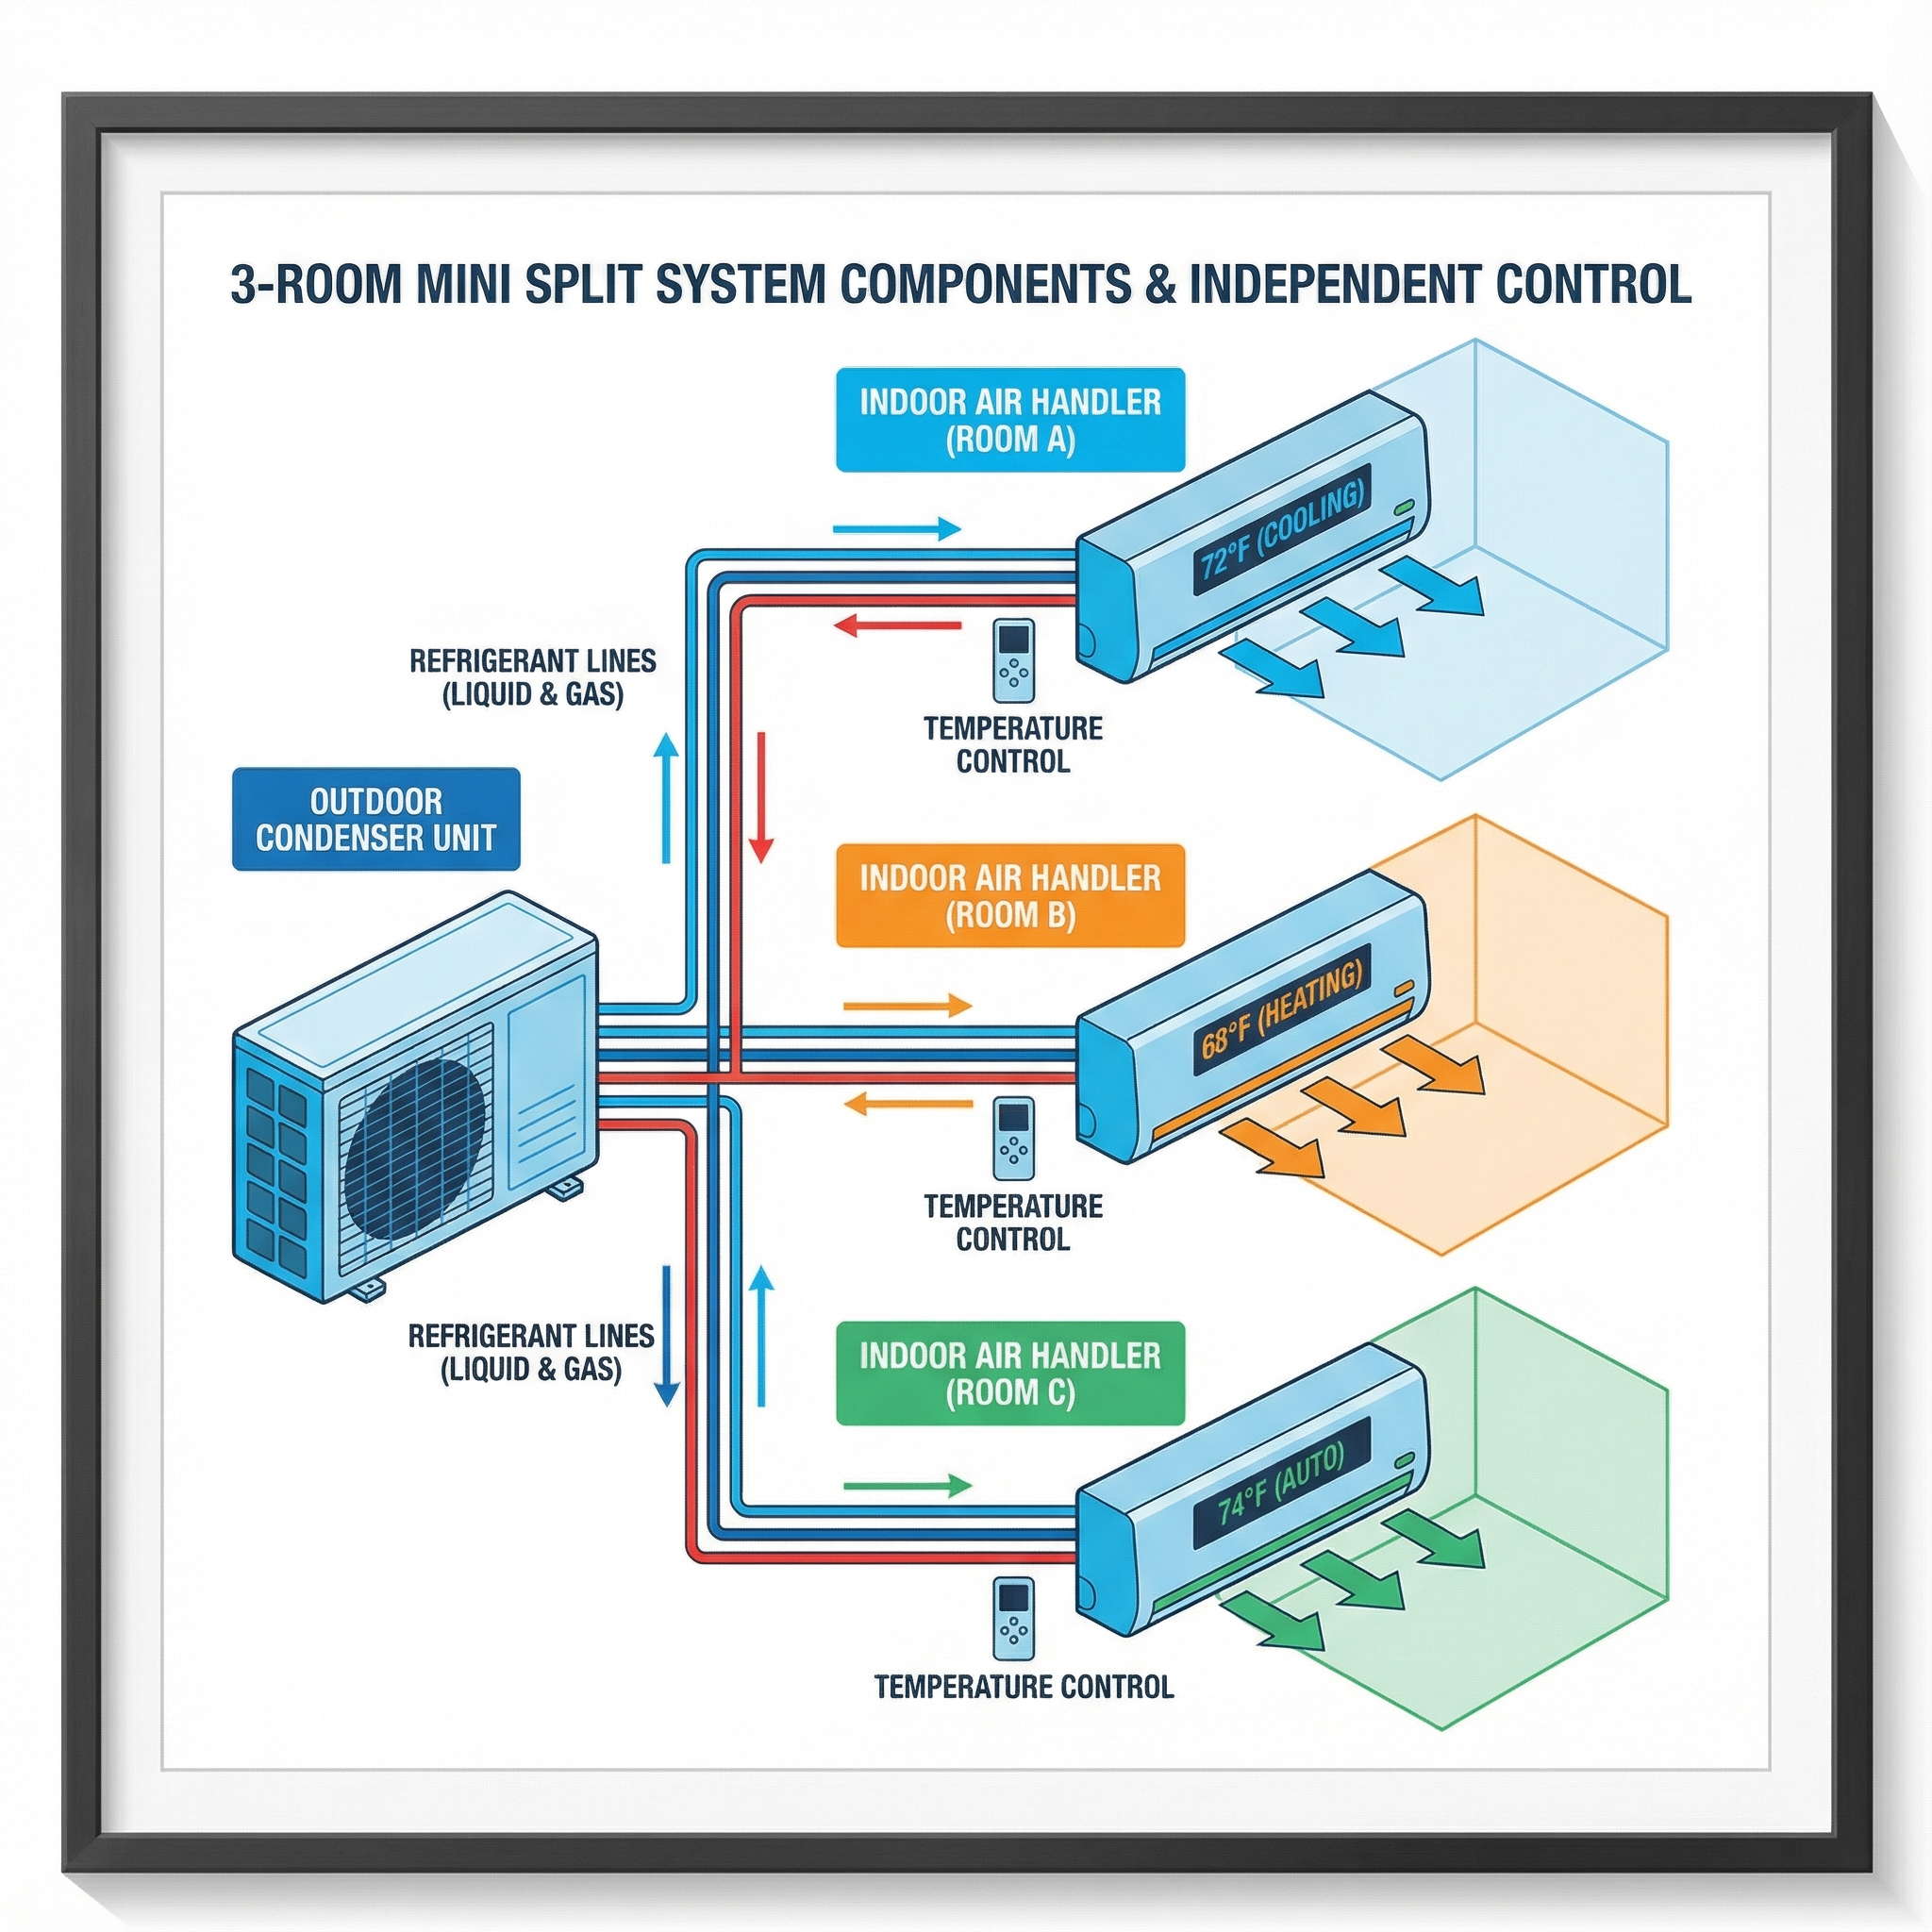
A multi-zone 3-room mini split links one outdoor unit to three indoor heads so each of three spaces can be controlled independently. A 3-zone setup pairs a single outdoor condenser with three indoor air handlers to deliver room-by-room comfort without ducts; this guide explains where they shine and what to check before buying.
Zoning means each room gets its own thermostat-like control, like giving every space its own light switch, so you condition only the areas you use. To decide, consider room-by-room needs, existing ductwork, and electrical capacity.
What Is a 3 Room (Multi Zone) Mini Split and How It Fits Your Home?
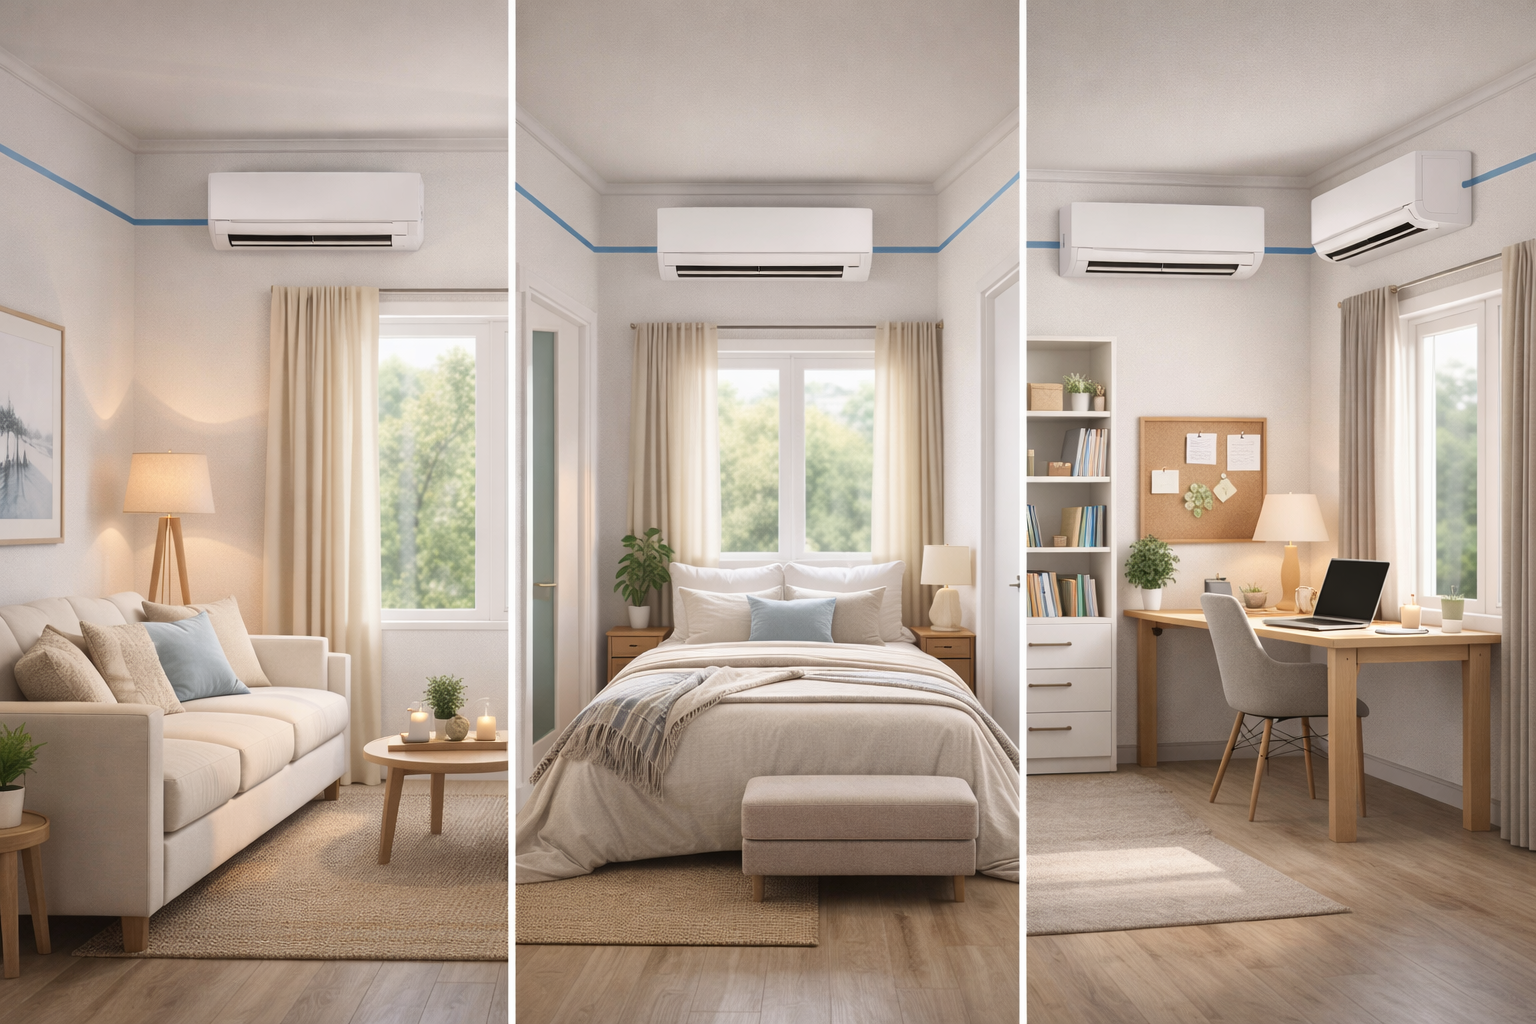
In a 3 room setup, one outdoor condenser has three refrigerant ports that feed three indoor air handlers. We often mix indoor heads: wall mounted for bedrooms or offices, ceiling cassettes to keep walls clear in living areas, and concealed duct heads tucked in a soffit to serve awkward layouts. Ductless delivery avoids the losses of long or leaky ducts, improving efficiency. Many systems add Wi Fi control and per zone schedules, so comfort works like a dimmer switch. Most multi zone units are heat pumps, providing cooling and heating year round; if using as primary heat, confirm the model's low ambient rating.
When a 3 Room Mini Split Makes Sense: Typical Use Cases
A 3 zone mini split fits when you want targeted comfort in up to three areas with a noninvasive installation. You get zoned comfort, ductless efficiency, precise control, and often lower operating costs than aging central systems. It is a flexible alternative to extending ducts, usually cheaper and faster for tricky layouts.
- Homes without existing ductwork.
- Finished basements, additions, or garage conversions.
- Split levels with hot and cold rooms.
- Primary bedroom, kids rooms, or a home office.
- Retrofits where specific spaces need conditioning.
Independent room control cuts waste by avoiding conditioning unused spaces, like putting a dimmer on each room instead of one switch. In our experience at Budget Heating (BudgetHeating.com), mixed use households report fewer comfort complaints and steadier bills when each zone runs only as needed.
Sizing & Capacity: Calculating BTUs for Three Rooms
Matching BTU capacity to each room is the foundation of a comfortable three-zone system. In practice, we start with a Manual J room-by-room load calculation. A simplified method can screen options, but final selection should follow Manual J and Manual S. Consider room size, insulation, window area and orientation, ceiling height, air leakage, and internal gains from people and appliances. Think of each room as its own sink, the faucet should deliver just the right flow.
Adjust for climate. In hot or humid regions, upsize roughly 10 to 20 percent to cover peak heat and moisture. Where winters are long and cold, prioritize heating output and choose cold-climate models that hold capacity at low temperatures.
For a three-room multi-zone, size each indoor head to its room to prevent oversizing or undersizing. Then confirm the outdoor condenser's combined capacity and modulation range support the three attached heads without chronic short cycling. Check that it can ramp down when a single room calls and ramp up when all three call. Inverter, variable-speed compressors excel at part load, delivering steadier temperatures and better comfort across zones.
Installation: DIY vs Hiring a Pro (Can I Install a Mini Split Myself?)
In our experience, a hybrid approach works best. Homeowners can set pads, hang brackets, drill and seal wall sleeves, clear work areas and handle cosmetic touchups. Leave refrigerant and final electrical connections to a licensed, EPA certified contractor. That protects warranties, satisfies permits and HOA rules, and ensures proper commissioning.
- Pro only tasks: brazing or flaring, nitrogen pressure testing, deep vacuum to micron spec, charging or recovery, and a full commissioning report.
- What to ask a contractor: room by room Manual J, Manual S equipment selection, line length and charge calculations, nitrogen test, deep vacuum, documented startup data.
Safety and upkeep: power off before cleaning, never handle refrigerant, avoid pressure washers on coils, use ladder safety. Clean indoor filters every 4-8 weeks, keep 2-3 ft clear around heads, clear debris at the condenser, gently rinse coils, verify condensate drains flow. Pumps or repeat clogs need service. Check line set insulation, reseal wall penetrations, watch for oil stains. In winter, place and keep the condenser above the snow line and allow defrost cycles. Use stable setpoints and avoid rapid mode switching, replace remote batteries as needed.
Common myths: not single room only, modern cold climate models do heat well, installation is typically modest, and they are quiet when sized and placed correctly. They are not zero maintenance.
When a mini split is not ideal: very leaky homes without envelope upgrades, consider weatherization or a ducted system. Homes with good existing ductwork, a central heat pump or furnace may be better. Renters or strict HOAs, consider portable or window options.
Key Layout Considerations: Room Adjacency, Sight Lines, and Open vs. Closed Spaces
In practice, we let the floor plan drive head placement. Open areas can use one larger head, closed rooms usually need their own. Place heads high on interior walls with clear sight lines. Mind throw distance and avoid curtains or shelving. Envelope quality matters, since weak insulation or leaky windows raise the load and may force additional or differently placed heads.
- Two bedrooms plus office: with closed doors, plan three small heads. If bedrooms are adjacent and doors stay open, one head aimed through both doorways can work in a tight, well sealed envelope.
- Basement, kitchen, and living room: the basement needs its own head. An open kitchen living area can use one correctly sized head placed to see both zones.
- Small addition: a common three head layout is living area, bedroom wing, and a dedicated head for the addition, especially for sunrooms or west-facing rooms.
Flag high gain or high use rooms, like home offices, for extra capacity or dedicated coverage.
Placement Best Practices: Indoor Heads and Outdoor Unit Location
With indoor heads sited as discussed, focus on the outdoor condenser. In our field installs, outdoor location is the difference between silky quiet operation and a unit that struggles.
- Airflow and clearance: follow manufacturer recommended clearances, typically at least 12 to 24 in. on the sides and several feet above if there are overhangs or decks.
- Avoid recirculation and heat wash: do not place the unit where its hot discharge can be pulled back in or blown toward windows and doors. Steer clear of tight corners and tall fences.
- Stable base and noise: set the condenser on a level pad or wall bracket. Add rubber isolation pads if bedrooms or neighbors are close.
- Service access: leave room to open panels, clean coils, and replace the unit later without tearing out landscaping or siding.
Think of the condenser as needing to breathe freely and stay quiet, and choose a spot that allows both.
Line Set Lengths, Refrigerant Piping, and Electrical Requirements
For a solid 3 zone install, keep line sets short and direct, since long runs raise difficulty and reduce efficiency. Confirm the maker's max line length and elevation difference; tall multi story routes often hit limits, and exceeding them can require a redesign or special parts. Electrically, check panel capacity, a dedicated 240V circuit and disconnect, correct breaker size, code compliant wiring, and surge protection. Many jobs need a new breaker and conduit.
Costs, ROI, Brands & Reliability: What to Expect and Which Makers to Trust
Upfront cost is higher than a simple AC swap, usually above a single-room replacement yet below adding ductwork. With targeted zoning, many homes see 25 to 50 percent lower energy use, and incentives can offset costs, though many require SEER2/HSPF2 ratings and qualified installers. Choose brands with solid warranties, service and parts, and ask about regional reliability and DIY-friendly lines. Expect visible indoor heads, routing limits, and pro refrigerant and electrical work; in our experience at Budget Heating (BudgetHeating.com), that planning keeps lifetime costs predictable and avoids downtime.
Checklist & Next Steps: How to Move Forward With a 3 Room Mini Split
A 3 room mini split fits 2-3 rooms or ductless retrofits, not big open zones or where line runs or outdoor placement will not work. If the choice feels complex, a simple plan now avoids surprises.
- Map the three zones with square footage, height, sun and envelope.
- Plan line sets, drains and electrical, and site the outdoor unit with service clearance and access.
- Choose indoor unit types, confirm a 3 head condenser, and check HOA and incentives.
Next: use a sizing tool, get 2-3 licensed quotes with Manual J/S, compare SEER2/HSPF2 to DOE minimums, and verify permits.
- Get a Custom Quote
- Talk to our U.S.-based team by phone
- Shop Mini Split Systems
 Cooling
 Heating
 Learning Center
 Money Saving Tips
 Product and Brands Insights
 Buying Guides
 State by State
 HVAC Systems