HVAC Retrofit Guide for Property Owners: What to Expect
Upgrading or retrofitting HVAC improves comfort, lowers energy bills, enhances indoor air quality, and extends equipment life when done thoughtfully. This guide is for residential and small to mid size commercial property owners, landlords, property managers, and facility decision makers who are considering an HVAC retrofit and want a clear roadmap.
An HVAC retrofit means modernizing an existing system rather than starting from scratch. It can be as light as controls and airflow fixes, or as comprehensive as replacing major equipment and reworking ductwork. Core objectives are comfort and even temperatures, energy efficiency, healthy IAQ, and resilience during extreme weather and utility outages.
Here is what the guide covers: assessment of your current system, retrofit options, equipment and controls, ductwork and IAQ strategies, costs and incentives, selecting and contracting, permitting, commissioning, and post retrofit maintenance. Expect plain language explanations, typical decision points, and what a well run project looks like from first walkthrough to final verification.
Why Retrofit? Benefits, Typical Savings and ROI to Expect
Targeted HVAC retrofits cut waste and stabilize comfort. In our projects, well planned controls and equipment upgrades routinely trim cooling and ventilation energy in the tens of percent, often 20 to 50 percent depending on baseline and climate. A DOE school example reported about 27 percent annual energy savings and roughly 18,900 dollars per year from controls and retro-commissioning.
Beyond energy, replacing aging or poorly controlled equipment reduces breakdowns, emergency repairs, and extends useful life. Strategic upgrades and retro-commissioning deliver double digit reductions that translate into meaningful annual cost savings. ROI follows the math: combine verified savings, local utility rates, run hours, and available incentives. Payback is reached when annual savings offset capital and commissioning costs, with risk lowered thanks to improved reliability.

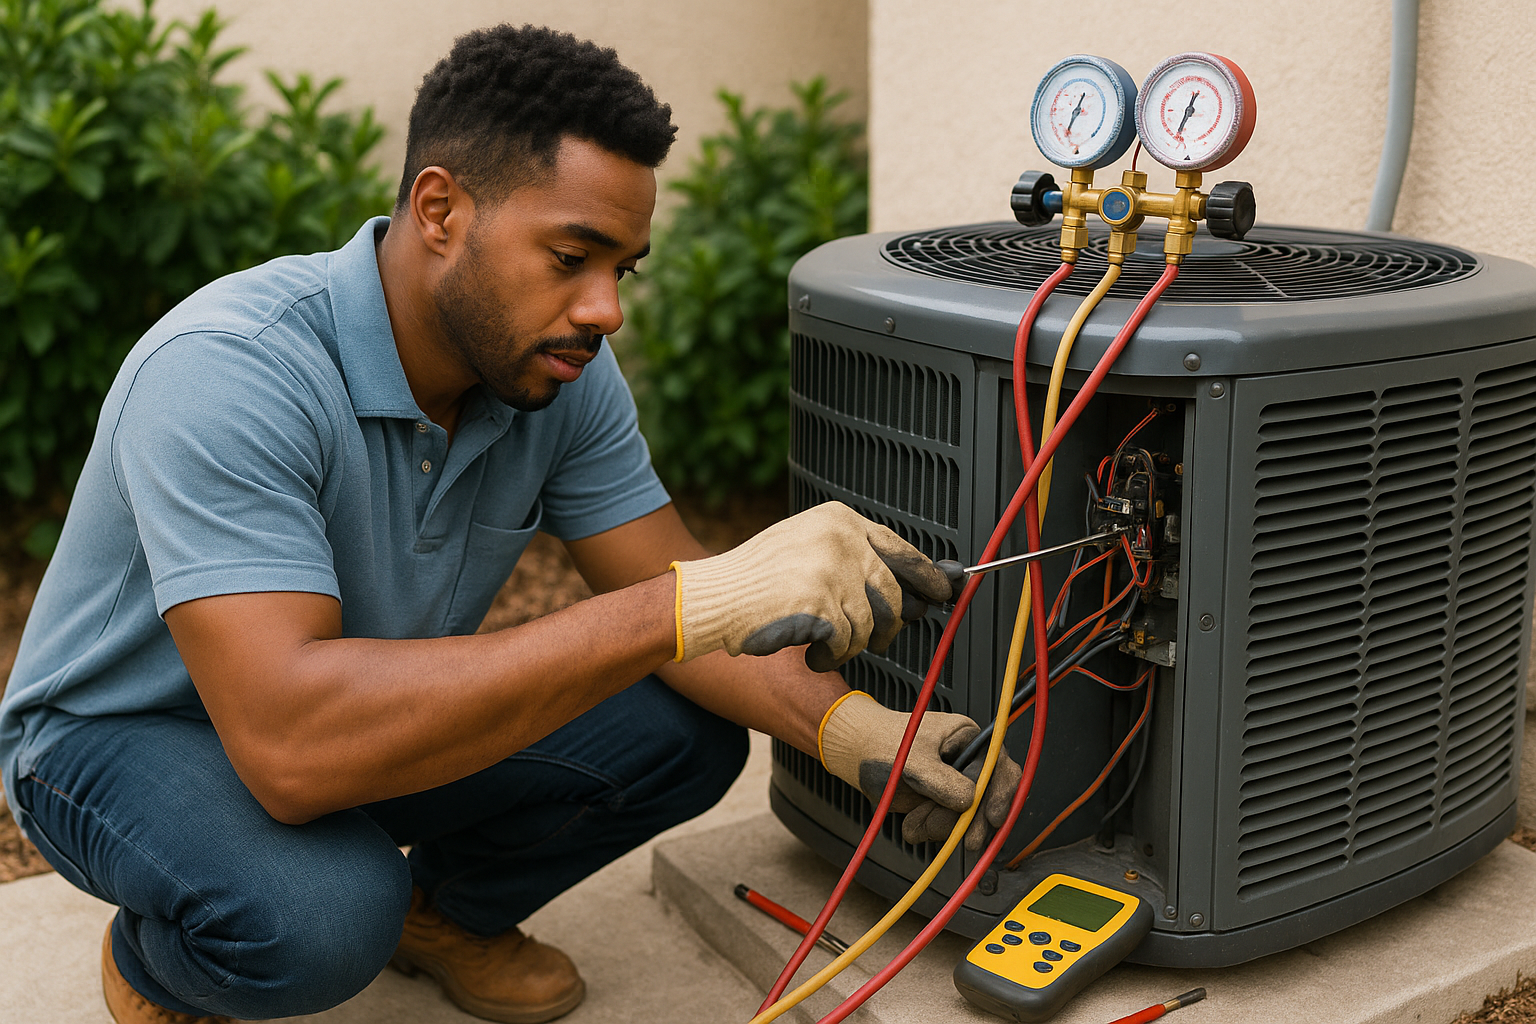
Step 1 - Start with an Energy Audit, Load Calculation and Baseline Assessment
Equipment choices should be driven by measured data, not guesses. We start with a professional energy audit that establishes the home and climate baseline. In humid regions, the design prioritizes dehumidification and long runtimes; in colder regions, cold-climate heat pump capability and capacity at low temps matter.
- Measure insulation levels, window specs, ceiling heights.
- Inspect duct condition and verify airflow.
- Document local climate data.
From those inputs, Manual J calculates room by room heating and cooling loads so new equipment is sized correctly. Manual D then sizes and lays out the duct system to deliver those loads with proper airflow.
This yields right-sizing, equipment that matches the actual load. Oversizing causes short cycling, humidity issues, and premature wear. Right-sized systems run steadier and feel more comfortable.

Step 2 - Evaluate Retrofit Options: Repair, Replace or Right-size (and How to Phase Work)
Before swapping equipment, optimize performance: balance supply and return air, sequester losses with air sealing and insulation, seal ducts, correct distribution issues, and optimize controls and setpoints. It is like fixing holes in a bucket before buying a bigger bucket. We often see these steps recover 10 to 25 percent in usable capacity and comfort.
Phase work to limit disruption. Start with no or low cost actions, then targeted repairs, then partial upgrades, and only then full replacements or right-sizing from load calculations. Schedule noisy or invasive tasks off-hours, and communicate plans to occupants.
Lock in results with an operations handoff: document setpoints, schedules, and control strategies, train facility staff, and verify after seasonal changeover. This preserves value and keeps performance consistent long after the project ends.
Common Pitfalls and Tradeoffs: When a Retrofit May Not Be the Best Choice
We see retrofits miss the mark when underlying constraints are ignored. Swapping equipment without fixing leaky or undersized ductwork undermines efficiency and comfort. Matching the new unit to the old tonnage, instead of using a proper load calculation, risks repeating past mistakes. Bigger is not better, oversizing drives short-cycling and poor humidity control. Treating the job as an unverified swap, with no commissioning and performance checks, rarely delivers the savings people expect. Waiting for a failure forces rushed, costly choices.
There are cases where a different path makes more sense:
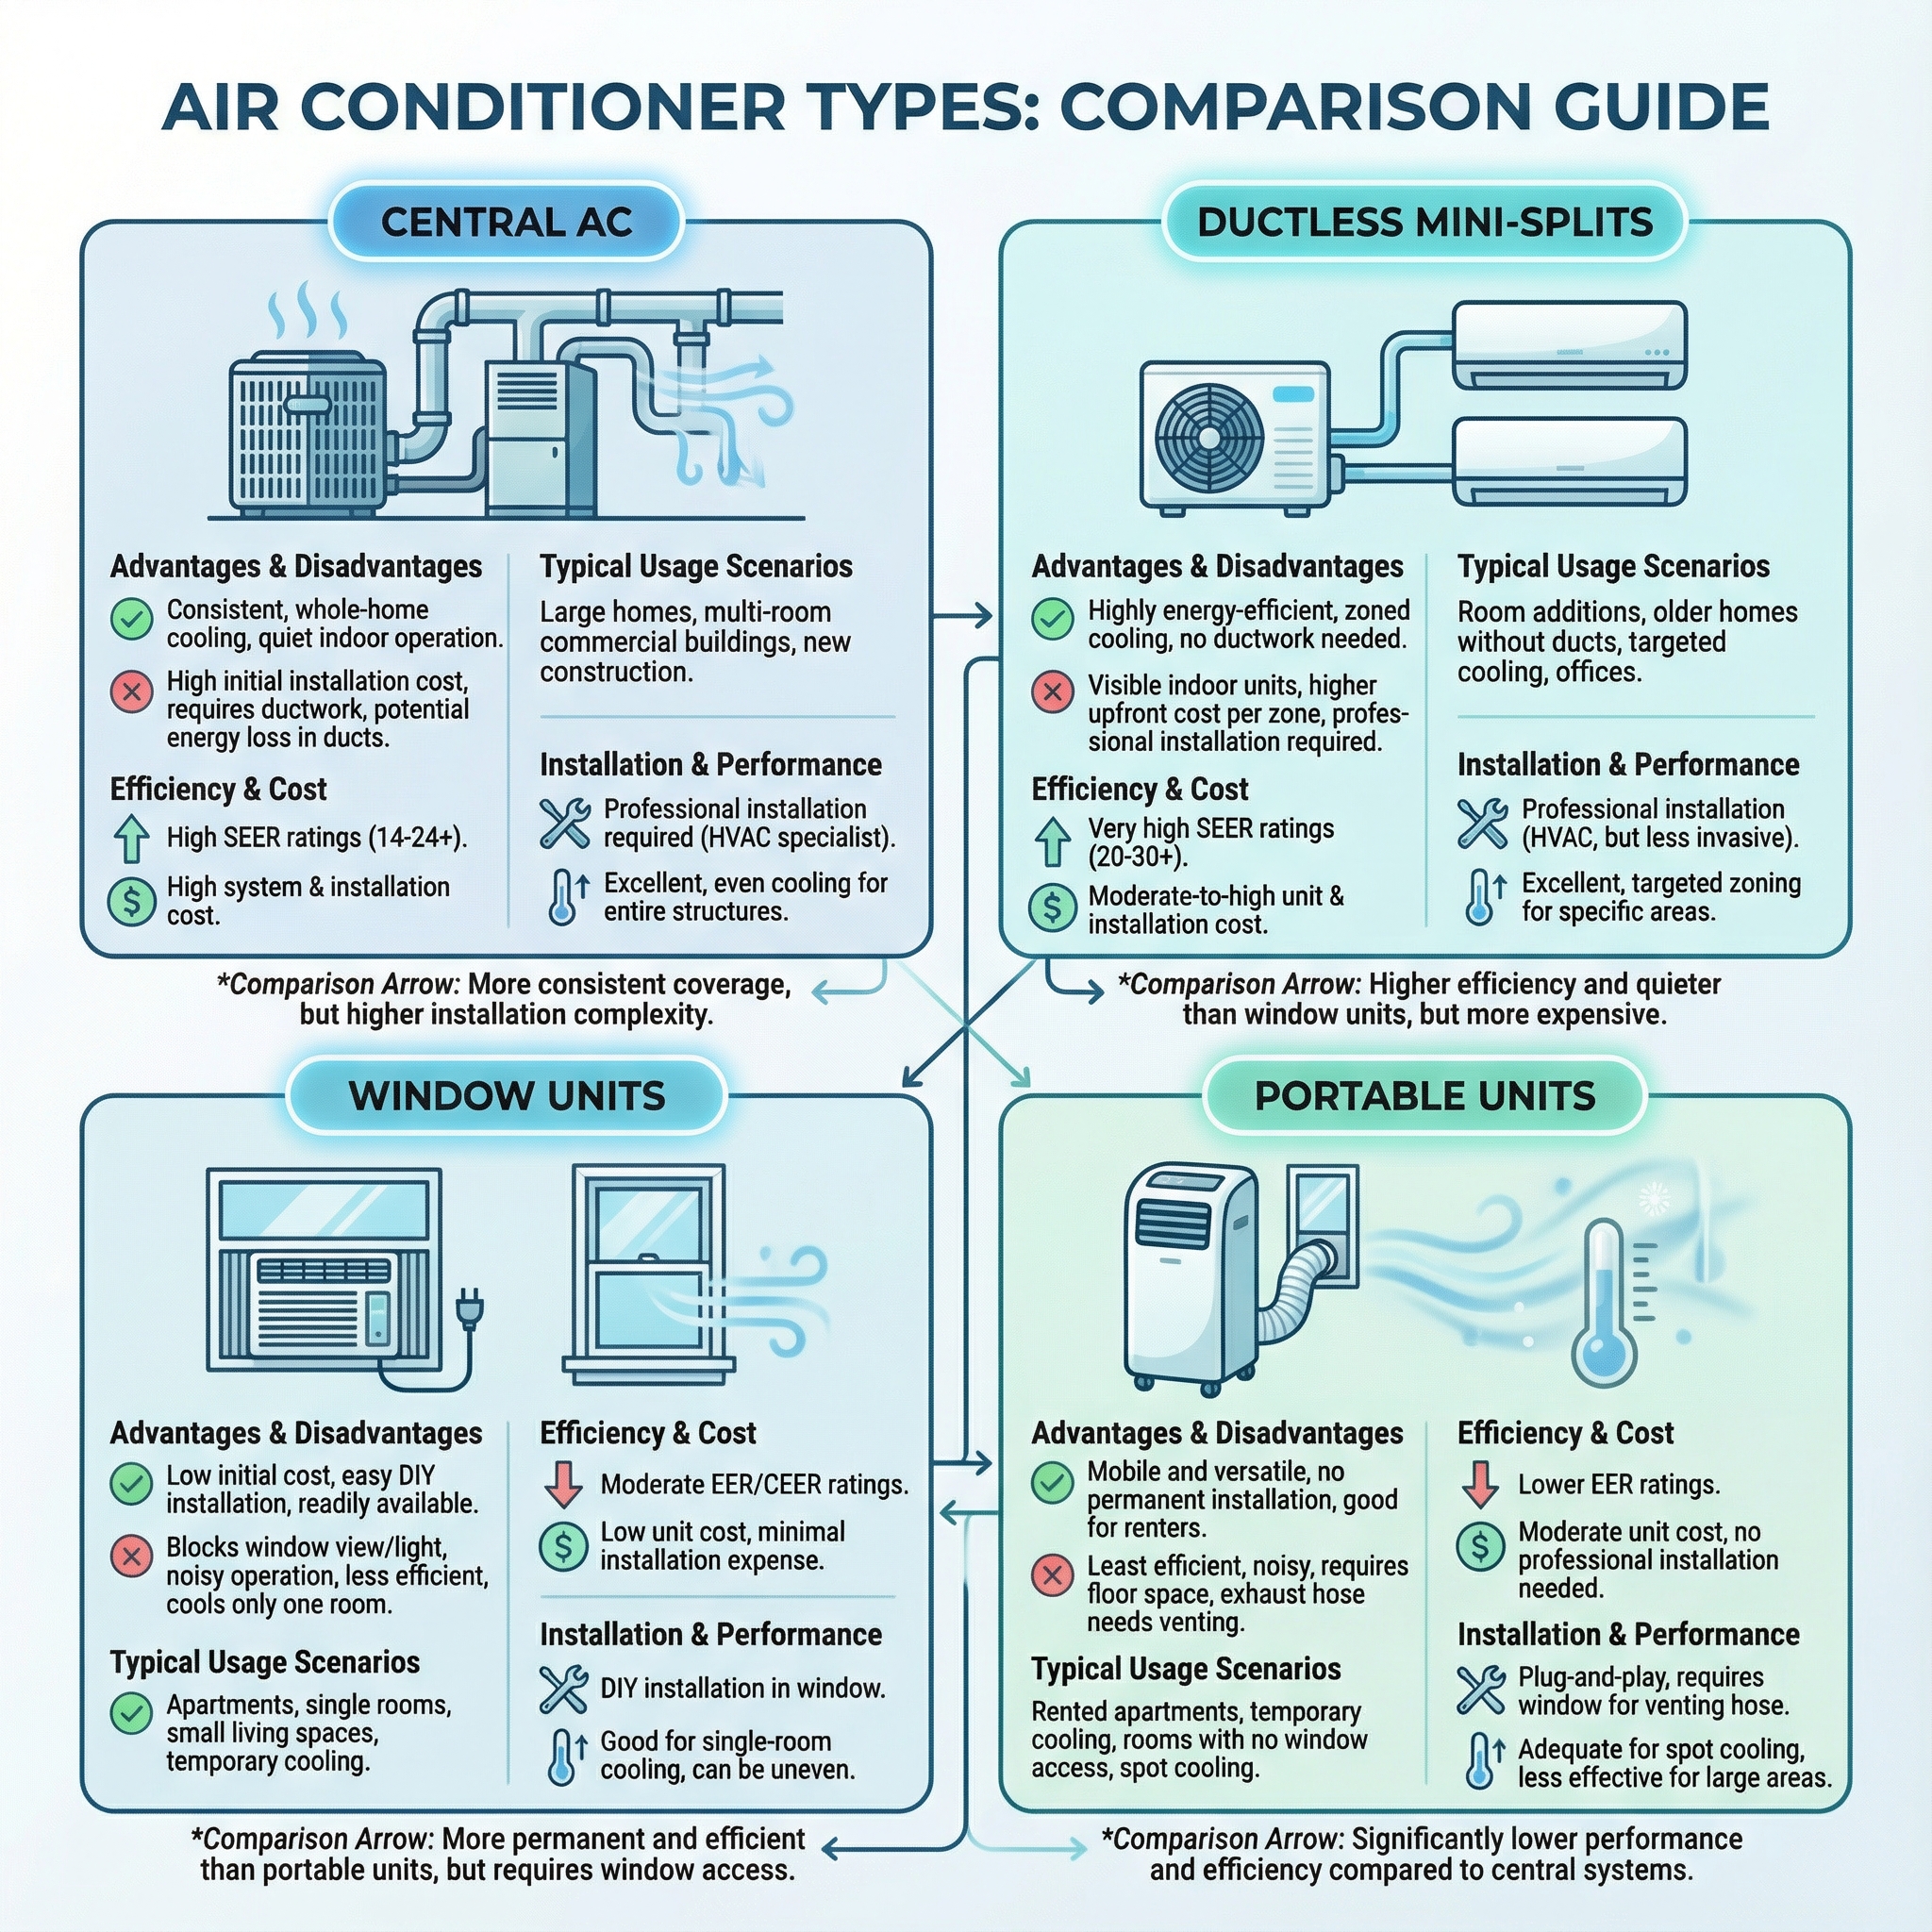
- Severely degraded or inaccessible ducts: favor localized replacements or ductless mini-splits instead of a full central rebuild.
- Very cold climates: choose true cold-climate heat pumps with backup heat, or select a gas furnace when conditions make that more practical.
- Very tight budgets: prioritize air sealing, insulation, and duct repairs first, which often produce the fastest near-term gains.
A clear-eyed plan, not a like-for-like swap, prevents regret and aligns comfort, reliability, and cost.
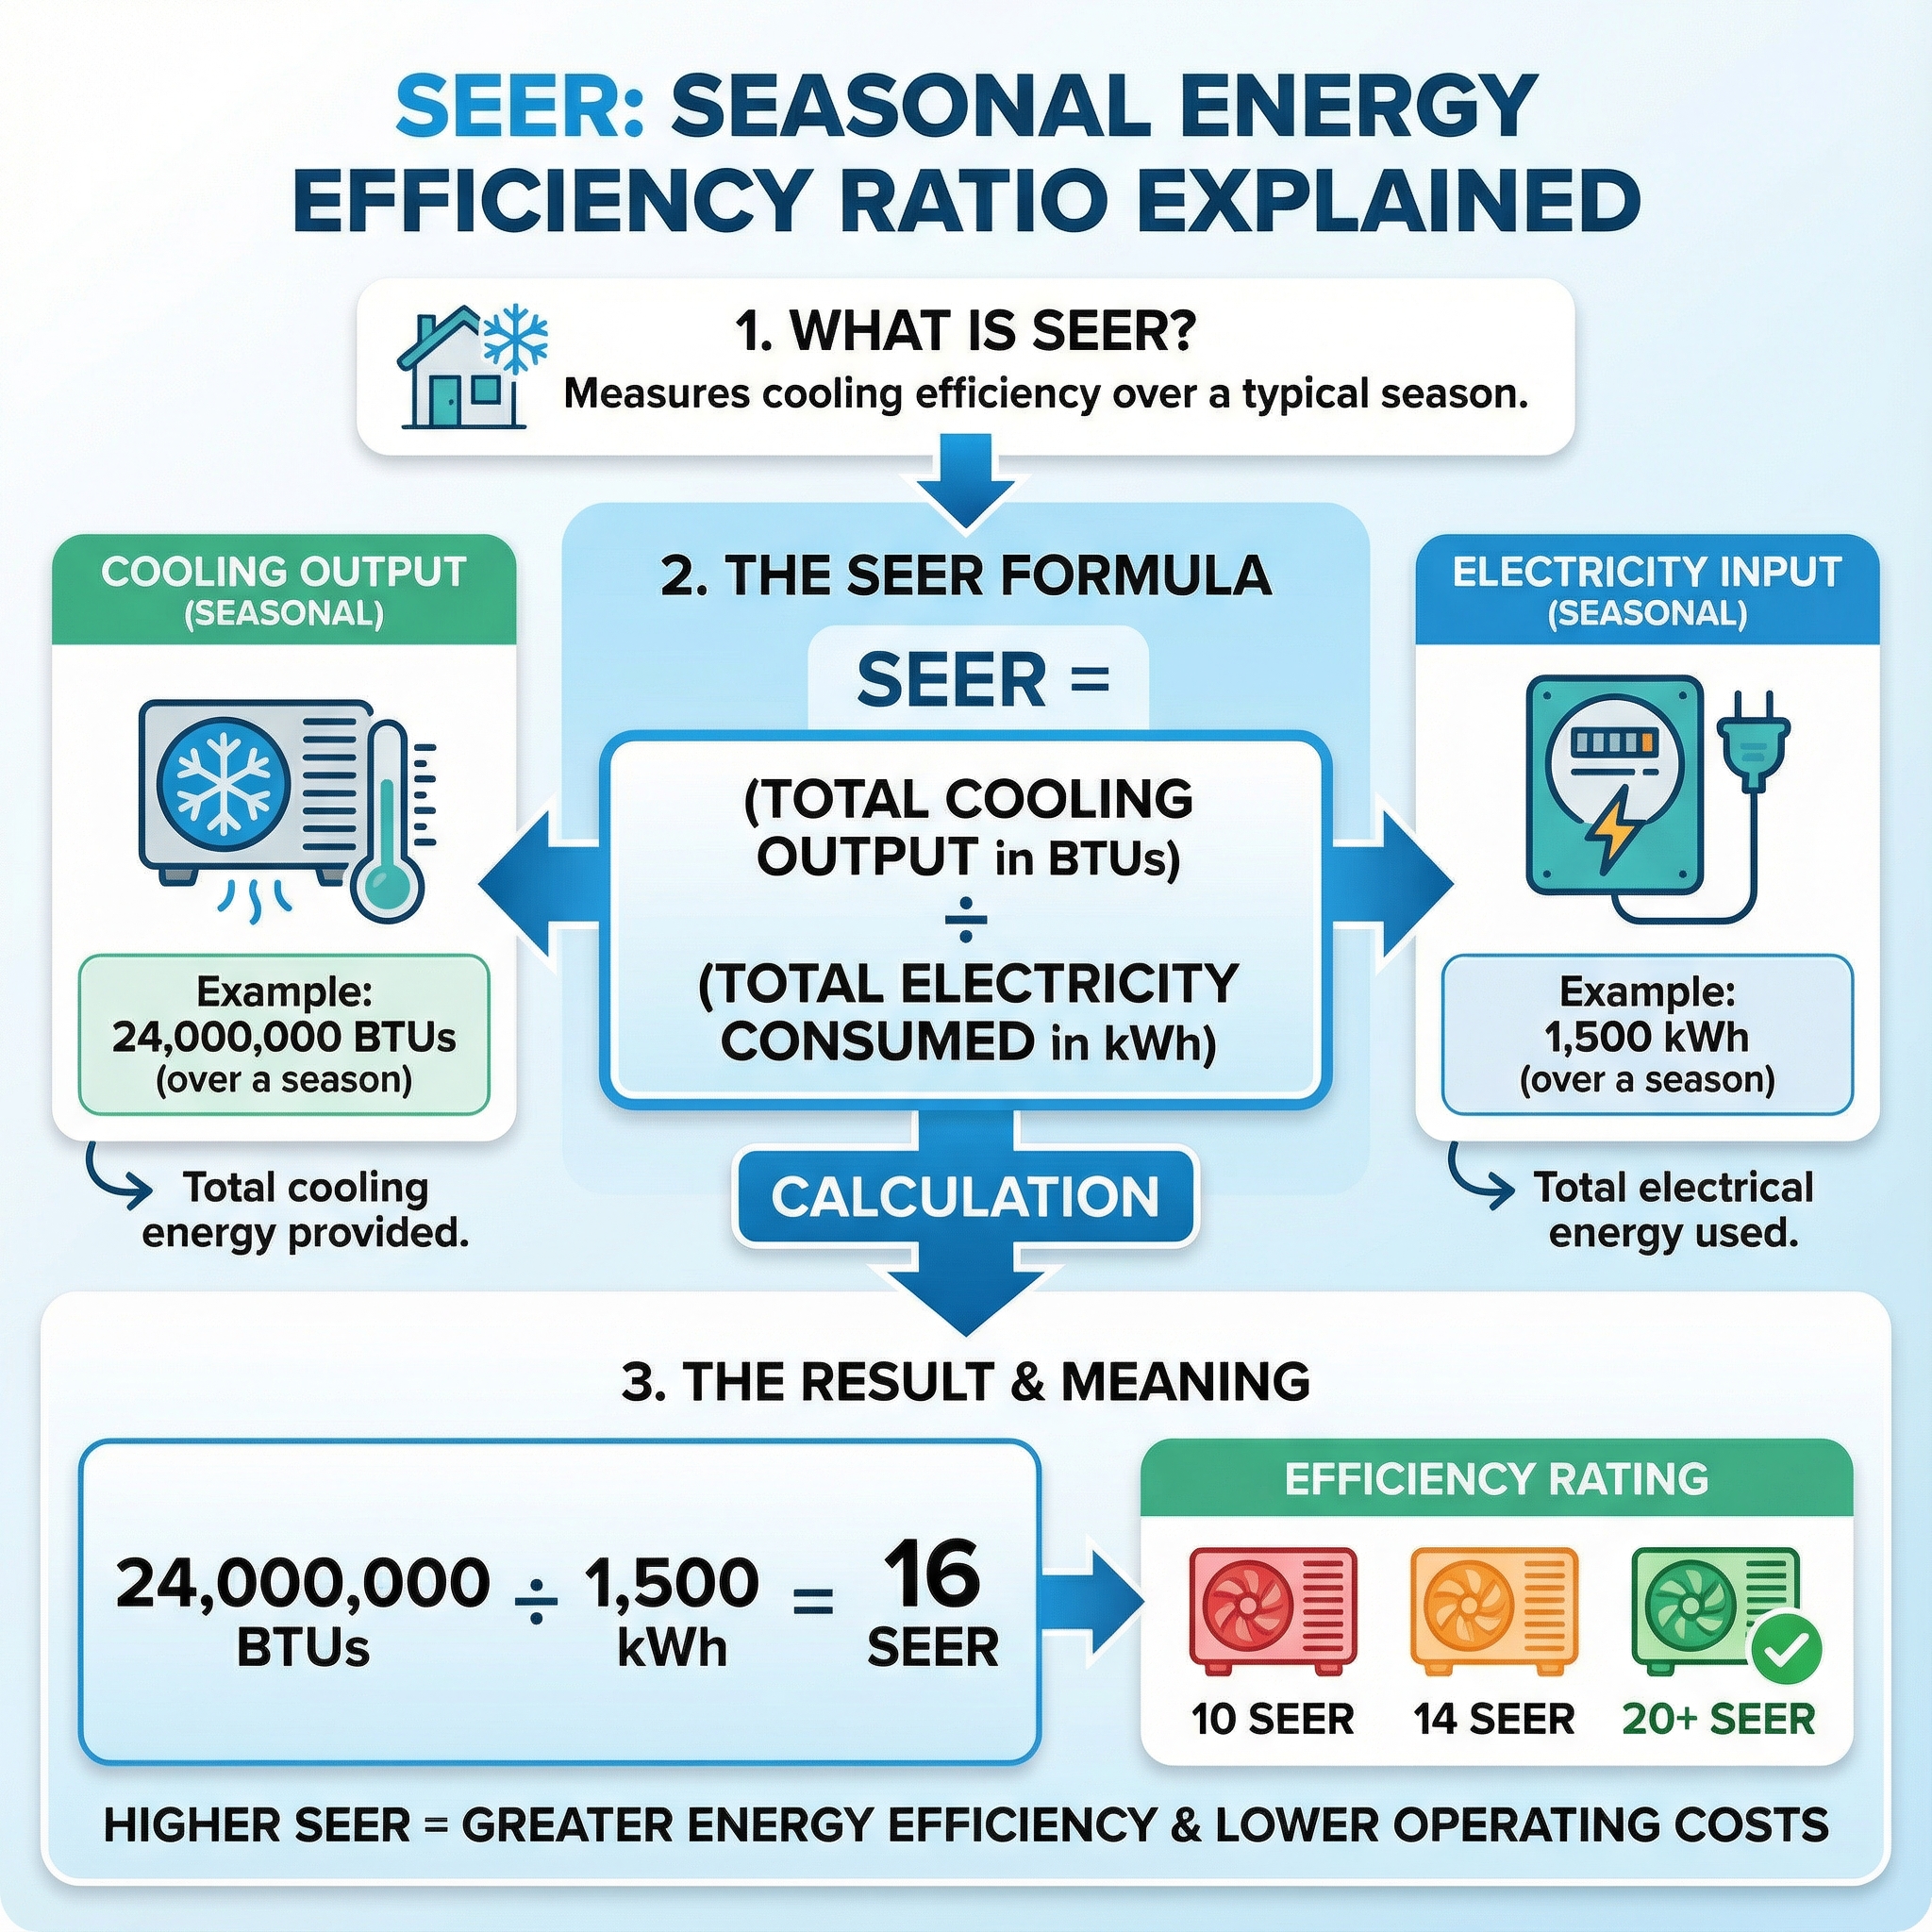
Step 3 - Equipment Selection: Efficiency Ratings, Heat Pumps vs. Furnaces and Refrigerant Choices
SEER and SEER2 both measure seasonal cooling efficiency. SEER2 uses an updated test procedure. Think of it like miles per gallon under a newer test cycle, so compare SEER to SEER and SEER2 to SEER2. Regional minimums apply: roughly 14 SEER in many Northern areas, about 15 SEER in many Southern areas, and split heat pumps around 15 SEER nationwide. For most owners, 15 to 18 SEER or the SEER2 equivalent balances cost and savings. Upgrading from SEER 10 to SEER 16 can cut cooling energy about 15 to 30 percent depending on climate. Proper installation, ductwork, and commissioning are essential.
Heat pump or furnace depends on climate, energy prices, and decarbonization goals. In our experience at Budget Heating (BudgetHeating.com), modern heat pumps with variable speed compressors, ECM blowers, and premium coils are an excellent fit in moderate or hot regions. In colder zones, consider a cold climate heat pump or a dual fuel setup with a condensing gas furnace. This positions you for future code changes and electrification while preserving comfort.
Where feasible, choose low GWP refrigerants and use properly certified technicians to manage environmental and regulatory risk. After a proper Manual J load calculation, we align high efficiency options with your home and priorities.
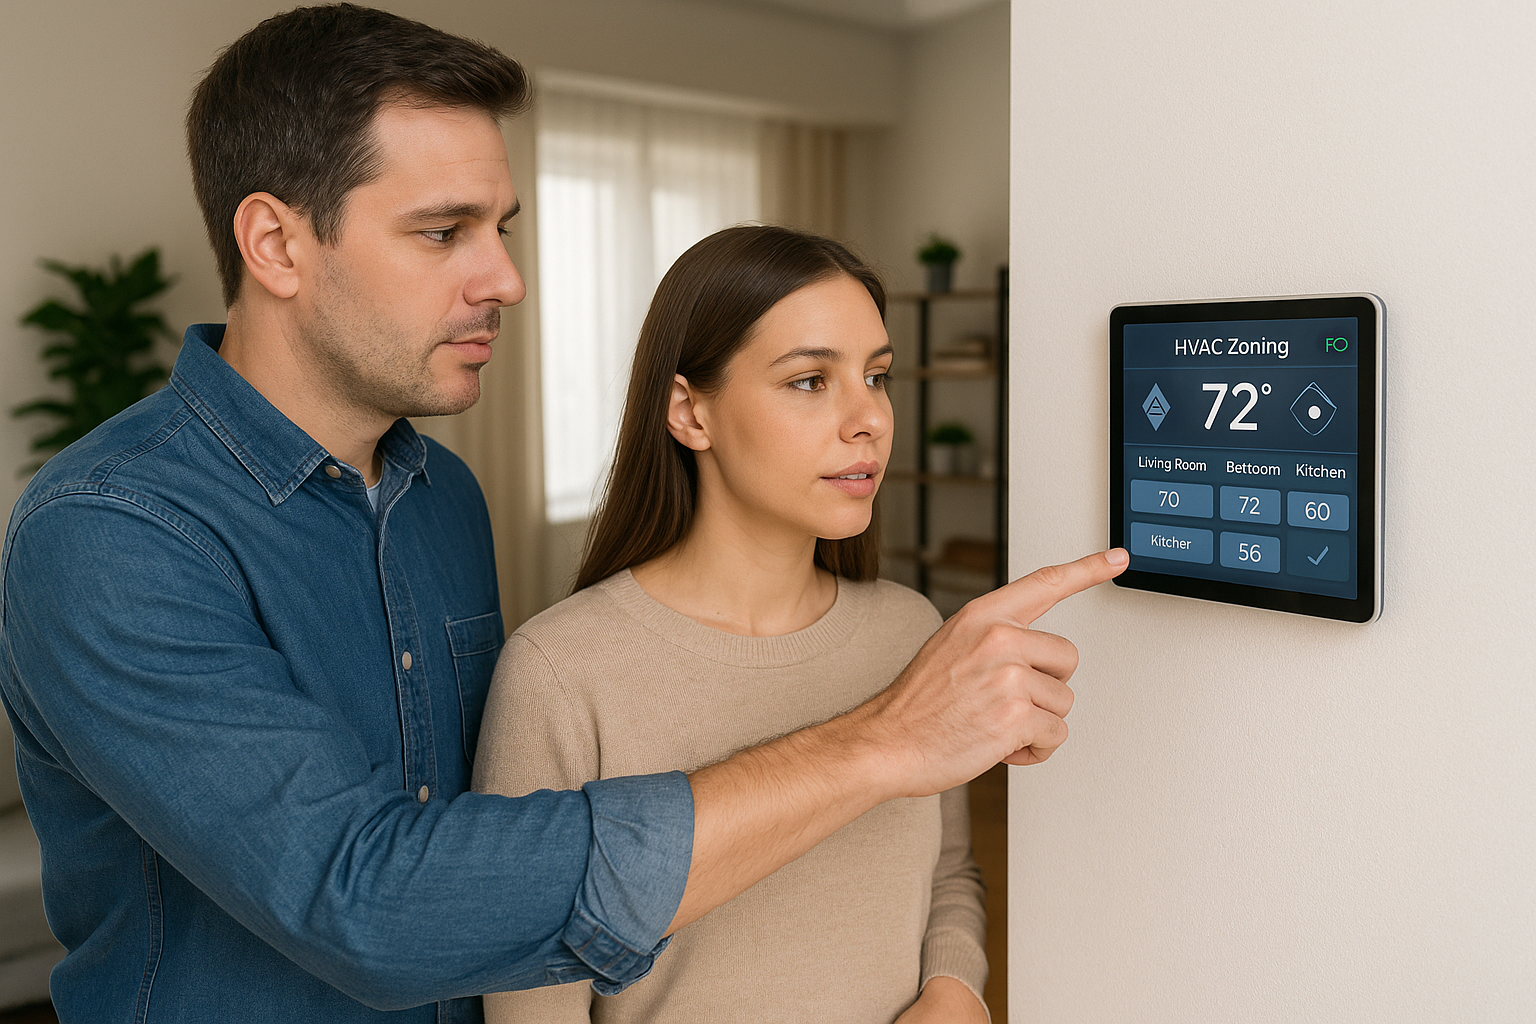
Step 4: Controls, Zoning and Building Automation: How Smart Controls Preserve Savings
Controls, zoning, and a building automation system are HVAC cruise control. They apply schedule-based setbacks, supply-air and temperature reset, and zone-by-zone delivery to improve occupant comfort while trimming runtime.
In our experience at Budget Heating (BudgetHeating.com), the fastest gains come when BAS logic is paired with:
- Economizers
- Energy-recovery ventilation
- Demand-controlled ventilation
- VFDs on fans and pumps
- High-efficiency motors
DCV matches outside air to occupancy using CO2 or people counts, lowering ventilation at partial load and reducing peak kW and demand charges. Use smart schedules, pre-cool or pre-heat, and staggered starts to shave peaks. Plan measurement and verification using interval meter data, BAS trend logs, and analytics with fault detection and diagnostics to verify savings and catch drift early. That keeps systems tuned between commissioning touchpoints and preserves savings year after year.
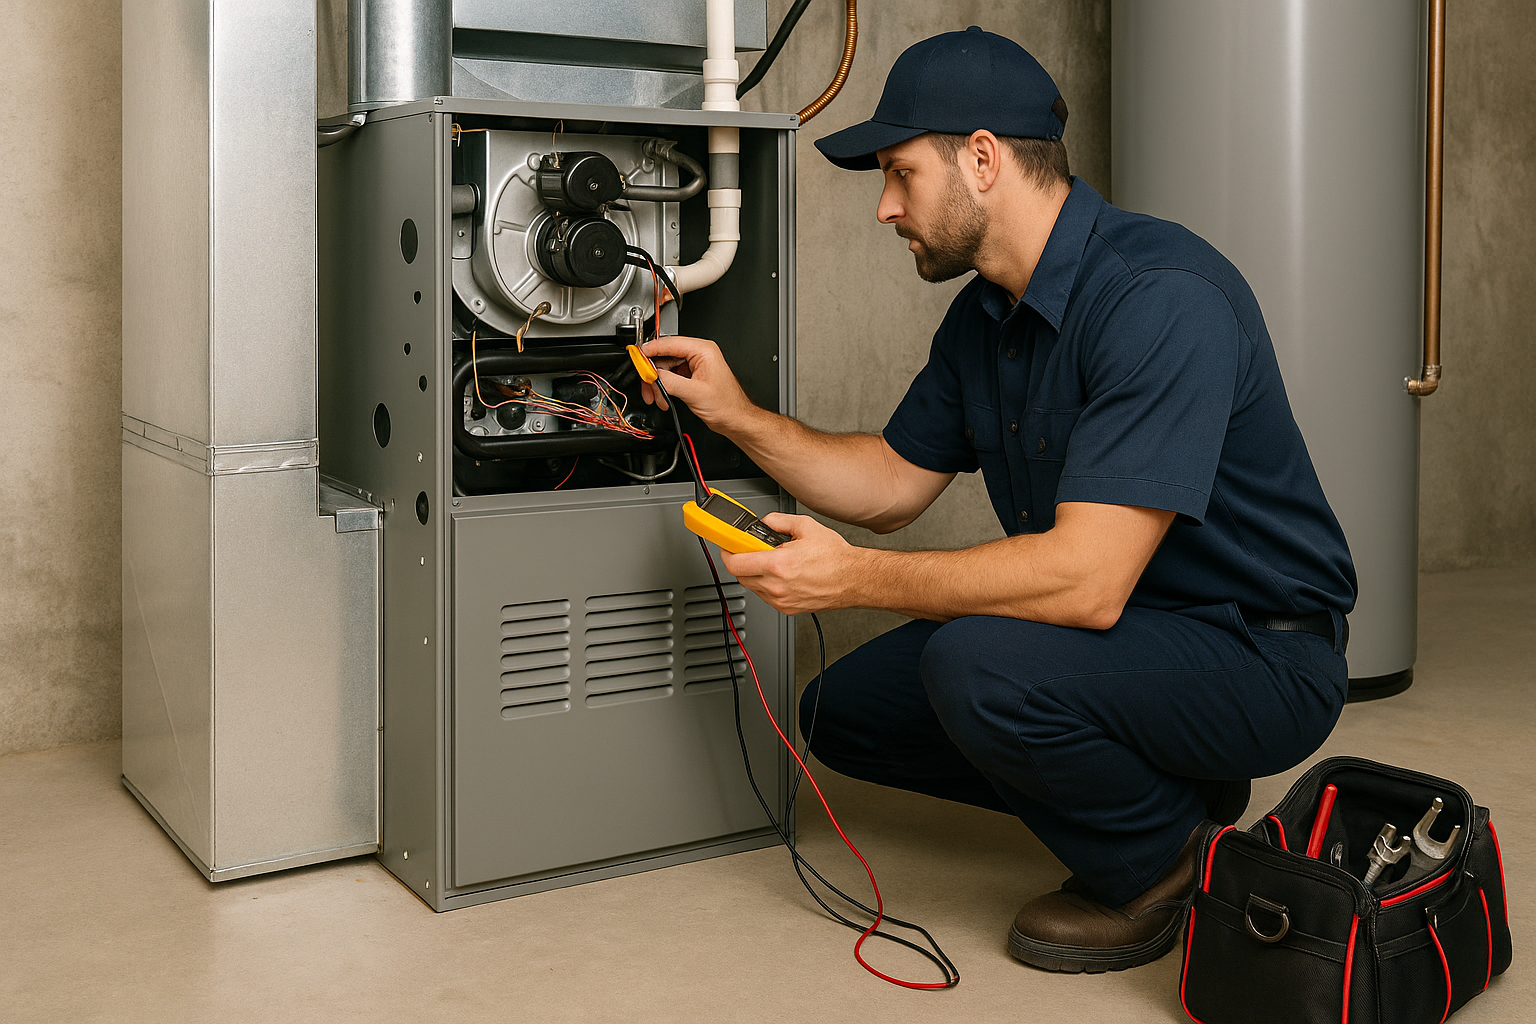
Step 5: Ductwork, Ventilation and Indoor Air Quality Upgrades
A thorough duct inspection is essential to find leaks, undersized returns, and damaged runs. Seal seams with mastic or UL 181 tape, then insulate ducts in attics or crawlspaces to reduce heat gain or loss. Verify return and supply sizing matches the new unit airflow, and replace crushed or kinked sections. Design for serviceability: reachable filters, clear access to equipment, and straightforward controls simplify ongoing maintenance.
Ventilation and IAQ complete the upgrade. Provide adequate mechanical ventilation. In tight homes, an ERV or HRV exchanges stale and fresh air through a core that transfers heat, and for ERVs some moisture, so outdoor air is tempered before it enters. Improve filtration, ventilation control, and humidity management to reduce pollutants and improve occupant comfort.
- Inspect condensate drains and pumps to prevent water damage and nuisance shutdowns.
- Inspect accessible duct runs, reseal obvious joint leaks, replace damaged sections, and confirm return and supply sizing with the new airflow.
- Establish a filter replacement schedule, and keep outdoor condensers and coils clear to maintain airflow and efficiency.
- If zoned, test dampers. If UV air purification is used, plan annual bulb replacement per manufacturer guidance.
- Set reminders for routine filter changes, coil cleaning, condensate checks, and periodic damper inspections. Owners can handle filter changes, basic visual checks, and keeping outdoor units clear, and should avoid high risk tasks.
Cost Estimates, Financing, Rebates and Permitting: How to Pay and Comply
We start with lifecycle cost analysis, not just the bid price. Think of it like owning a car: purchase, fuel, maintenance, and resale all matter. Use simple payback, then test the plan with NPV or IRR to see true value over 10 to 20 years. Incentives should inform phasing, prioritizing measures that deliver the strongest net savings first.
To fund projects, mix options to fit cash flow: rebates, utility programs, PACE financing, equipment leases, and favorable loans. Match term length to expected equipment life to avoid negative equity.
Find incentives through ENERGY STAR tools, utility rebate portals, and state energy office sites. The Federal Energy Efficient Home Improvement Credit (IRC §25C) provides 30% up to $3,200 through 2025, including up to $2,000 for qualifying heat pumps.
Pull required permits, meet ASHRAE and local energy codes to keep eligibility and avoid rework, coordinate inspections, notify occupants, and document models, commissioning data, and baseline versus post-install performance for rebates and warranties.
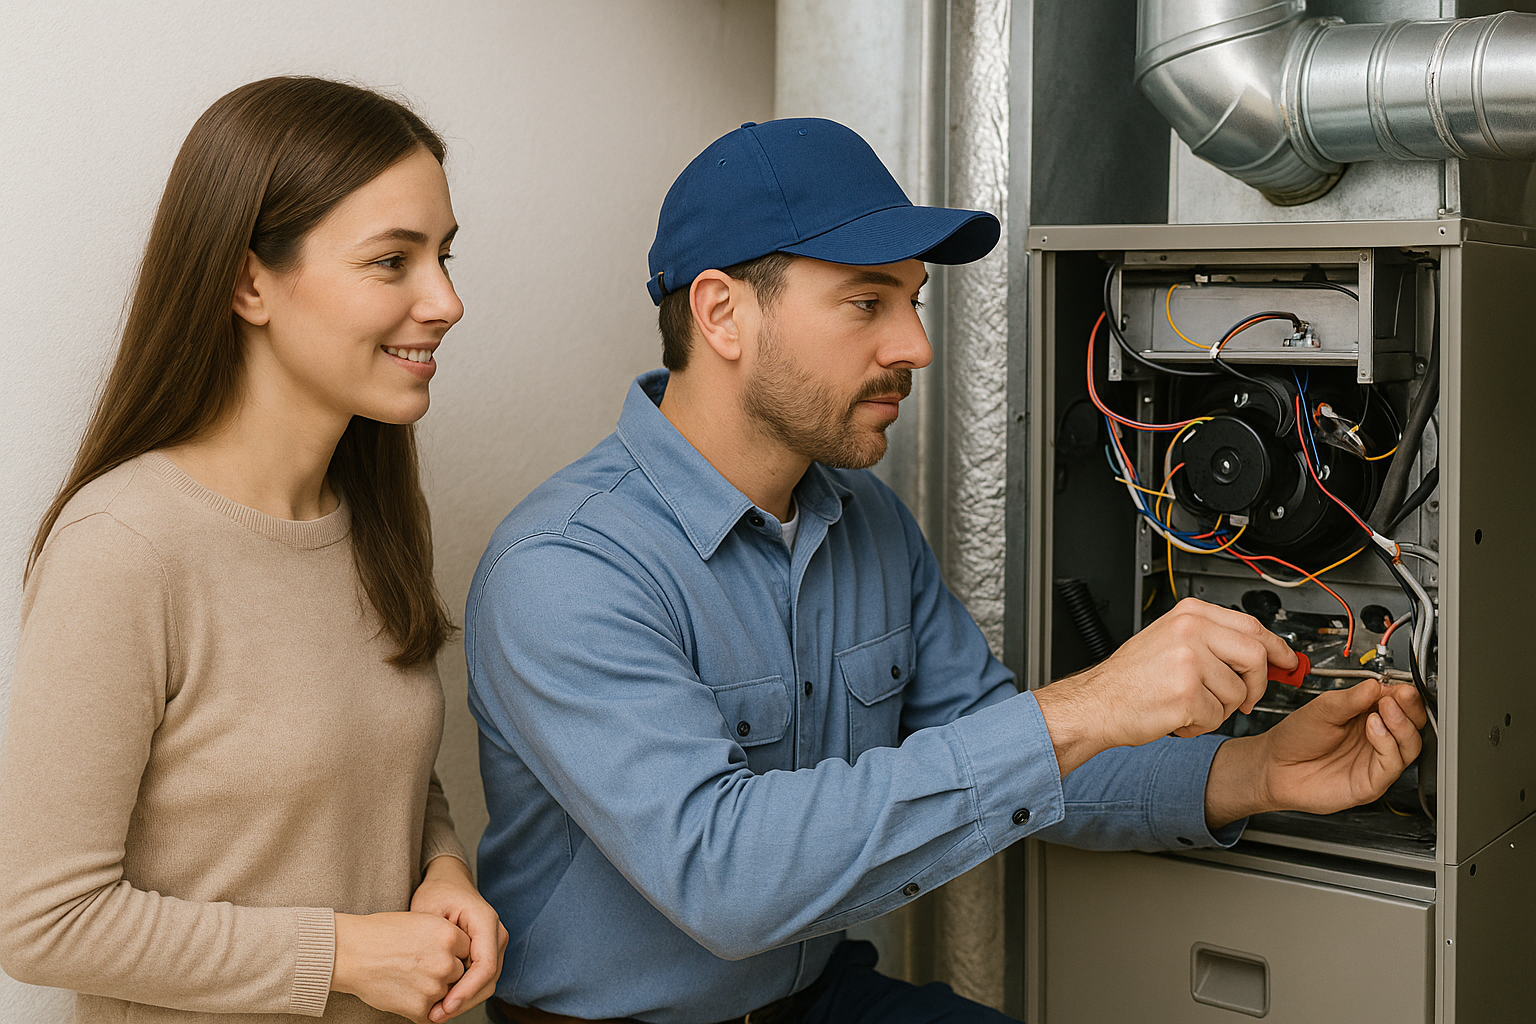
Commissioning, Maintenance and Next Steps: Protect Your Savings
Real savings are locked in by proper commissioning and verification. Our team expects airflows, static pressures, supply and return temperatures, refrigerant charge and thermostat calibration to be measured and documented. A successful retrofit starts with clear objectives, then finishes with proof the equipment meets them.
We know you are balancing comfort, savings, IAQ and resilience. Here is the quick checklist we hand off on every project:
- Schedule professional commissioning and keep a signed report with airflow, pressure, temperature, charge and thermostat data.
- Engage qualified designers and installers, require written warranties and document model numbers, setpoints and baseline measurements for your records.
- Set a maintenance plan: filters, coils and drains on a schedule, plus an annual tune-up. Leave electrical, refrigerant, combustion and full commissioning to licensed pros to protect safety and warranties.
- Watch for red flags like ice on lines, burning smells, gas odor, standing water or repeated breaker trips, and install and test CO and smoke detectors near sleeping areas.
With 30+ years in HVAC, we can help you select matched equipment, align commissioning expectations and organize the warranty handoff.
- Get a Custom Quote
- Talk to Our Team, U.S.-based phone support
- Shop Heat Pumps
- Ask about wholesale pricing, free shipping on many orders and financing with Affirm