Why HVAC Planning Must Start Before You Demo: HVAC & Home Renovations Overview
Renovations reshape how a home gains and loses heat. Move a kitchen, add windows, tighten air sealing, or upgrade insulation, and the heating and cooling loads change. A system that once felt fine can become noisy, short cycle, or struggle to keep rooms even. Planning the HVAC before framing and finishes reduces redesigns, protects the look of the space, and delivers better comfort and energy outcomes. We see this weekly, and early decisions make later work cheaper and cleaner.
Early HVAC integration in design lets you reserve purposeful chases and soffits, set equipment clearances, and plan penetrations. That minimizes change orders and yields discreet, serviceable locations for air handlers, ducts, vents, and outdoor units. Think of it like mapping the plumbing before tile goes up. With space set aside, duct runs are smoother, returns are sized correctly, and equipment noise stays out of living areas.
In this overview you will learn:
- How layout, insulation, windows, and air sealing shift HVAC loads
- Where to reserve space for ducts, returns, and equipment clearances
- Measurements that prevent change orders and preserve finishes
- Ways to keep equipment discreet yet accessible for service
Assessing Your Existing HVAC System Before You Remodel
Start by mapping the remodel. Identify added or reconfigured rooms, any change of use, and envelope upgrades such as windows, air sealing, or insulation. Note the sequence so envelope work is done first, then final HVAC sizing.
- Equipment: note age, condition, model data, and refrigerant. Older R 22 units often mean limited service options.
- Ducts: check for damage or leaks, adequate insulation, and sizing that matches expected airflow.
With this snapshot, you can decide whether repair, a partial upgrade like duct sealing, or full replacement is the most cost effective path.
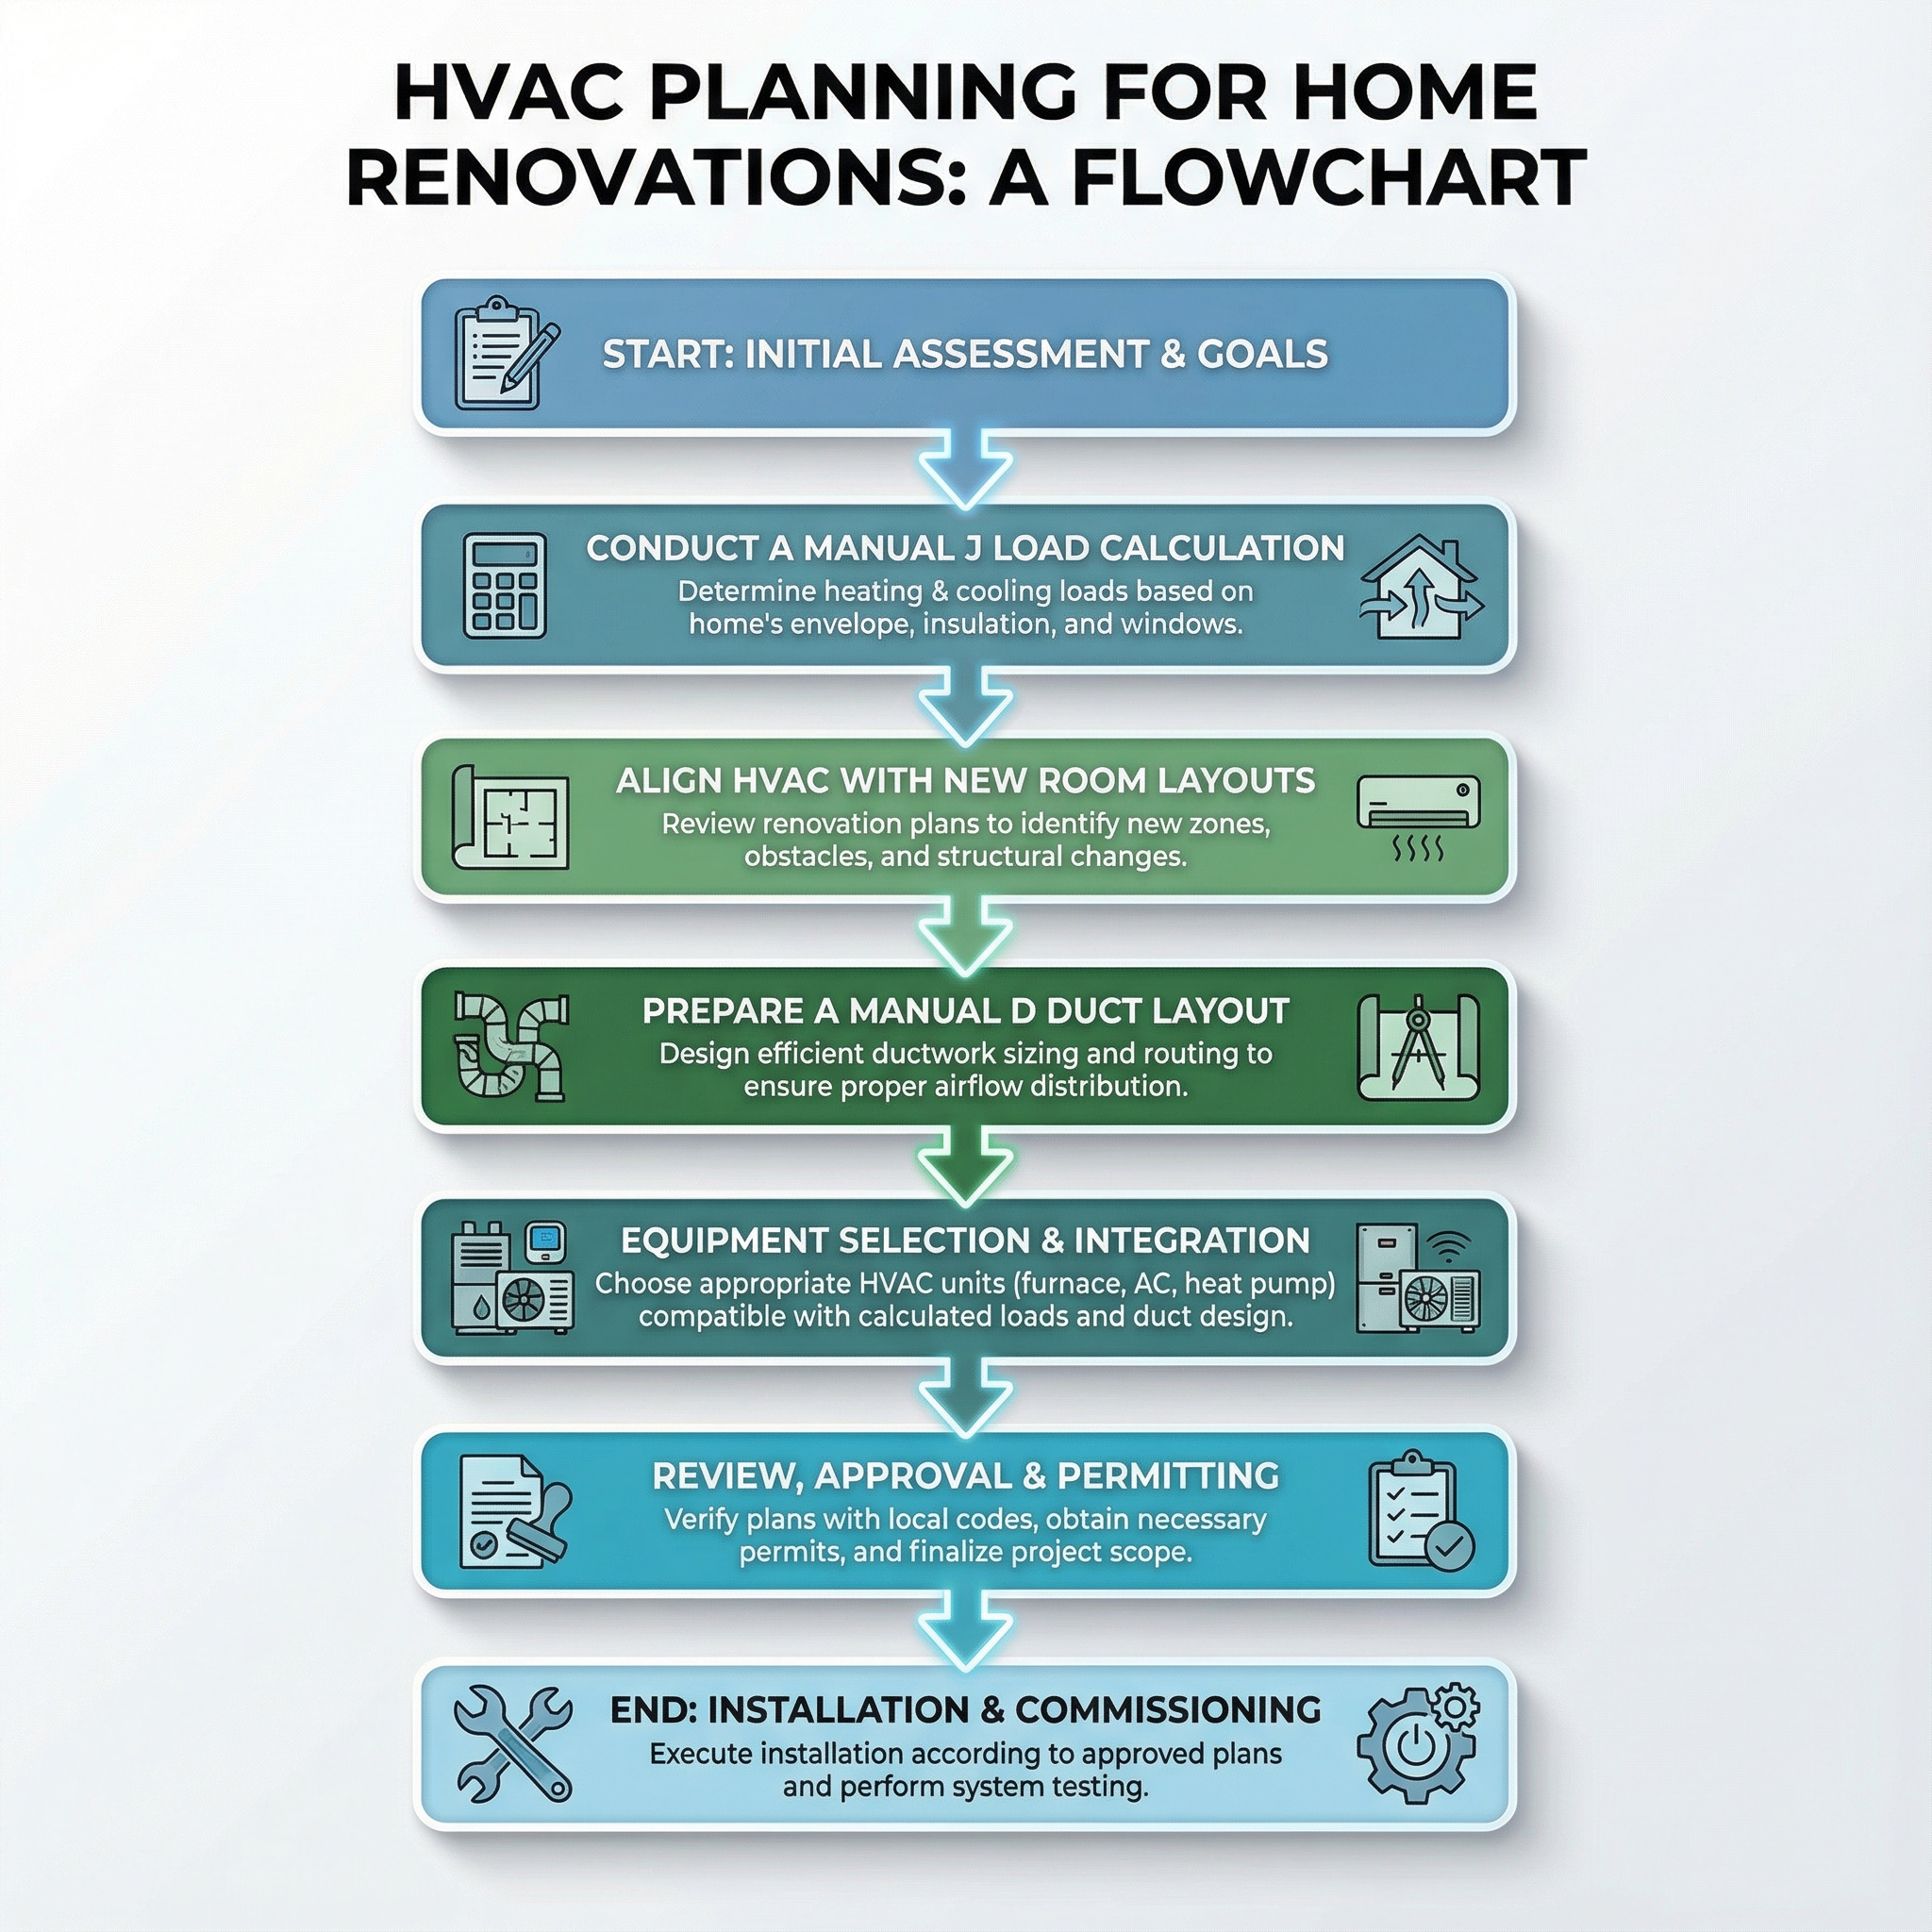
Sizing & Load Calculations: Getting Capacity Right (Manual J, S & D)
Square-foot rules of thumb miss the mark. Accurate capacity comes from a room-by-room Manual J that reflects the post-renovation condition. After insulation, air sealing, and window upgrades, loads often shrink. In 30+ years of sizing systems we regularly see downsizing by one ton or more in tighter homes. Right-sizing prevents short cycling, poor humidity control, and unnecessary upfront cost.
- Manual J: Calculates each room's sensible and latent loads using local weather, orientation, envelope details, and ventilation.
- Manual S: Selects equipment that matches those loads at design conditions, not just nameplate tonnage, so sensible and latent capacity line up.
- Manual D: Designs ductwork that delivers the required cfm with proper static pressure and velocities, so the selected system can actually perform.
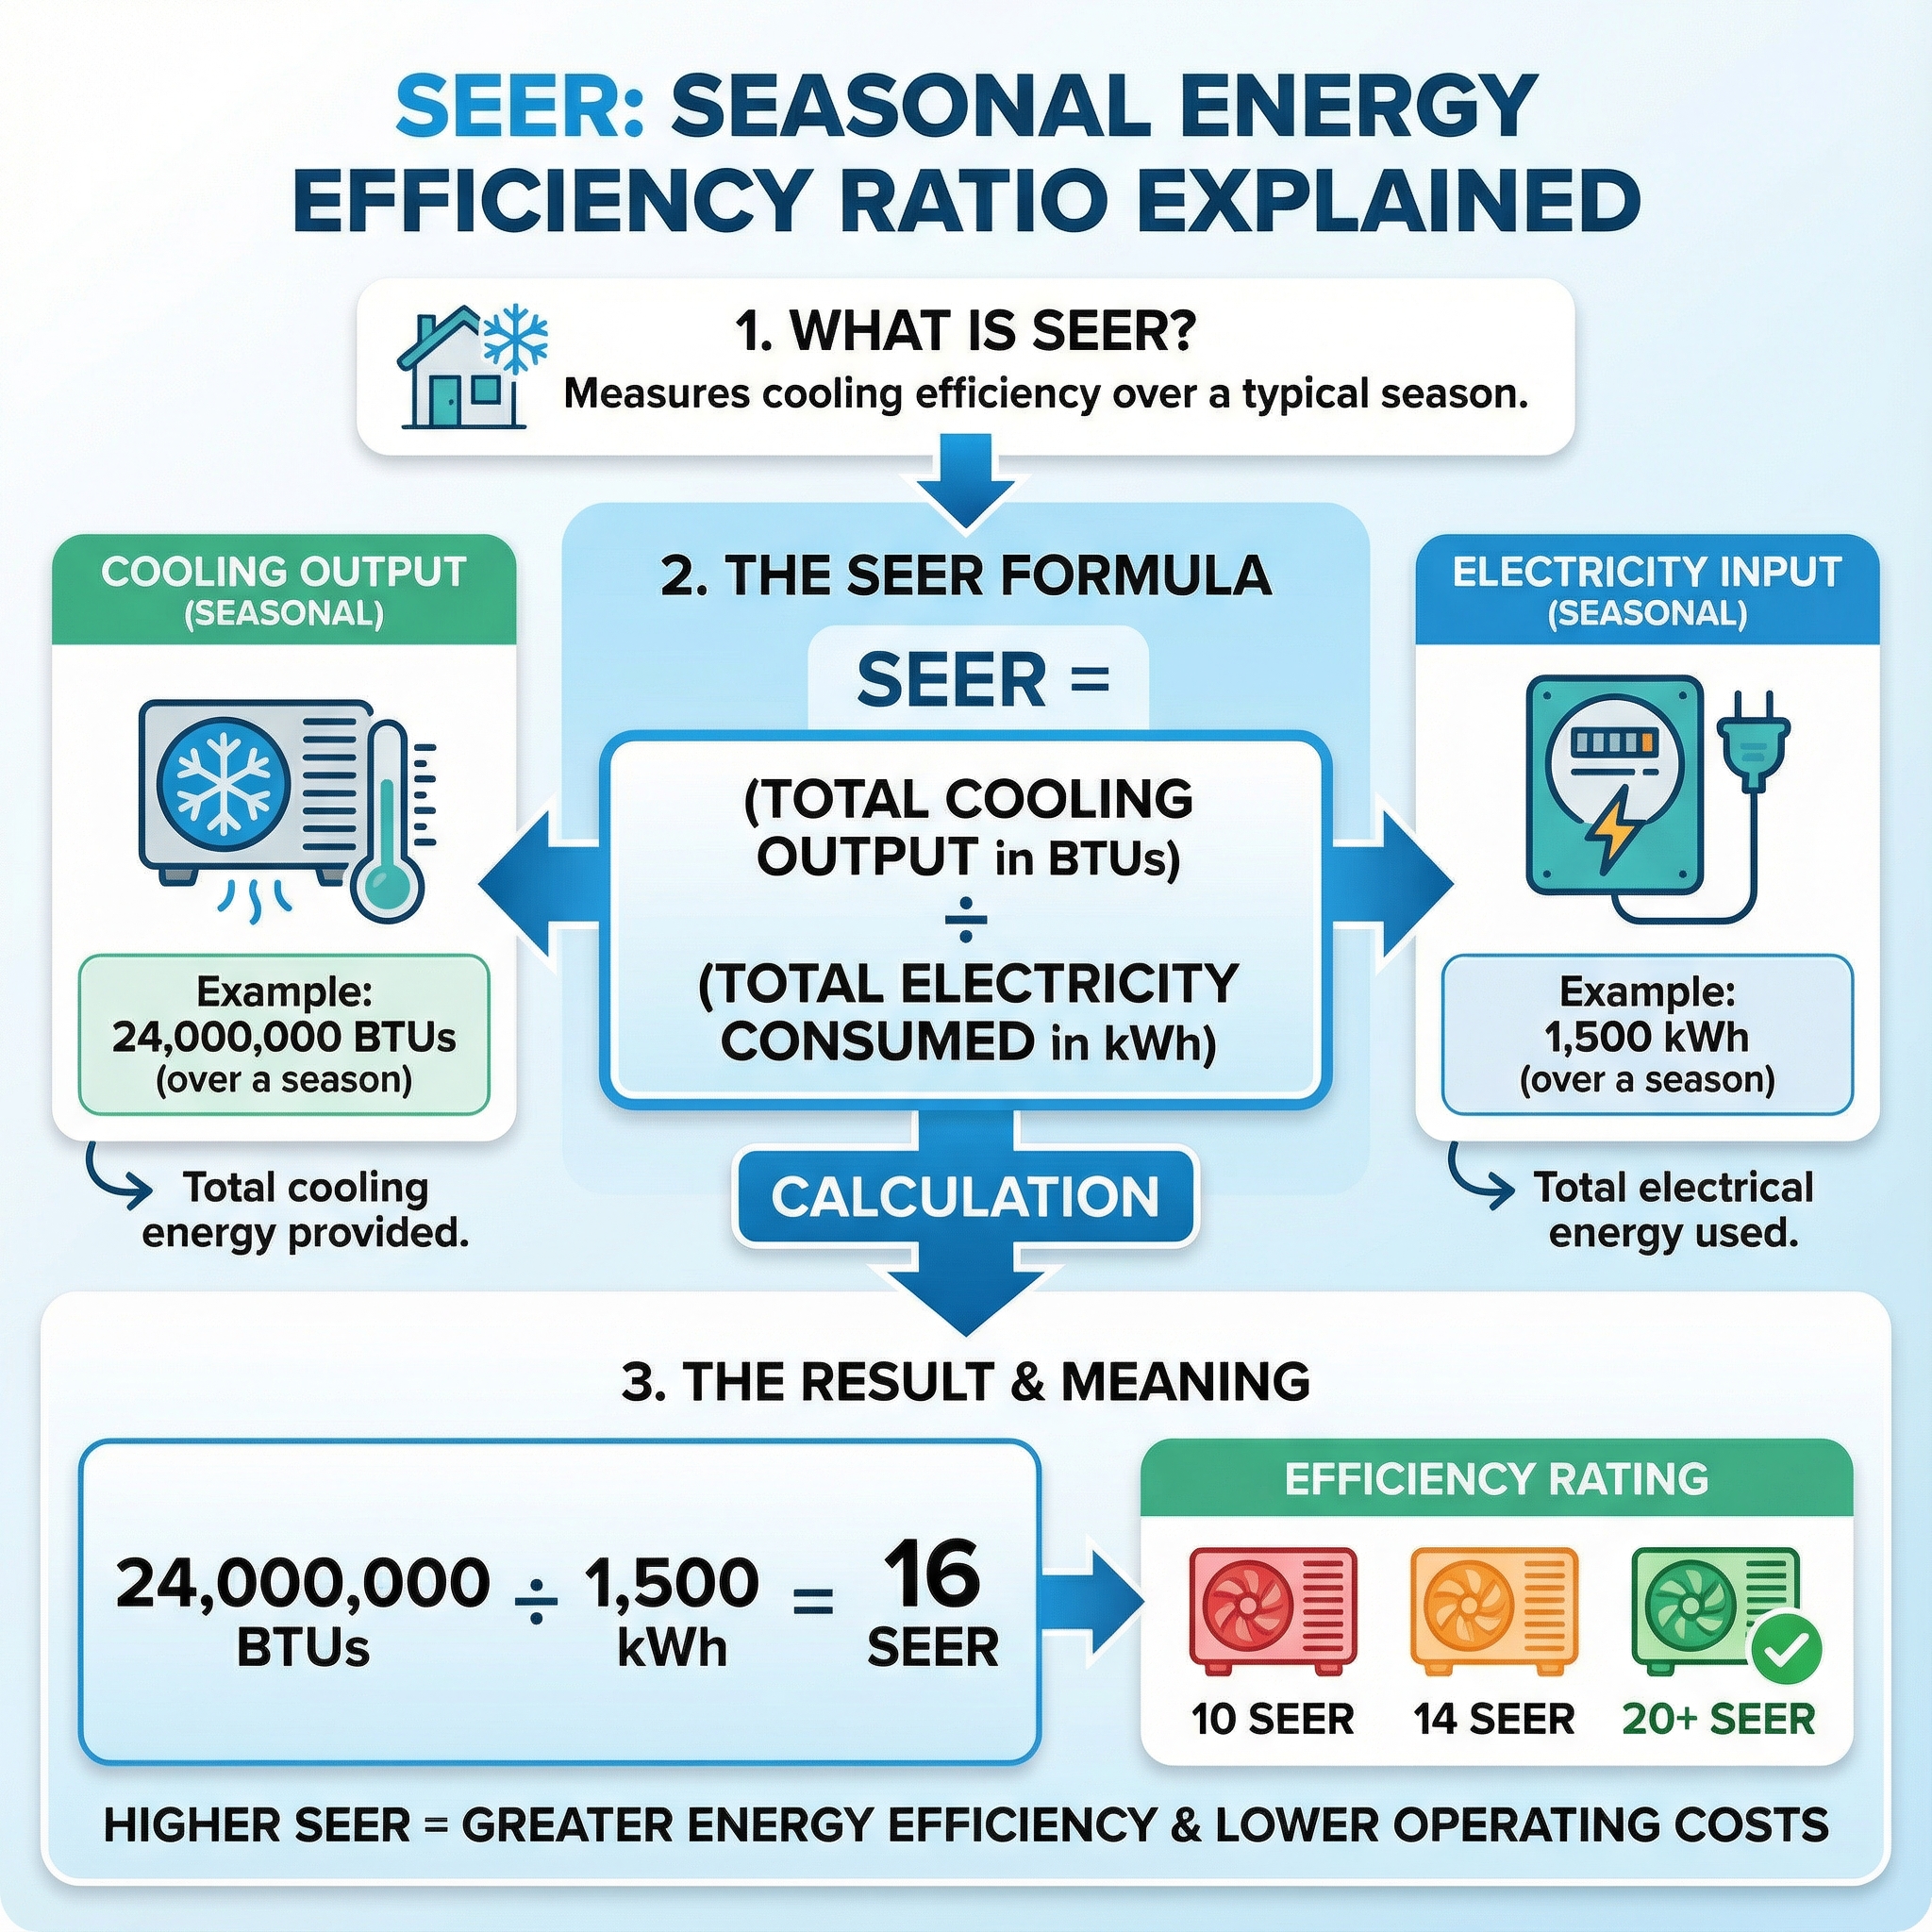
Efficiency labels influence selection too. SEER describes seasonal cooling efficiency. SEER2 uses a newer test with higher external static, so the same unit typically posts a slightly lower number. Baseline systems start around 13 to 14 SEER, while premium options reach the low to mid 20s. Federal minimums are now expressed in SEER2 and vary by region and size. Examples: many Northern U.S. split systems require 14 SEER, about 13.4 SEER2. In the Southeast and Southwest, many sizes require 15 SEER, about 14.3 SEER2. Verify the rating meets your regional code before purchase. Lead with Manual J, S, and D, then align efficiency tier and compliance for balanced comfort, humidity control, and predictable operating cost.
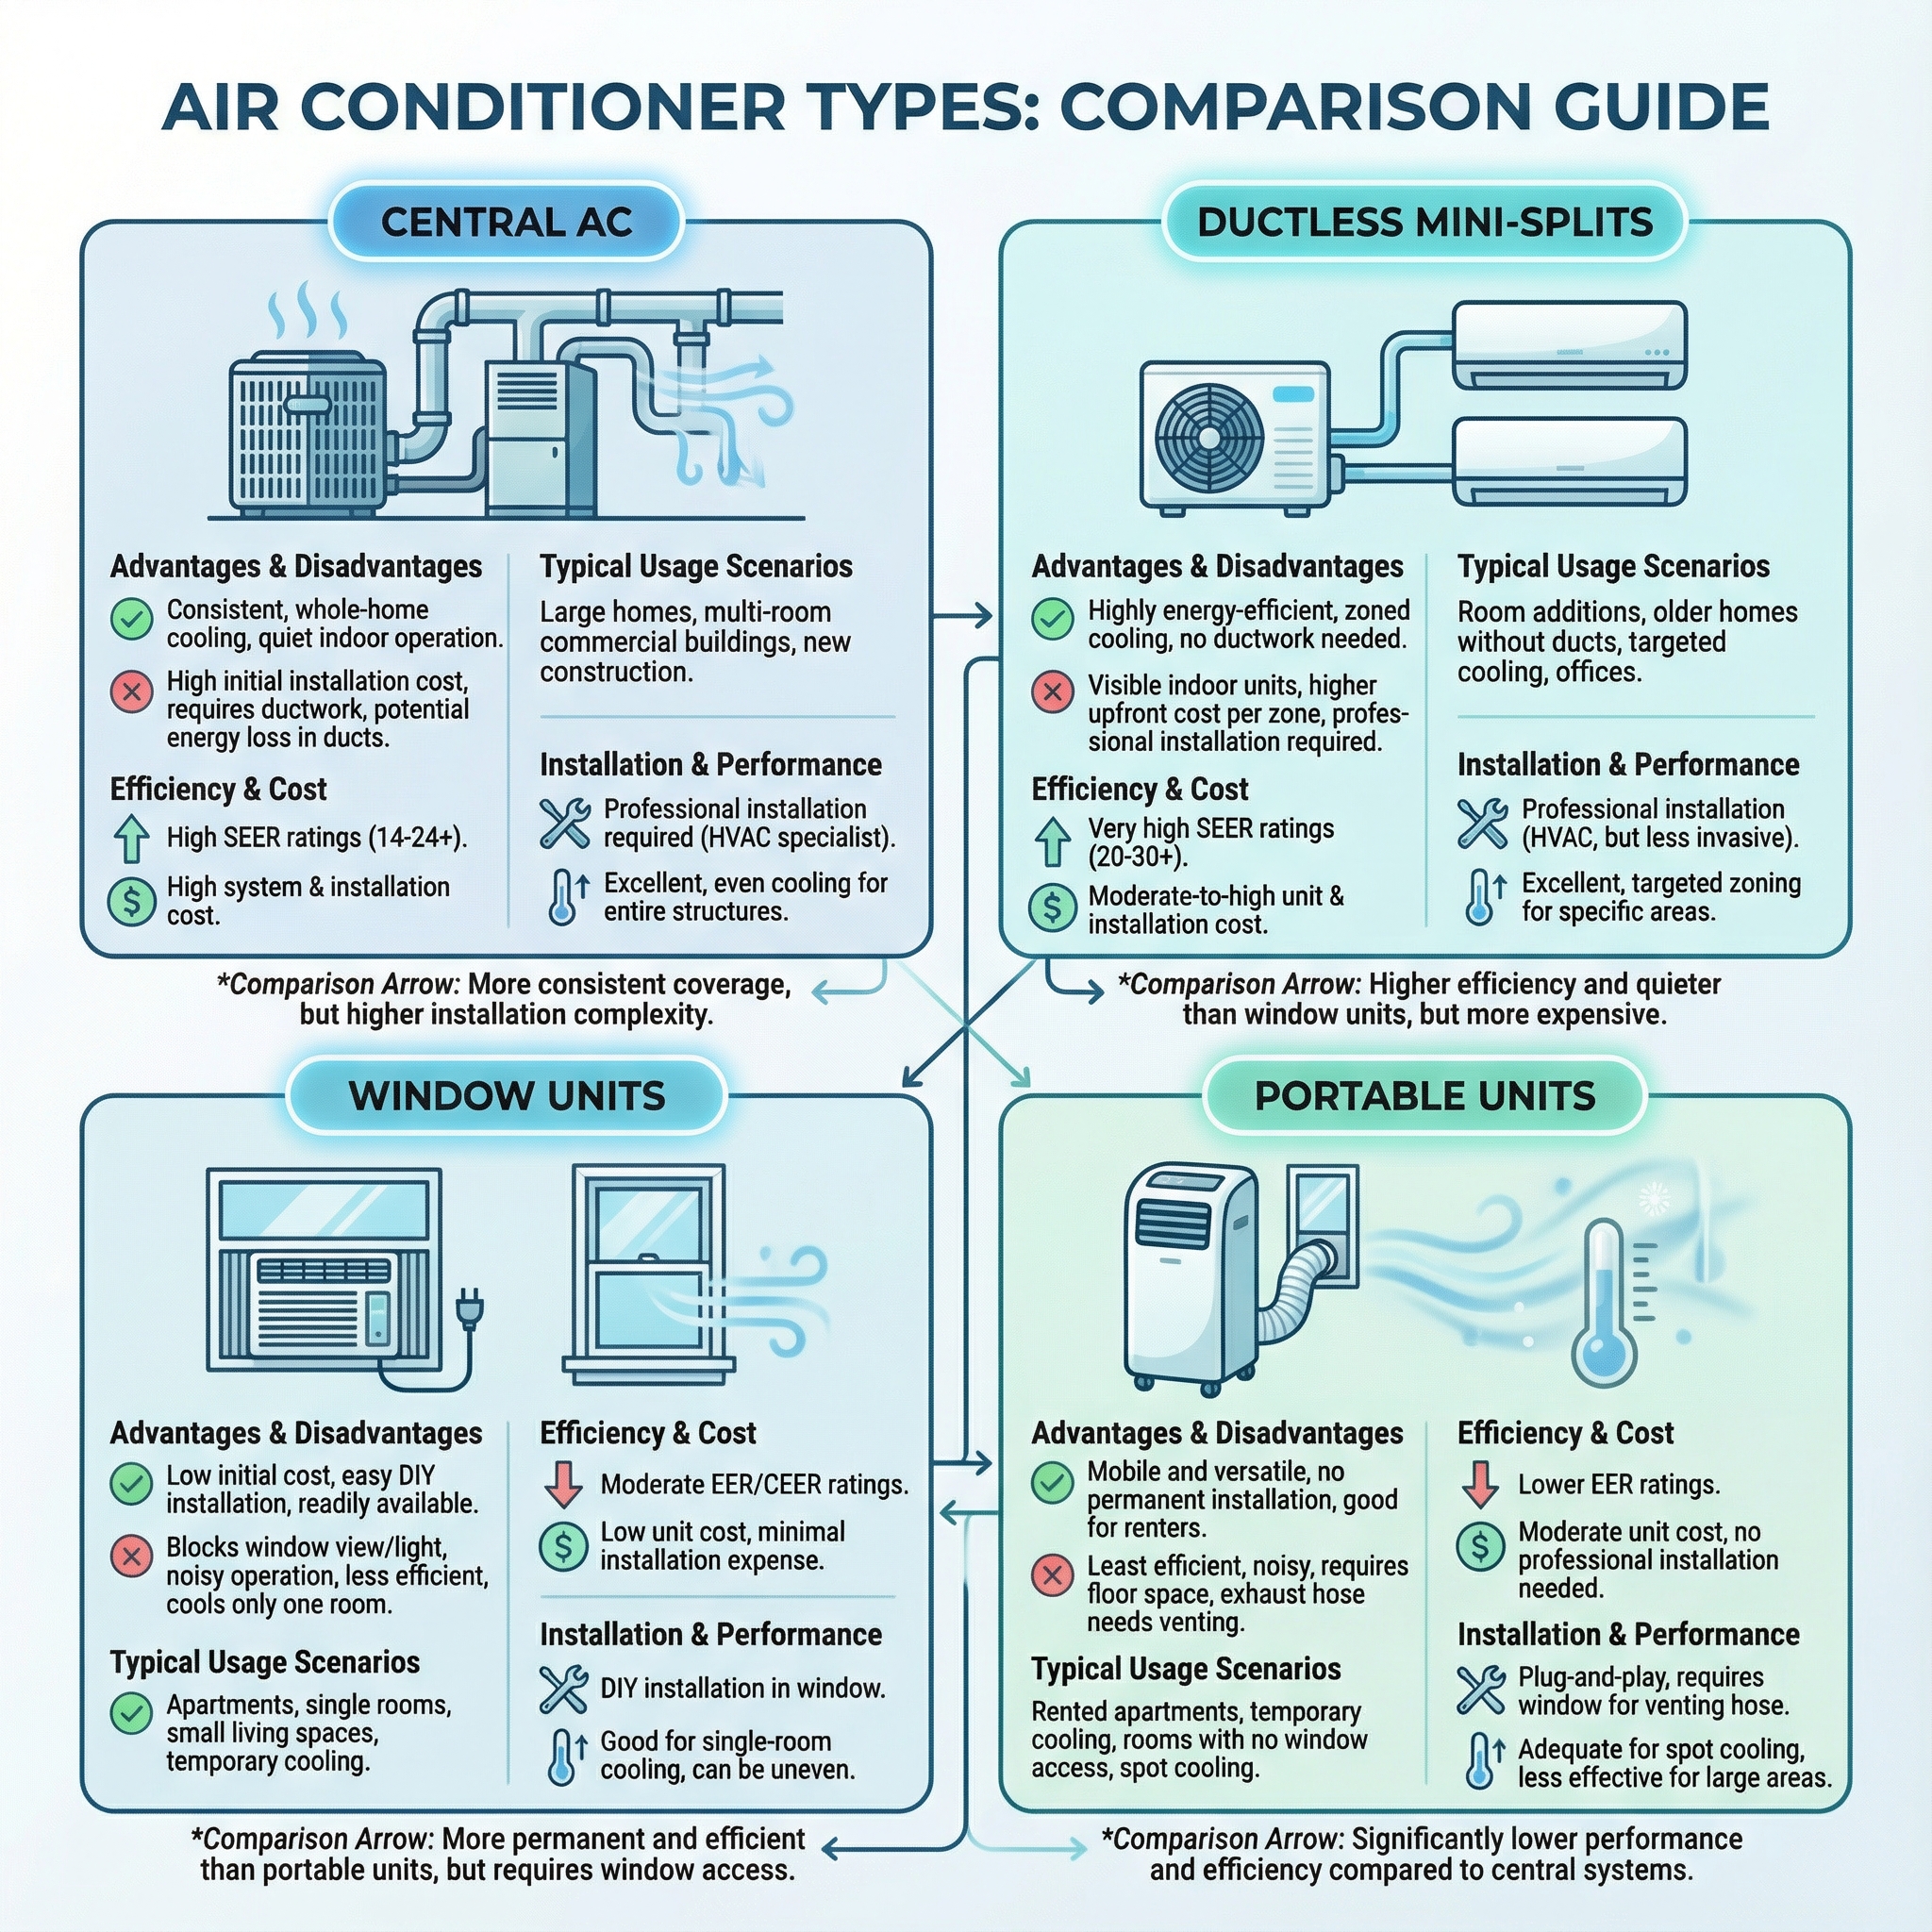
Types of HVAC Systems: Pros, Cons and When Each Fits a Renovation
Renovations are a good time to match system type to the space and utilities. We weigh efficiency, modulation, noise, and whether ducts exist before selecting a path.
- Heat pump, including cold-climate: efficient heating and cooling, smooth modulation. Needs good ducts; in deep cold use a cold-climate model or backup heat.
- Split AC with gas furnace: lower first cost, strong heat in cold weather. Fewer humidity controls if single stage, uses gas.
- Ductless mini-split: no ducts, zoned comfort, high efficiency. Wall heads are visible; multi-room projects can add cost.
- Hybrid or dual-fuel: switches between heat pump and gas for cost and comfort. More components and setup.
- Small-duct high-velocity: tiny outlets preserve finishes, dehumidifies well. Pricier, design is critical to keep sound down.
Common myths: oversizing for speed causes short cycling and humidity issues; closing vents to fight dust spikes static pressure; thermostat swings rarely speed recovery and worsen humidity. During construction, change filters to protect coils.
Size with a Manual J load, and favor variable-speed or two-stage compressors with ECM blowers for steadier temperatures and better moisture control.
Not every option fits: mini-splits do not fit if you dislike visible heads, and standard heat pumps struggle in frigid regions without a cold-climate model or dual-fuel.
Ventilation & Indoor Air Quality During and After Renovation
Start with an envelope-first plan: tighten air sealing and add insulation before final HVAC sizing. In our experience this often drops the required capacity, which lets quieter, less expensive equipment hit the comfort target. Tighter shells then need planned ventilation. Use a balanced system with an HRV or ERV to bring in outdoor air while recovering energy. HRVs transfer heat only, good in colder, drier seasons. ERVs transfer heat and some moisture, helpful where humidity swings or long humid seasons make indoor air sticky. Pair that with properly sized kitchen and bath exhausts to pull contaminants at the source.
Filtration matters during construction and after. Select filters in the MERV 8 to 13 range where the blower can handle the pressure, and change them frequently to capture cutting and sanding dust. Control moisture as the finishes cure: in humid climates prioritize latent capacity or add whole house dehumidification. In cold or dry regions consider humidification to protect wood and paint. Good moisture control helps prevent mold in new assemblies.
Ductwork Design, Relocation and Sealing Best Practices (Plus Installation Details)
When floor plans change, ducts must follow. Use Manual D to resize trunks and branches, and to add or relocate returns, so static pressure drops and each room gets its designed airflow and correct imbalance. Picture a road network: a bottleneck anywhere slows the whole route.
Sealing and testing are just as critical. Seal every joint with mastic or UL 181 tape, repair crushed or disconnected runs, and insulate ducts in attics, crawlspaces, garages, and other unconditioned spaces. At closeout, a duct leakage test validates the design, confirms the system is tight, and protects performance and efficiency.
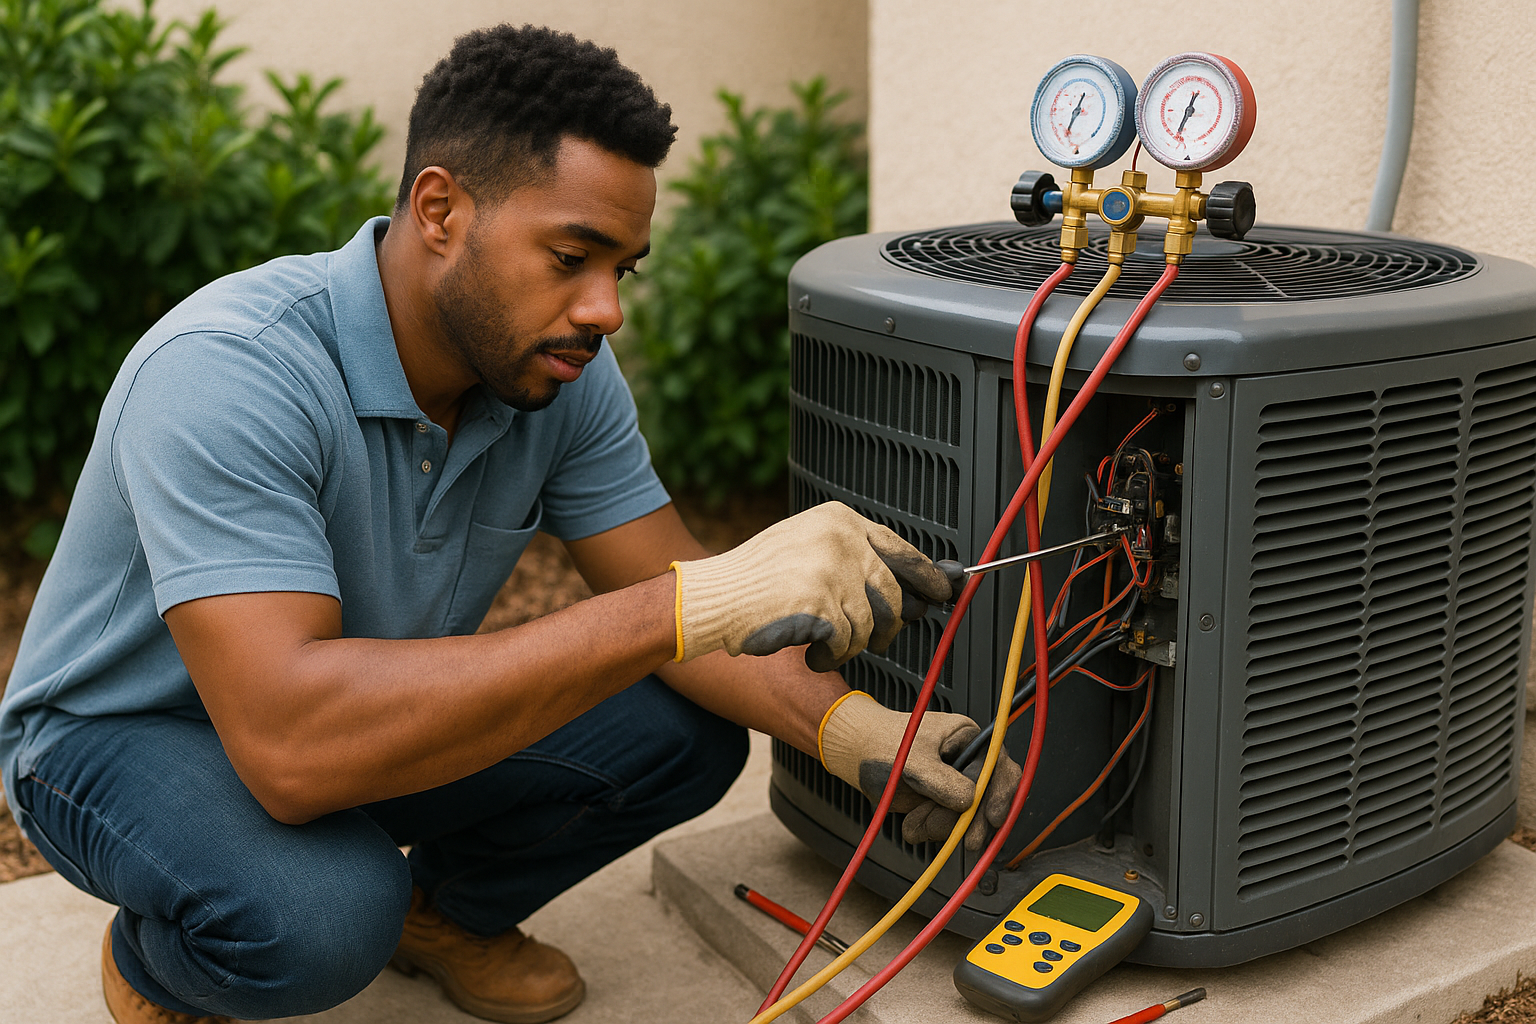
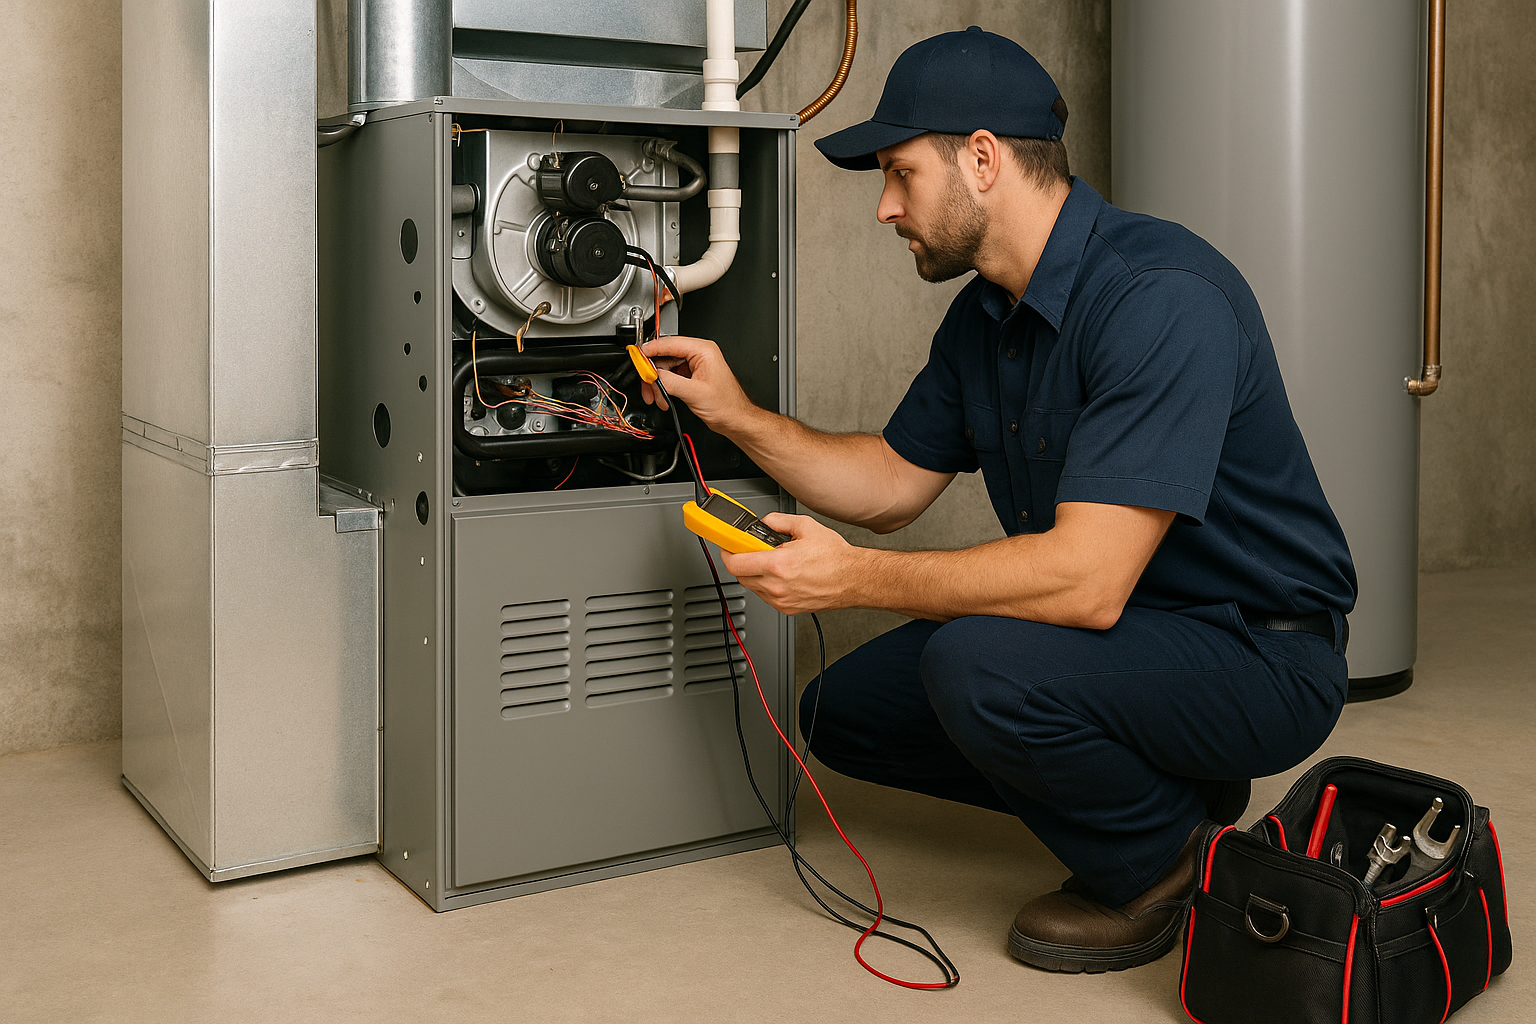
Details decide the outcome. Use correct starting collars and boots, mechanically fasten, then seal for airtightness. Nitrogen-purge and use proper brazing or soldering on refrigerant and drain lines. Provide dependable condensate protection: primary pan, secondary drain or pan, and float switches. In our experience at Budget Heating (BudgetHeating.com), these steps prevent most callbacks reliably.
Vent Placement & Finish: Choosing Wall Vents, Grilles and Where Units Live
We place supply and return registers to balance rooms first, then hide them where sensible. Filters must be reachable without tools, otherwise they do not get changed. Choose grille styles for the look you want, but keep free area generous so airflow is not throttled, like choosing wide lanes for traffic.
For acoustics, we relocate noisy air handlers into better insulated or mechanically isolated spaces when renovations allow. Outdoor units sit where they minimize bedroom and neighbor impact, with clear service access maintained on all sides.
Condensate management is critical: trap the drain, add a secondary pan and float switches anywhere water damage is possible, and pitch lines for continuous flow. Route refrigerant and drain lines for easy service and to avoid freeze risks, rather than the shortest or prettiest path.

Zoning, Controls and Smart Thermostats: Make Renovated Spaces Comfortable and Efficient
Renovations change how rooms are used. Zoning lets the HVAC treat spaces differently, like giving each room its own light switch. For multi story homes or rooms with different sun exposure, use motorized dampers with multiple thermostats so bedrooms, offices, and great rooms can call for comfort independently. For additions or isolated areas, a ductless mini split avoids long duct runs and keeps the main system from being overextended.
When walls are open, rough in low voltage wiring to key locations. That supports smart or communicating thermostats, remote sensors, occupancy detection, and indoor air quality monitors. These controls respond faster, improve humidity control, and can participate in demand management programs when offered by utilities. In our experience at Budget Heating (BudgetHeating.com), placing sensors where you sit or sleep delivers the most noticeable comfort improvement and cuts hot and cold spots.

Electrical, Gas and Mechanical Considerations: Permits, Safety and On-Site Practices
Adding conditioned space or changing ducts usually needs permits. Be ready to submit Manual J, S and D and pass inspections. At Budget Heating (BudgetHeating.com) we see inspectors confirm licensed installation and commissioning for warranty. Tight homes alter combustion air and venting, so test and add CO detectors. Sealed combustion or heat pumps simplify compliance and lower risk.
- Homeowners: shield equipment during dust, change filters weekly, keep outdoor clearances, cover registers.
- Licensed pro only: refrigerant circuits, major electrical, duct redesign, venting and fuel conversions.
Post Renovation Commissioning, Budgeting and Next Steps (Checklist & Costs)
Treat HVAC as part of the remodel, not an afterthought. At closeout, require commissioning data: refrigerant charge verification, measured airflow and static pressure, supply and return temperature splits, duct leakage results, room by room balancing, plus model and serial numbers, AHRI certificates, manuals, and written maintenance and warranty docs.
Installed cost for a mid tier 16 SEER2 central AC or heat pump is typically $6,000 to $8,000. Savings and payback vary by climate and usage. Renovations are a prime time to capture rebates and tax credits. Set a filter schedule, book annual tuneups, and ask for balancing tweaks after move in if hot or cold spots persist.
Bottom line: right sizing, duct redesign, ventilation, and proper commissioning deliver better comfort, lower operating costs, and future resilience. If you are deciding what to buy, we can sanity check your design and budget with real phone support.
- Get a Custom Quote
- Talk to Our Team by phone or email
- Shop Heat Pumps, Central AC, and Ductless Mini Splits